DS 160 form is one of the most important document for US visa application process. The DS-160, Online Nonimmigrant Visa Application form, is for temporary travel to the United States, and for K (fiancé(e)) visa. Form DS-160 is submitted electronically to the Department of State website via the Internet. Consular Officers use the information entered on the DS-160 to process the visa application combined with a personal interview, and determine an applicant’s eligibility for a nonimmigrant visa.
Visa applicants must submit a completed DS-160, Online Nonimmigrant Visa Application for all nonimmigrant visa categories, including applicants applying for K visas.
How to fill DS 160 form?
Fill DS-160 form is the first step in your US visa application online. It is also the most important step as the result of your visa to the most part depends on your DS-160 form. DS-160 is a very lengthy form, so it can take you a few days to complete.
We have listed out all sections and questions in this guide. For each question, there is a comment explaining what exactly needs to be entered.
1. Getting Started
To start your DS-160 form online, head over to the US Department of State’s Nonimmigrant Visa Application (DS-160) page.
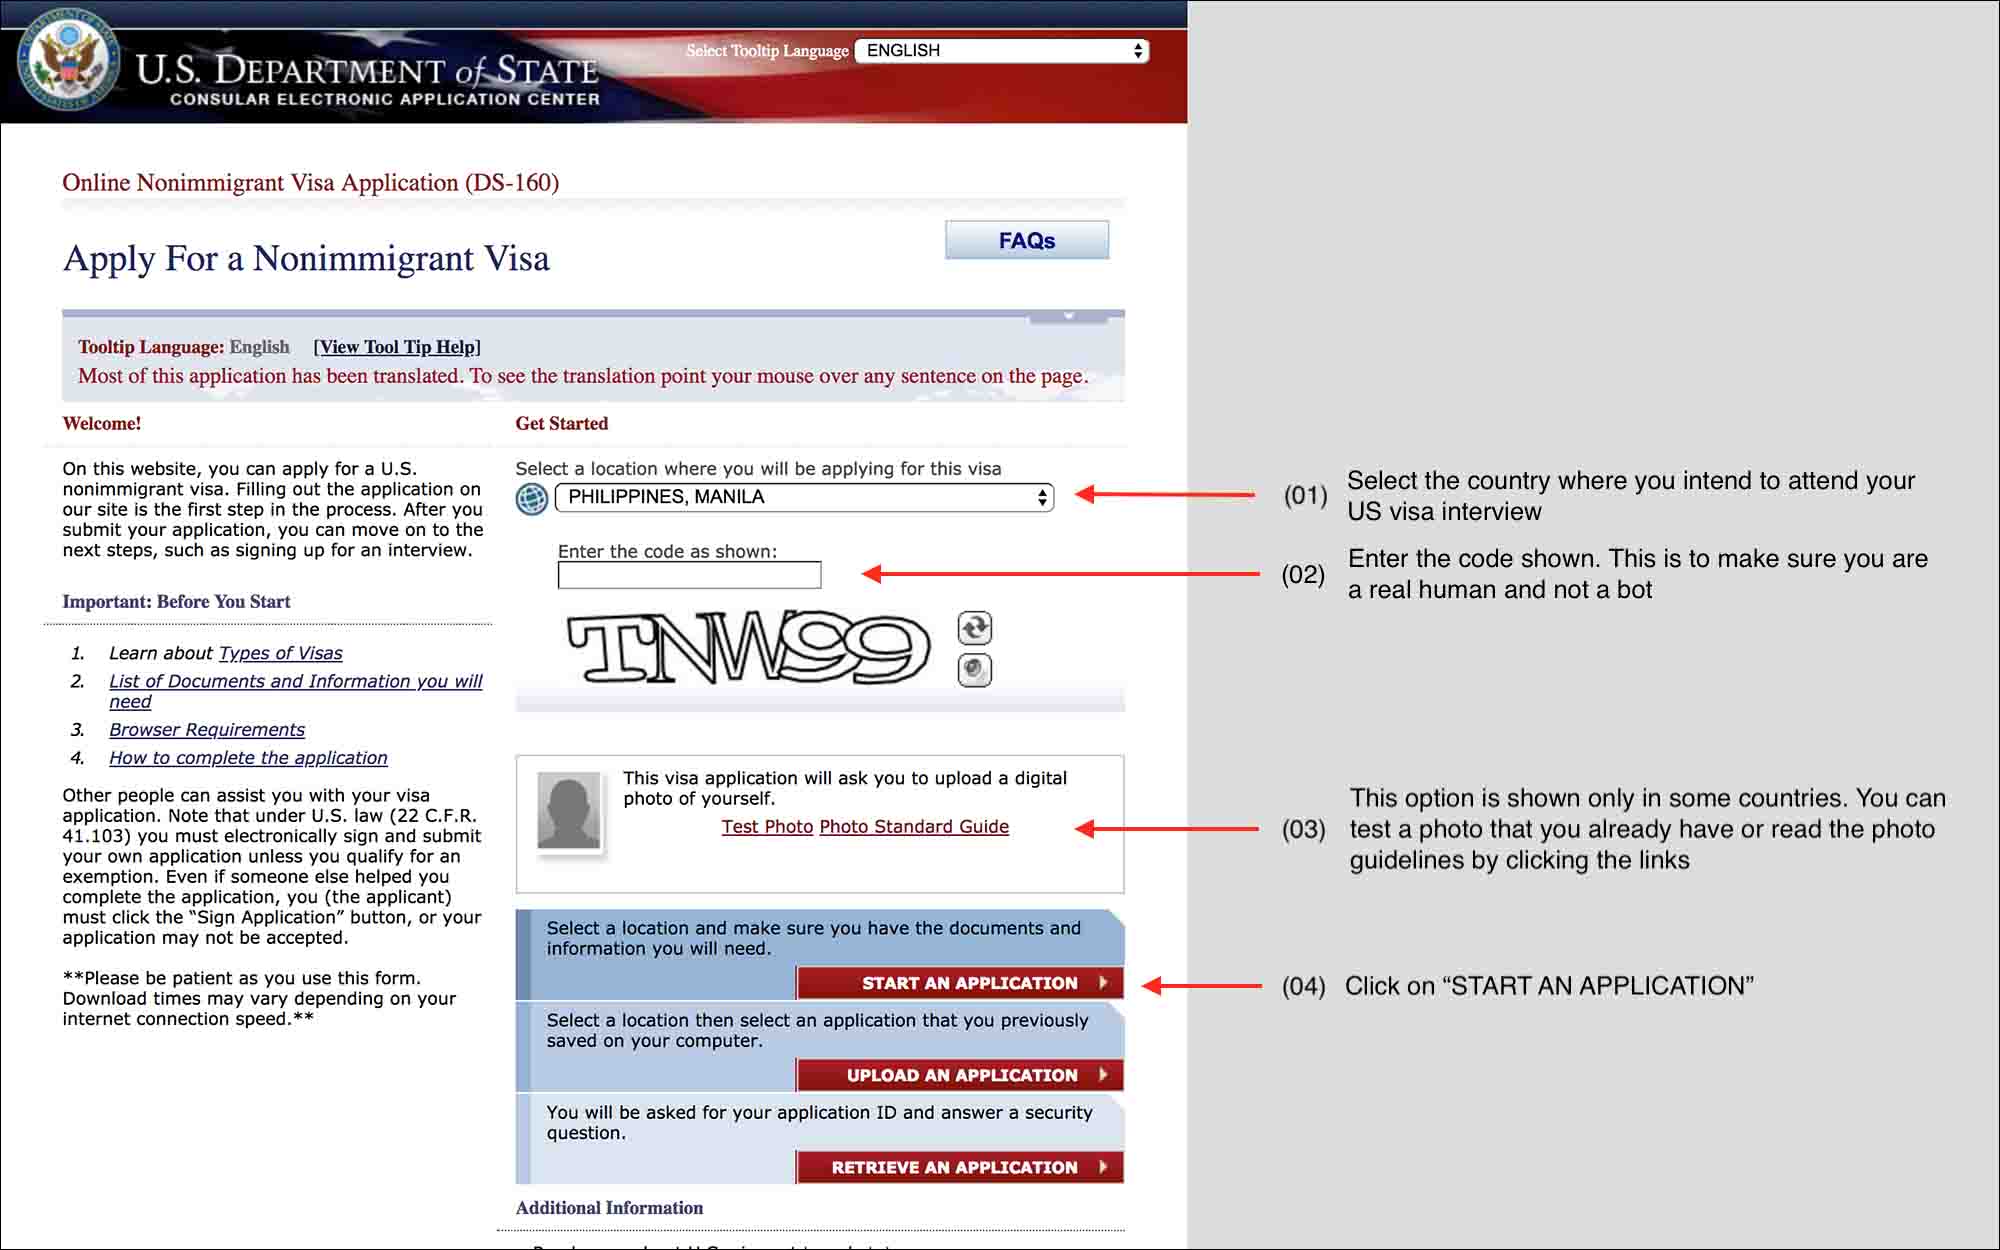
Enter the following details on the “Apply for a Nonimmigrant Visa” page
- Select a location where you will be applying for this visa
- Enter the code as shown
- This visa application will ask you to upload a digital photo of yourself. Click on “Test Photo” to check if your photo meets with the specifications. If you don’t have a photo and want to know the photo requirements, click on “Photo Standard Guide”
After you have entered the above data, you will be using “Start an Application” or “Retrieve an Application” while filling your DS-160.
Retrieve an Application
The DS-160 session times out if left open for too long. If that happens, you can come back to your saved application (saved till the last section) using this option.
Sometimes you might need extra time to gather the information needed to fill DS-160 form. In that case, you can save and come back to your saved application using this option. You would need your DS-160 Application ID to retrieve the saved application.
After you enter the above data and click on “Start an Application”, you will then see the “Application Information” Screen. Your “Application ID” will be displayed here. Print this page. Or take a screenshot or make note of the DS-160 Application ID somewhere. You will need your Application ID to retrieve your saved DS-160 application.
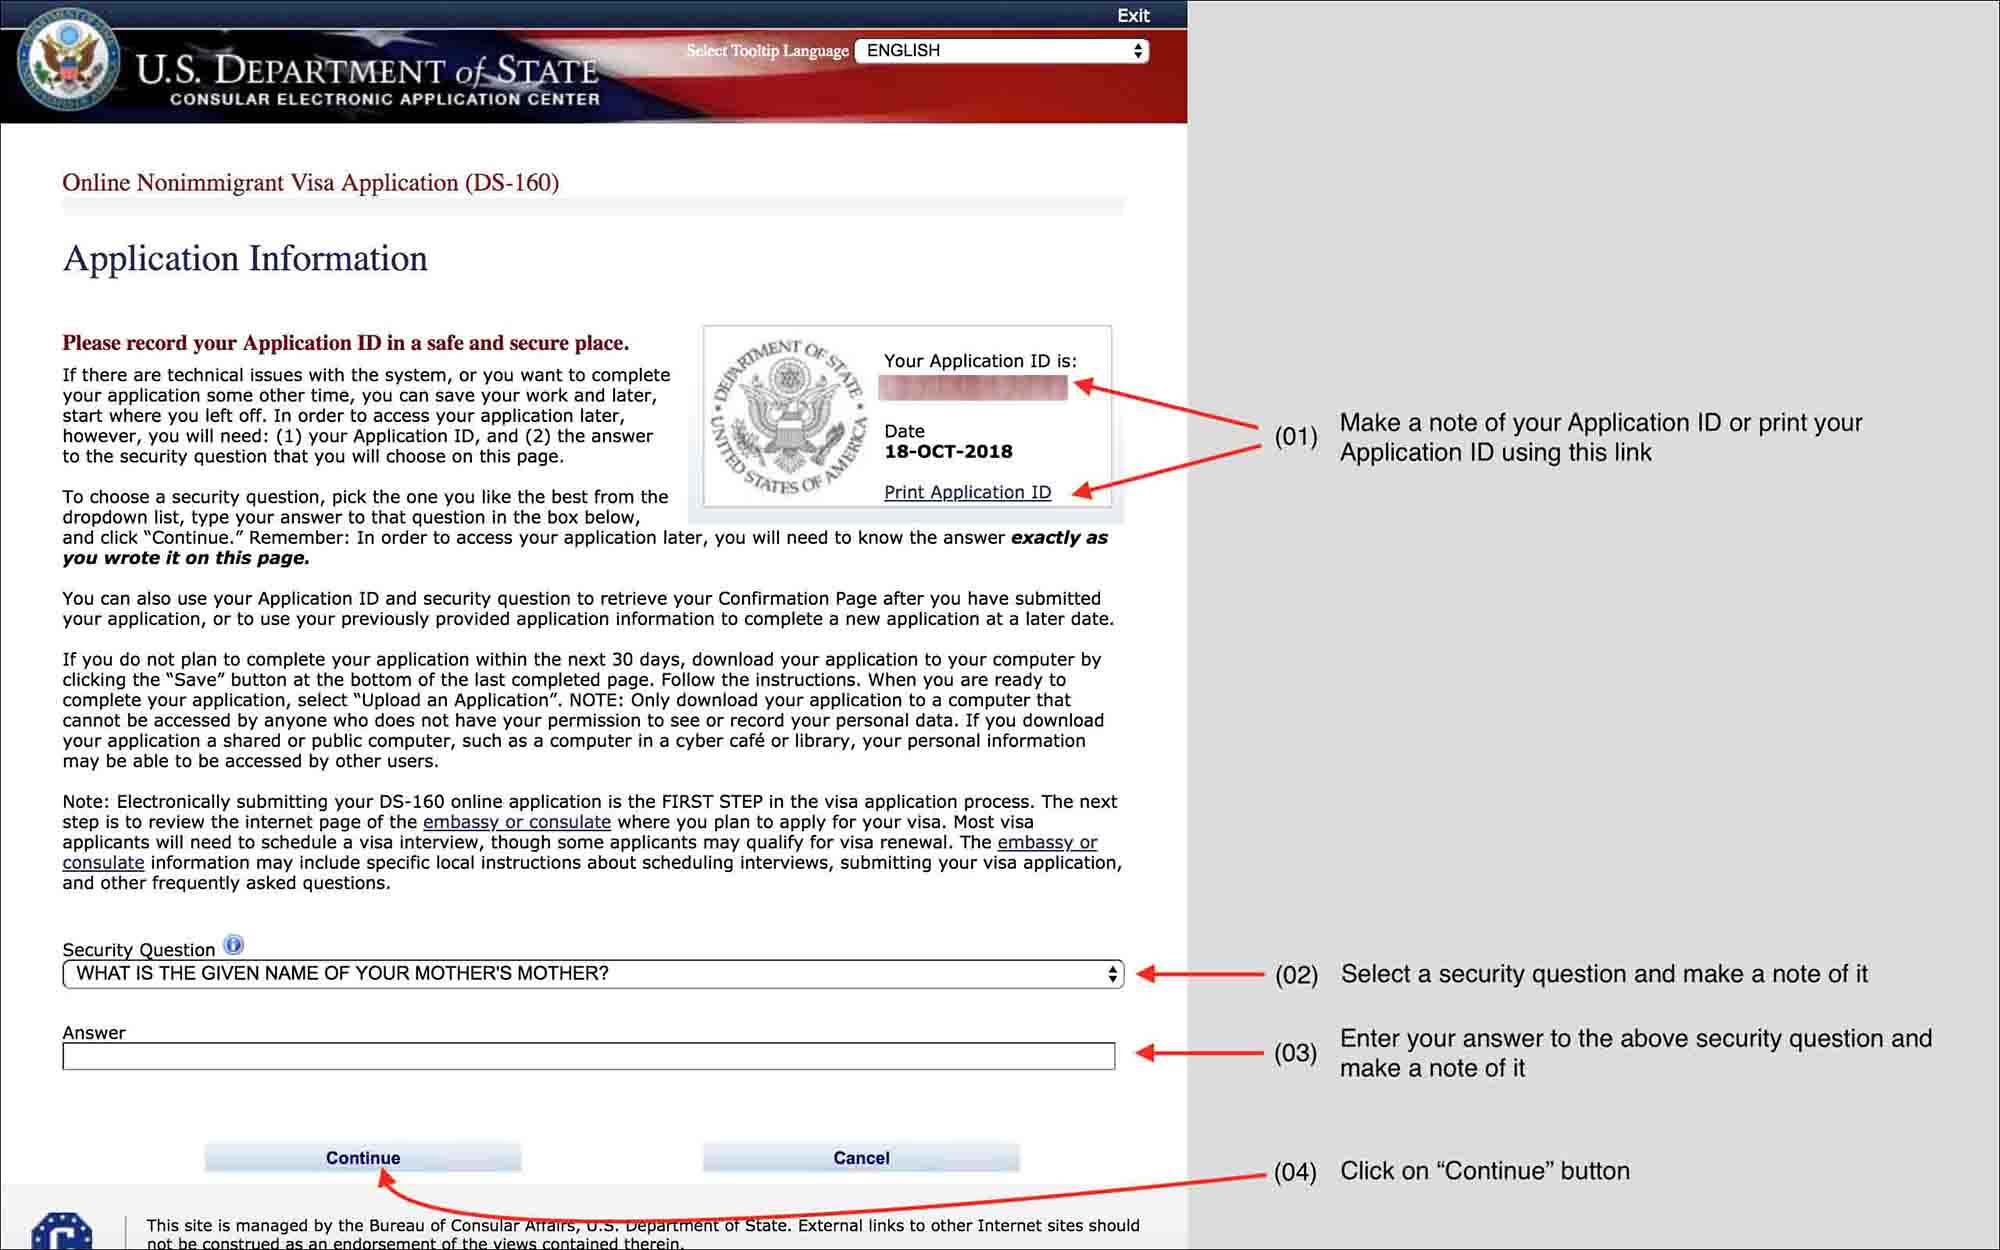
Note: Make a note of your “Application ID”, “Security Question” and “Answer”. The “Security Question and Answer” along with the “Application ID”, “Surname” and “Birth Year” are REQUIRED to retrieve your saved DS-160 visa application. If you forget any of this information, you will not be able to retrieve your saved application. You will have to start over again with a new DS-160 application.
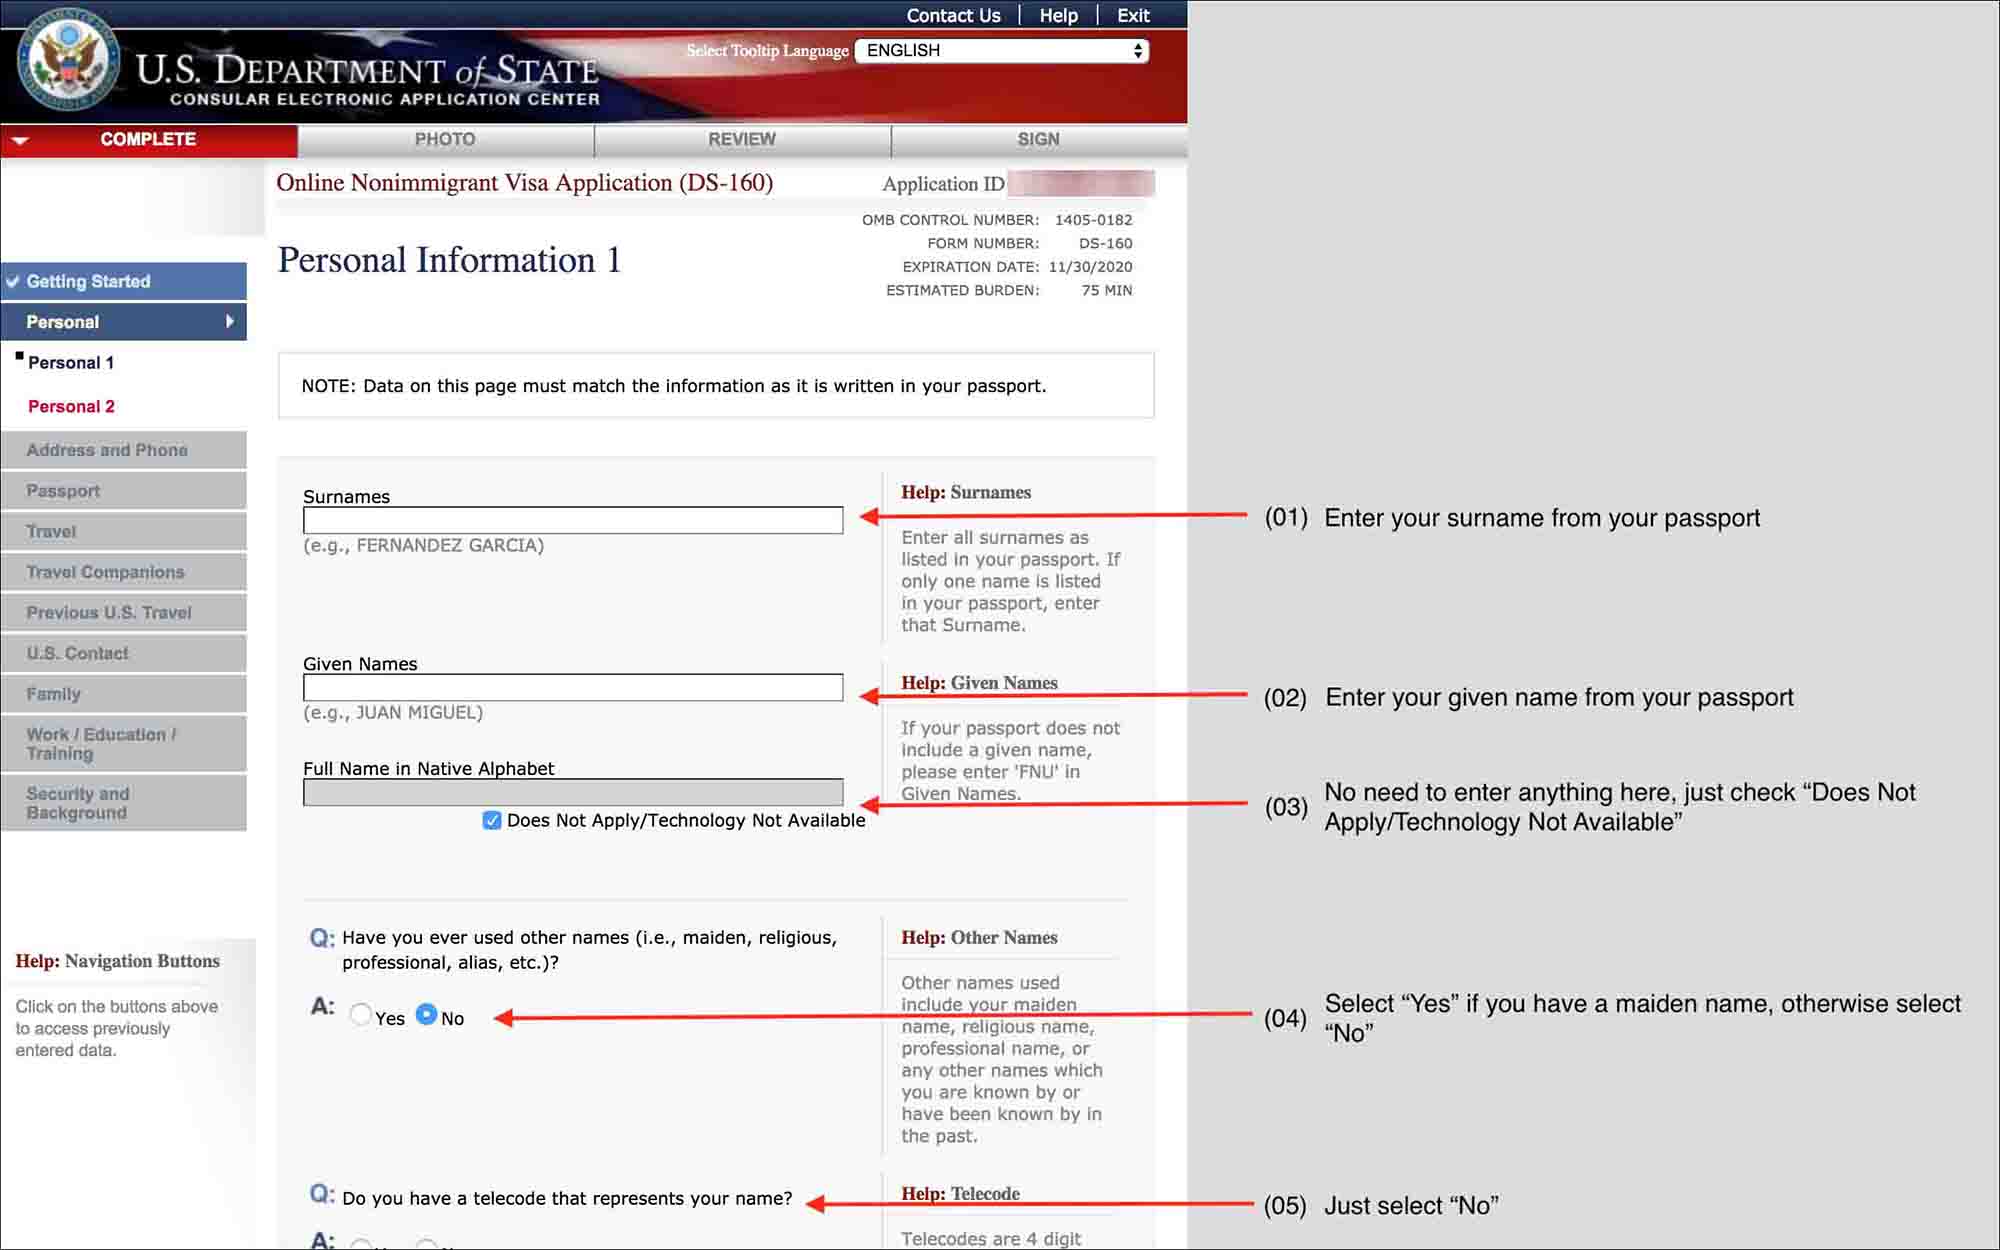
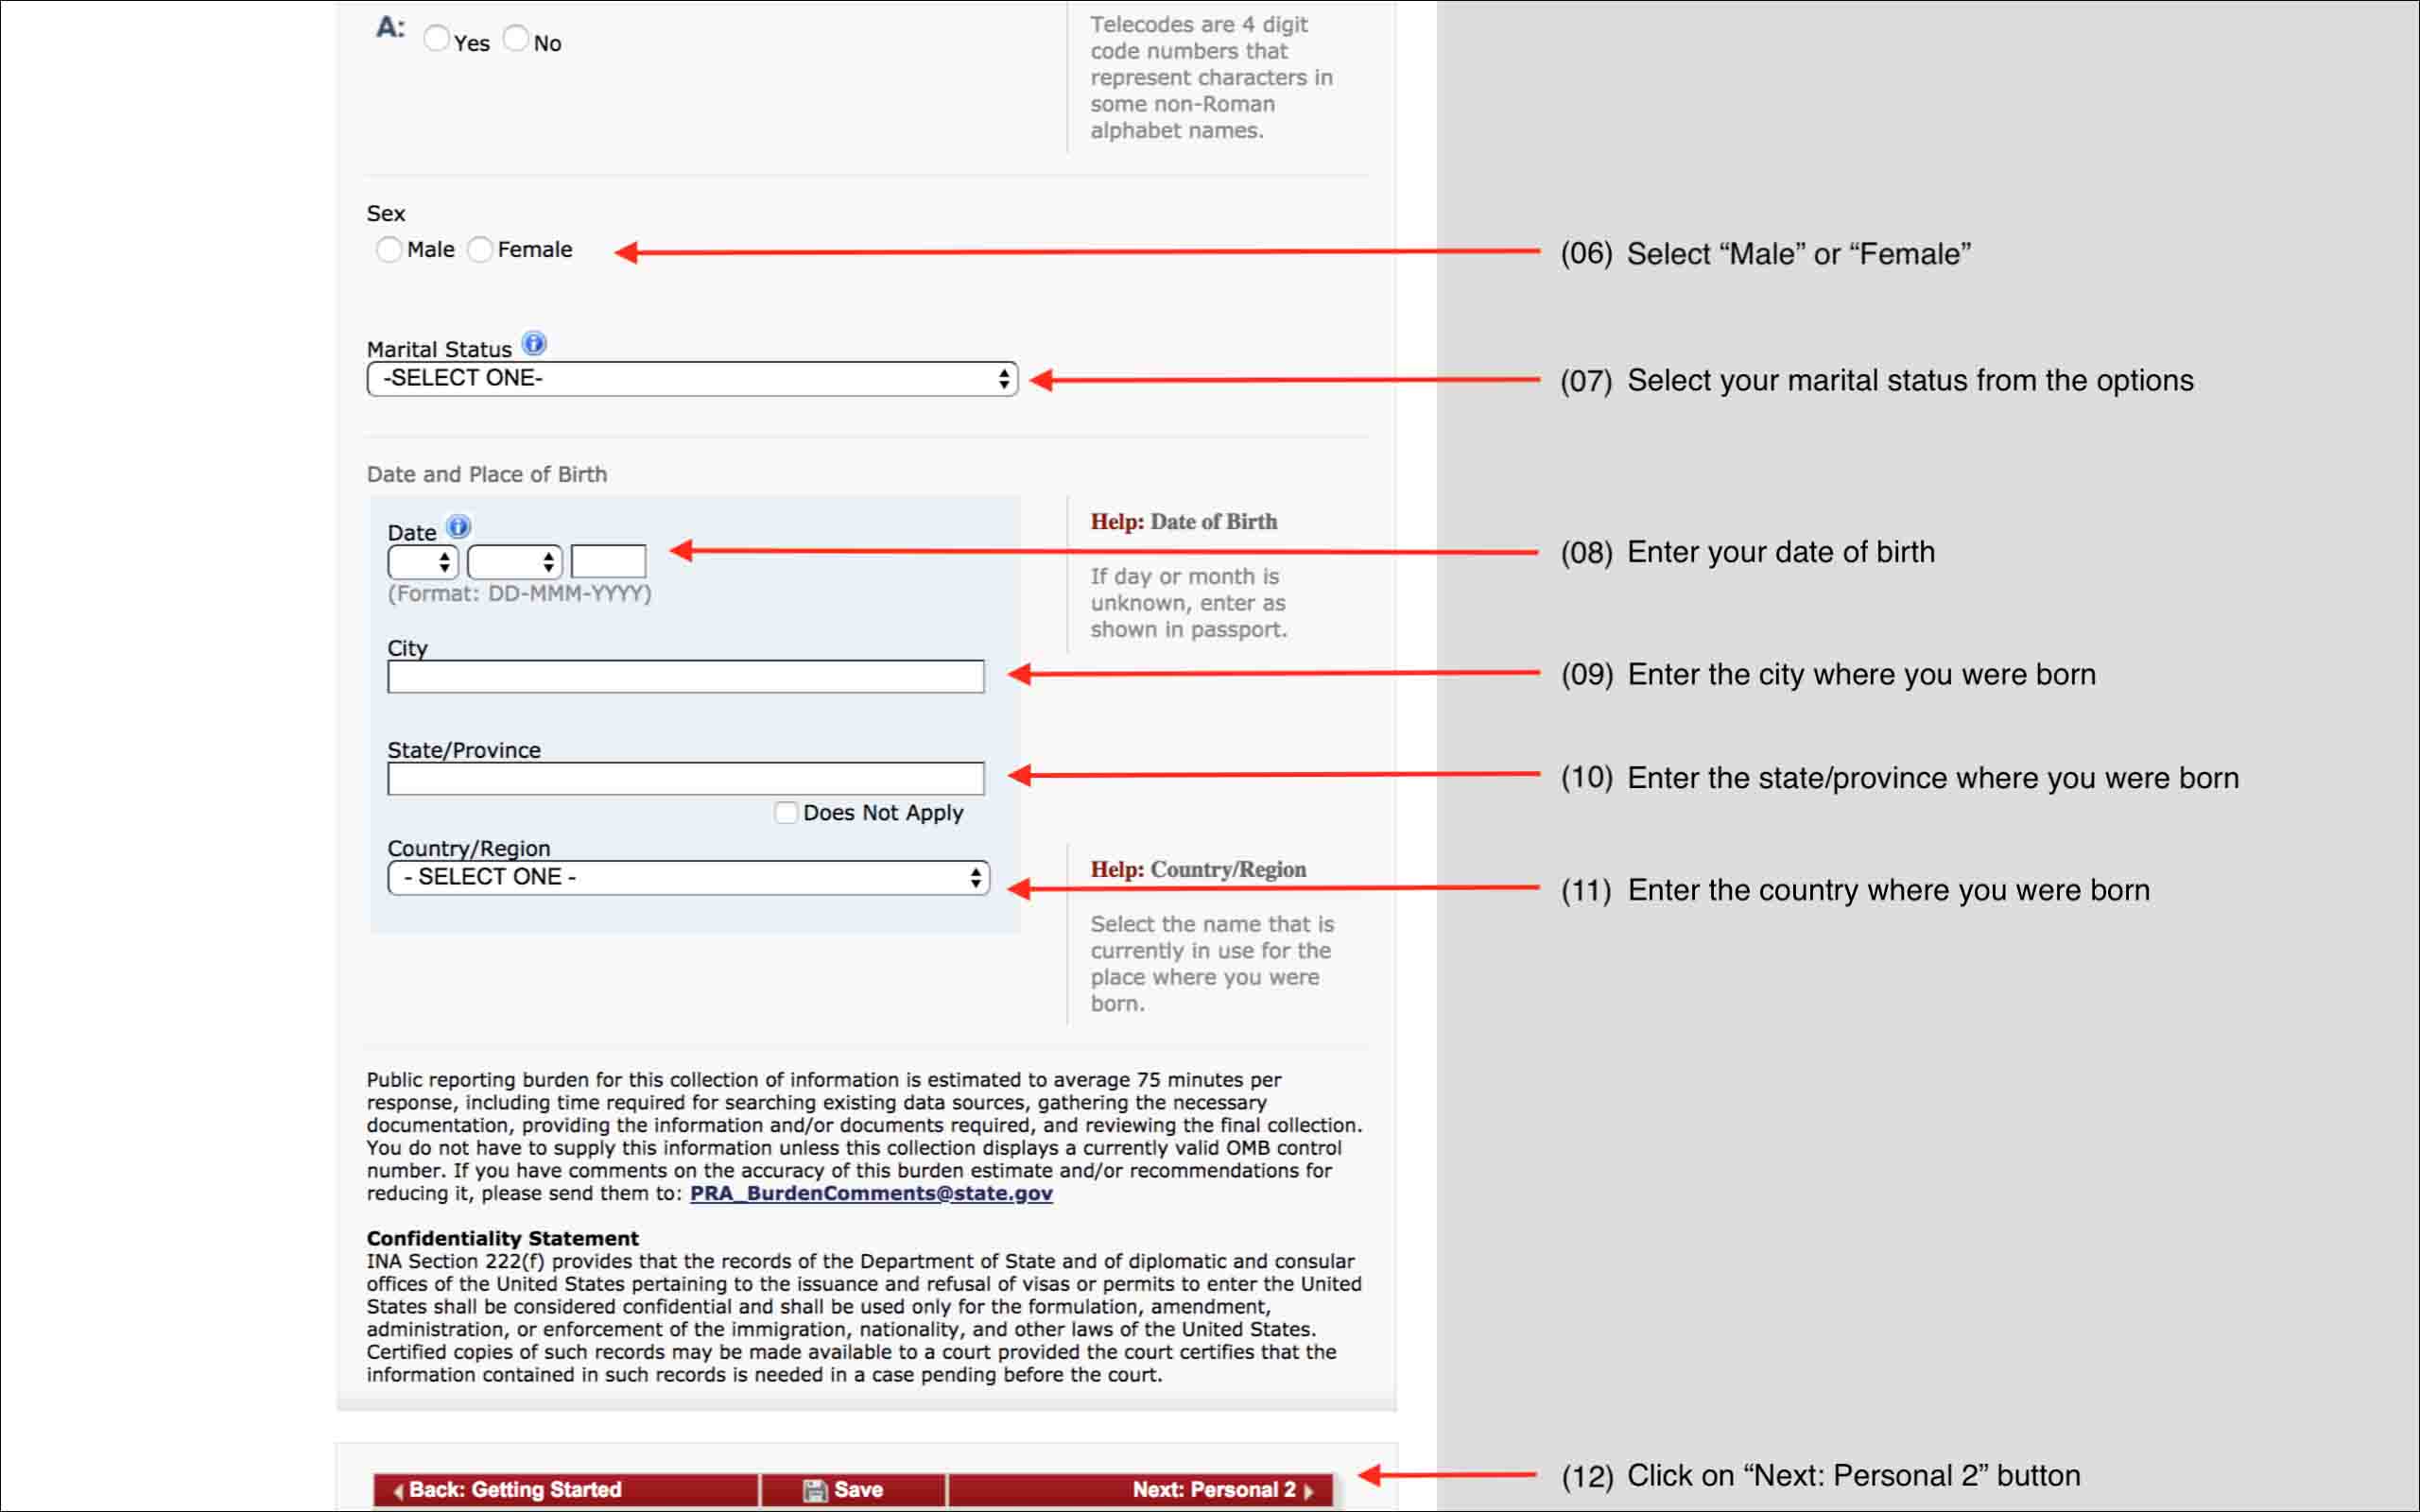
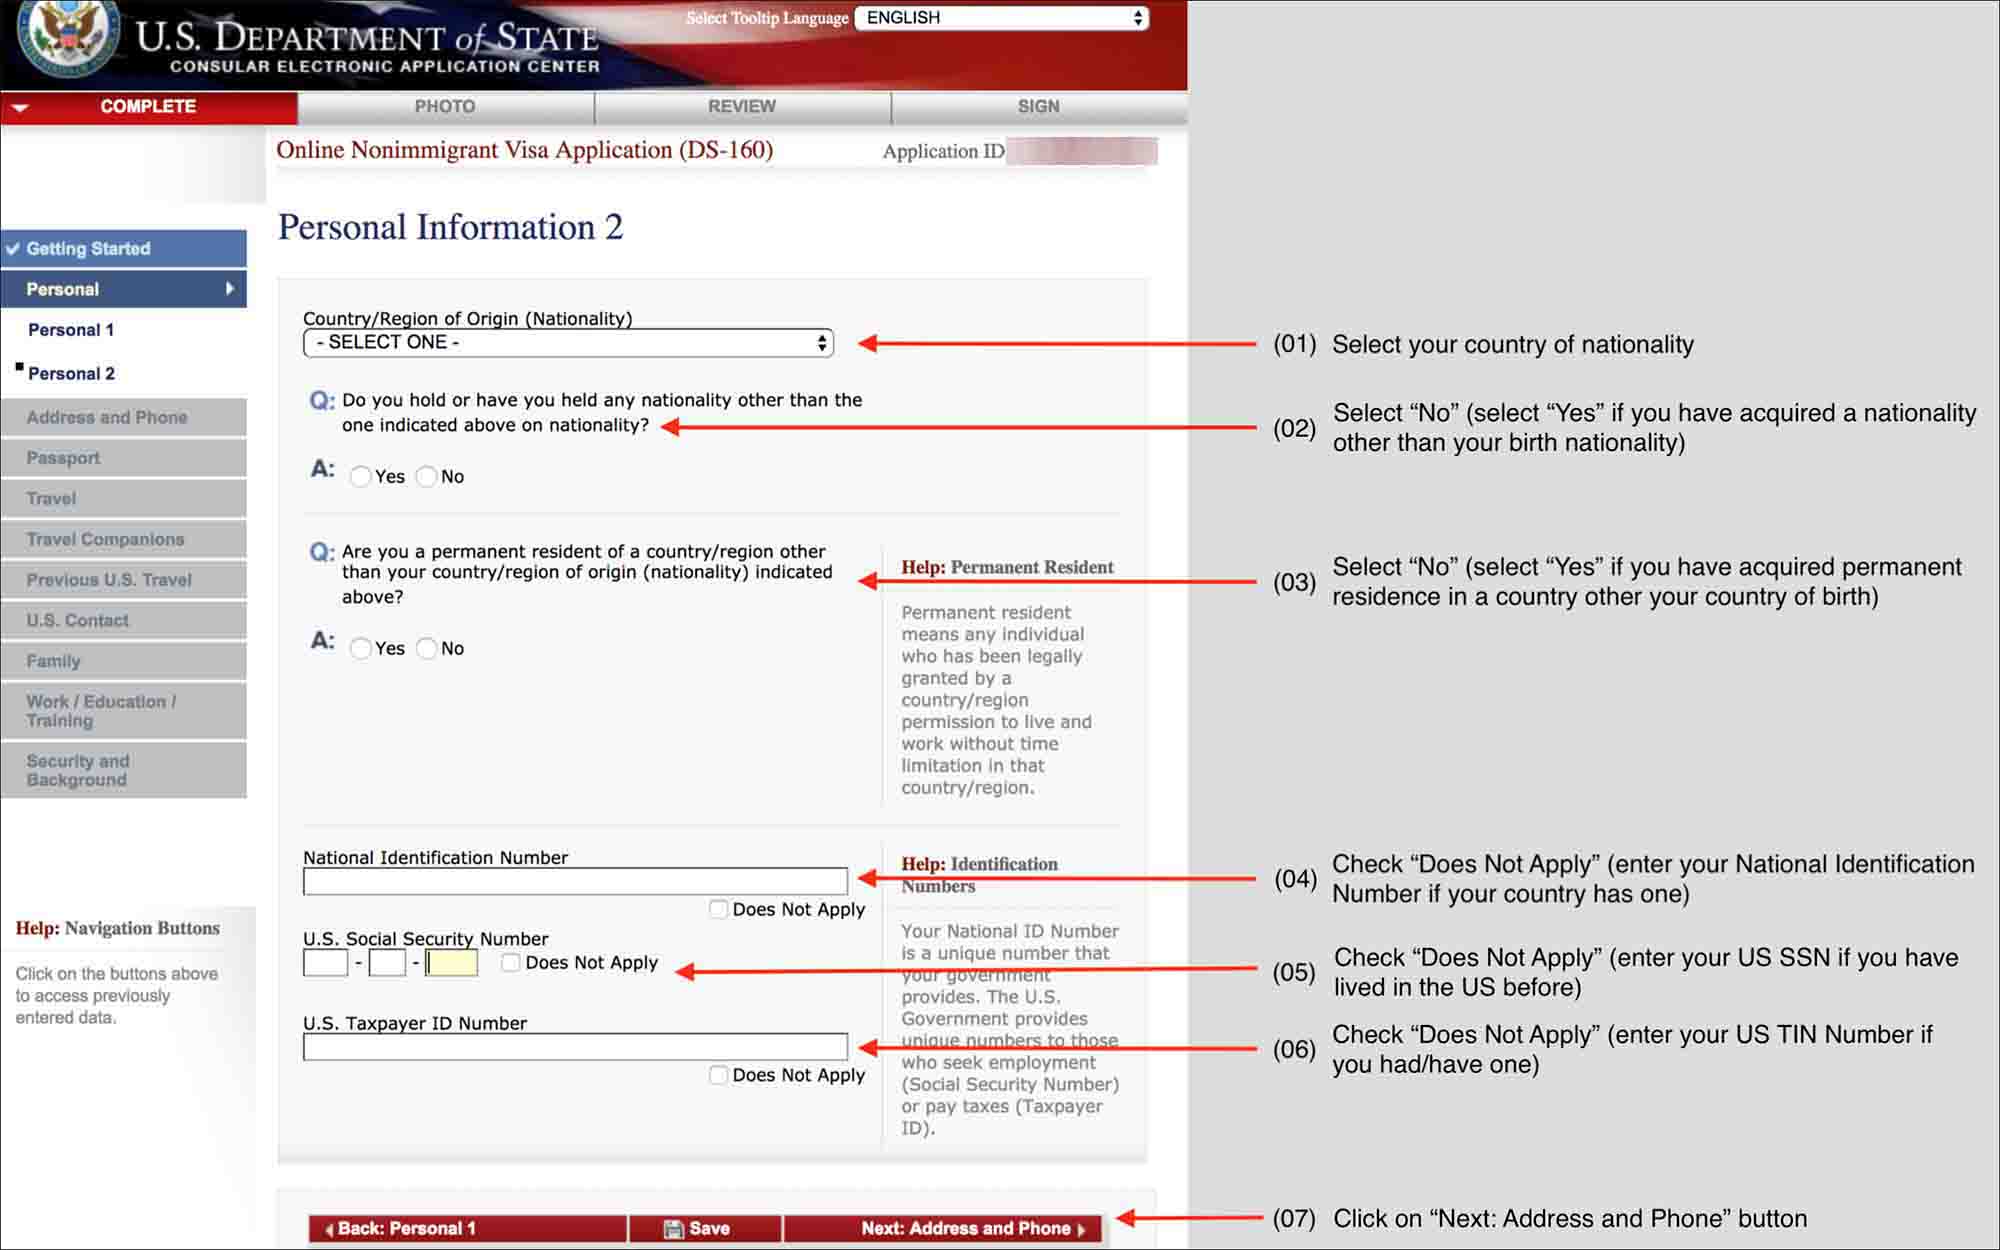
2. Personal
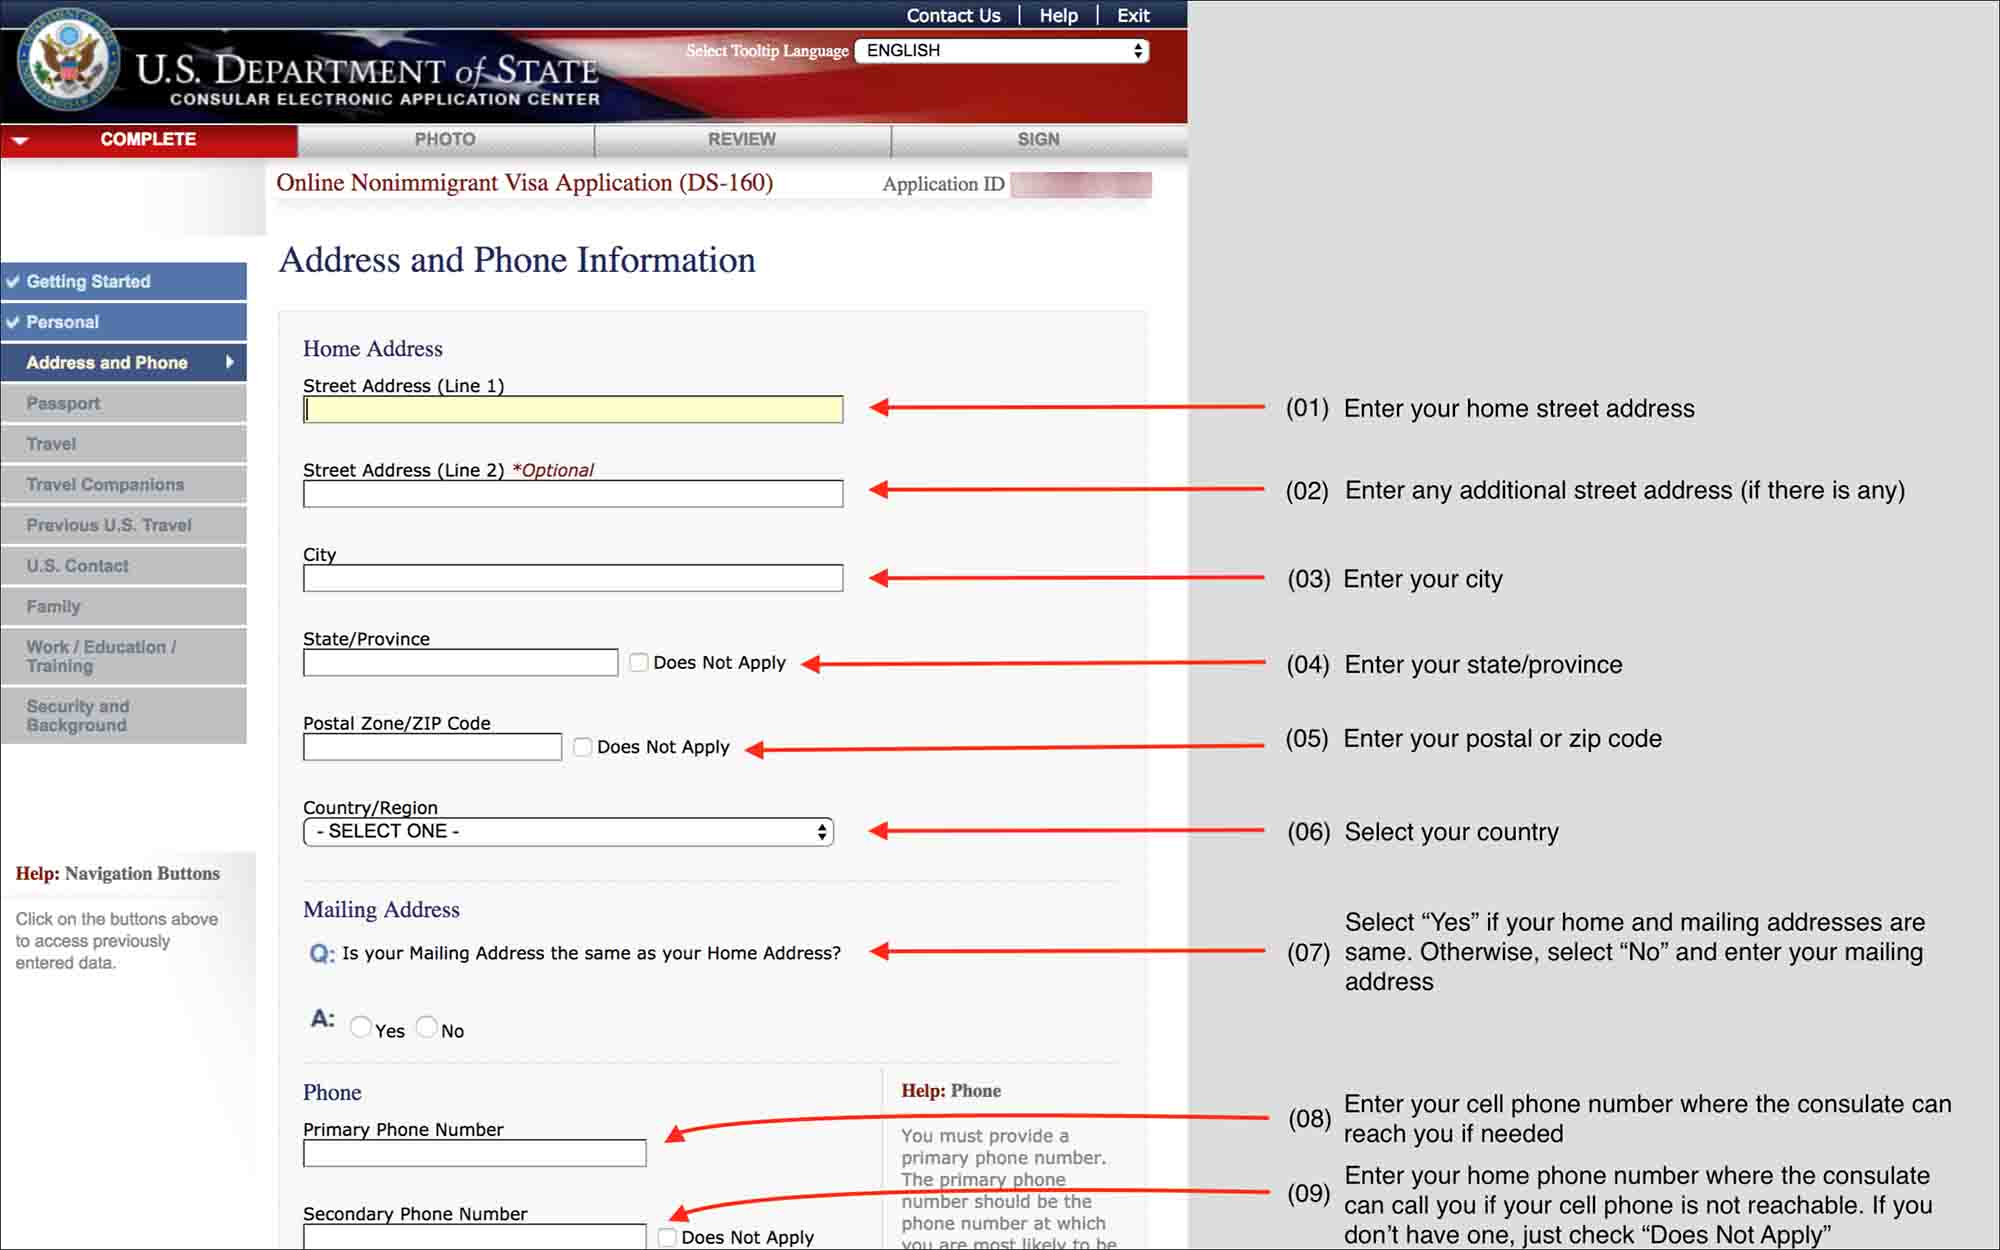
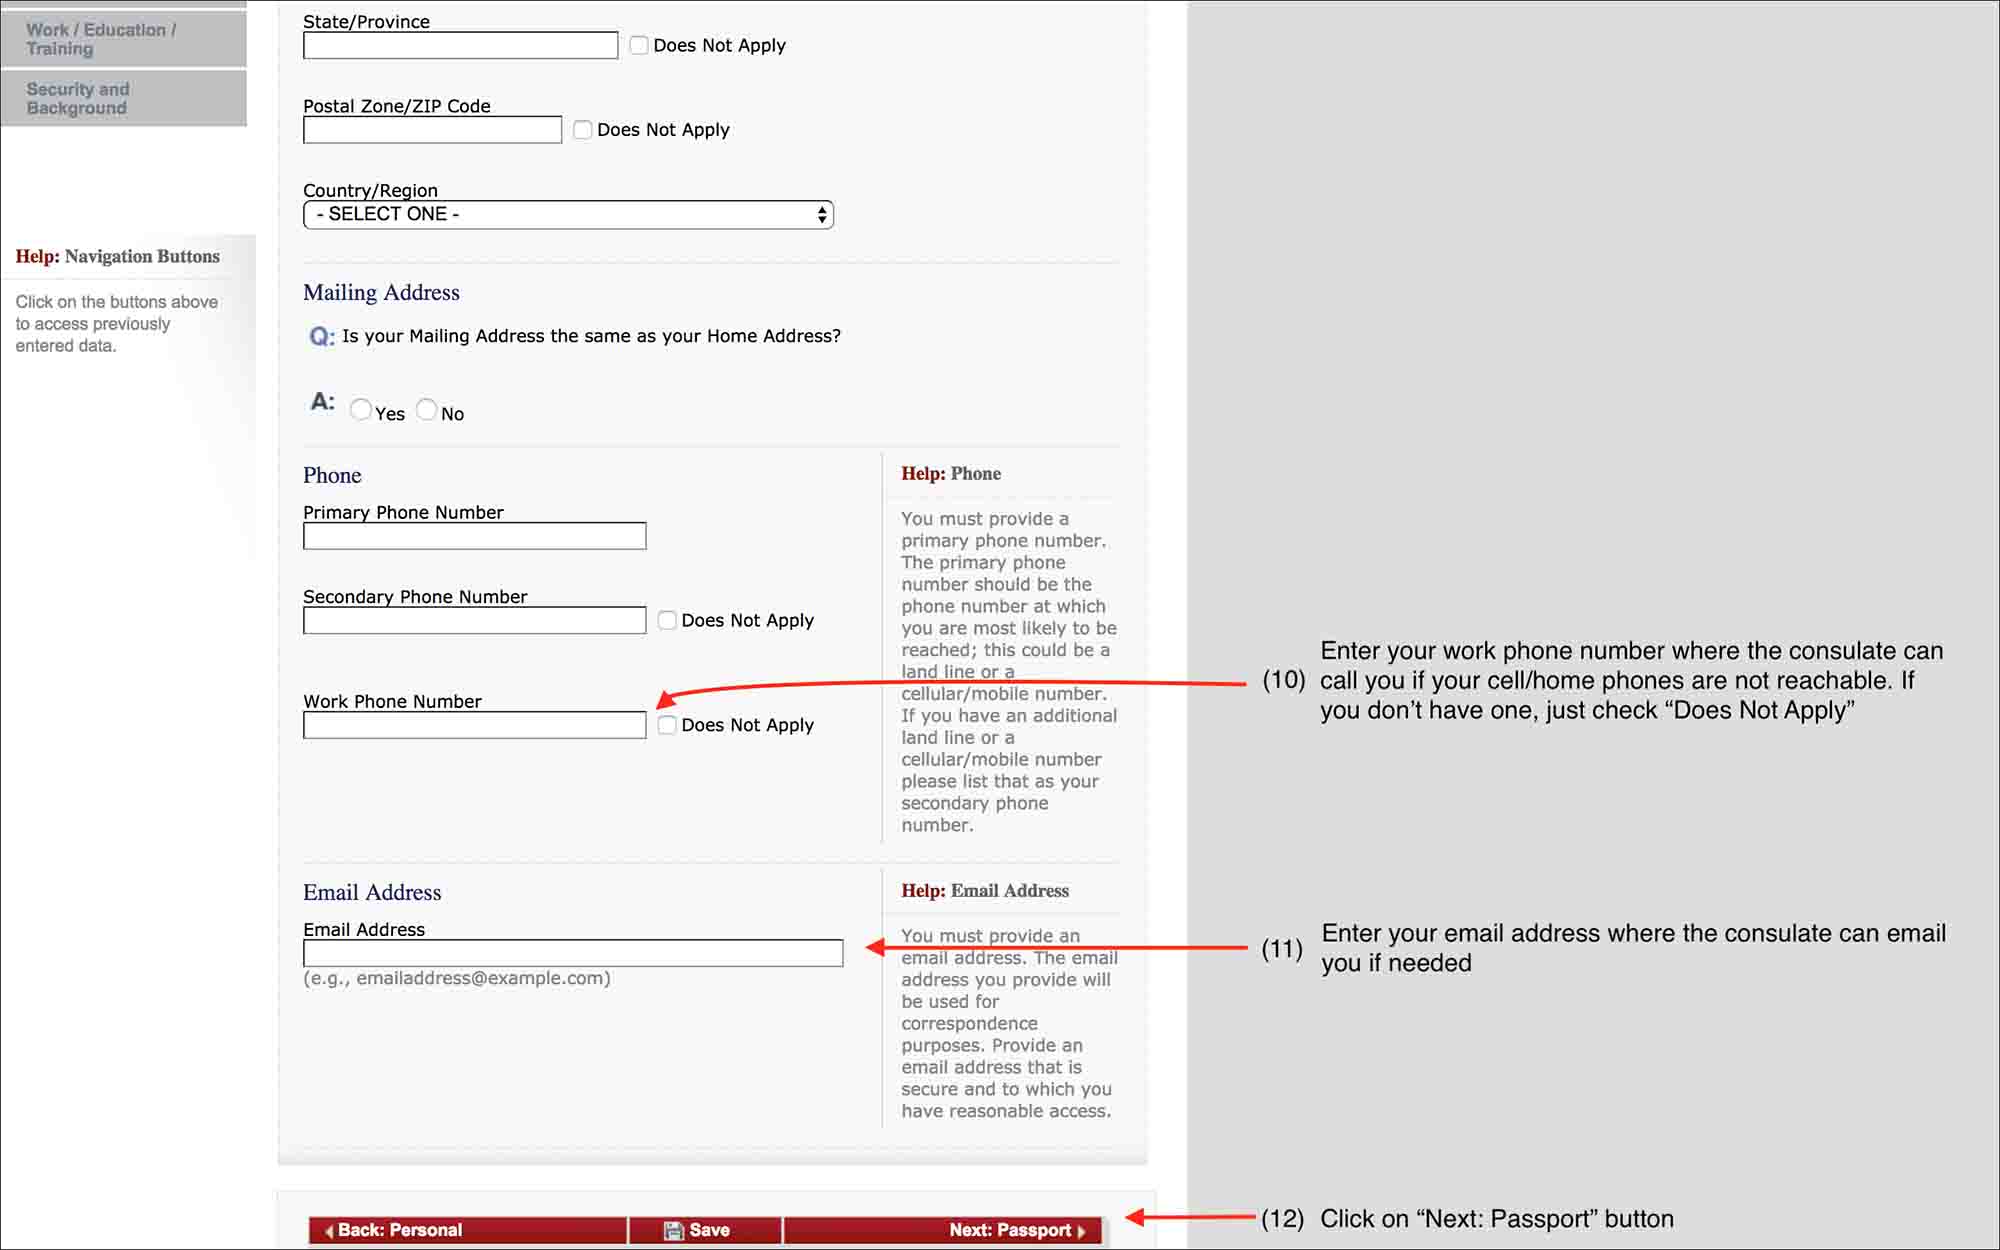
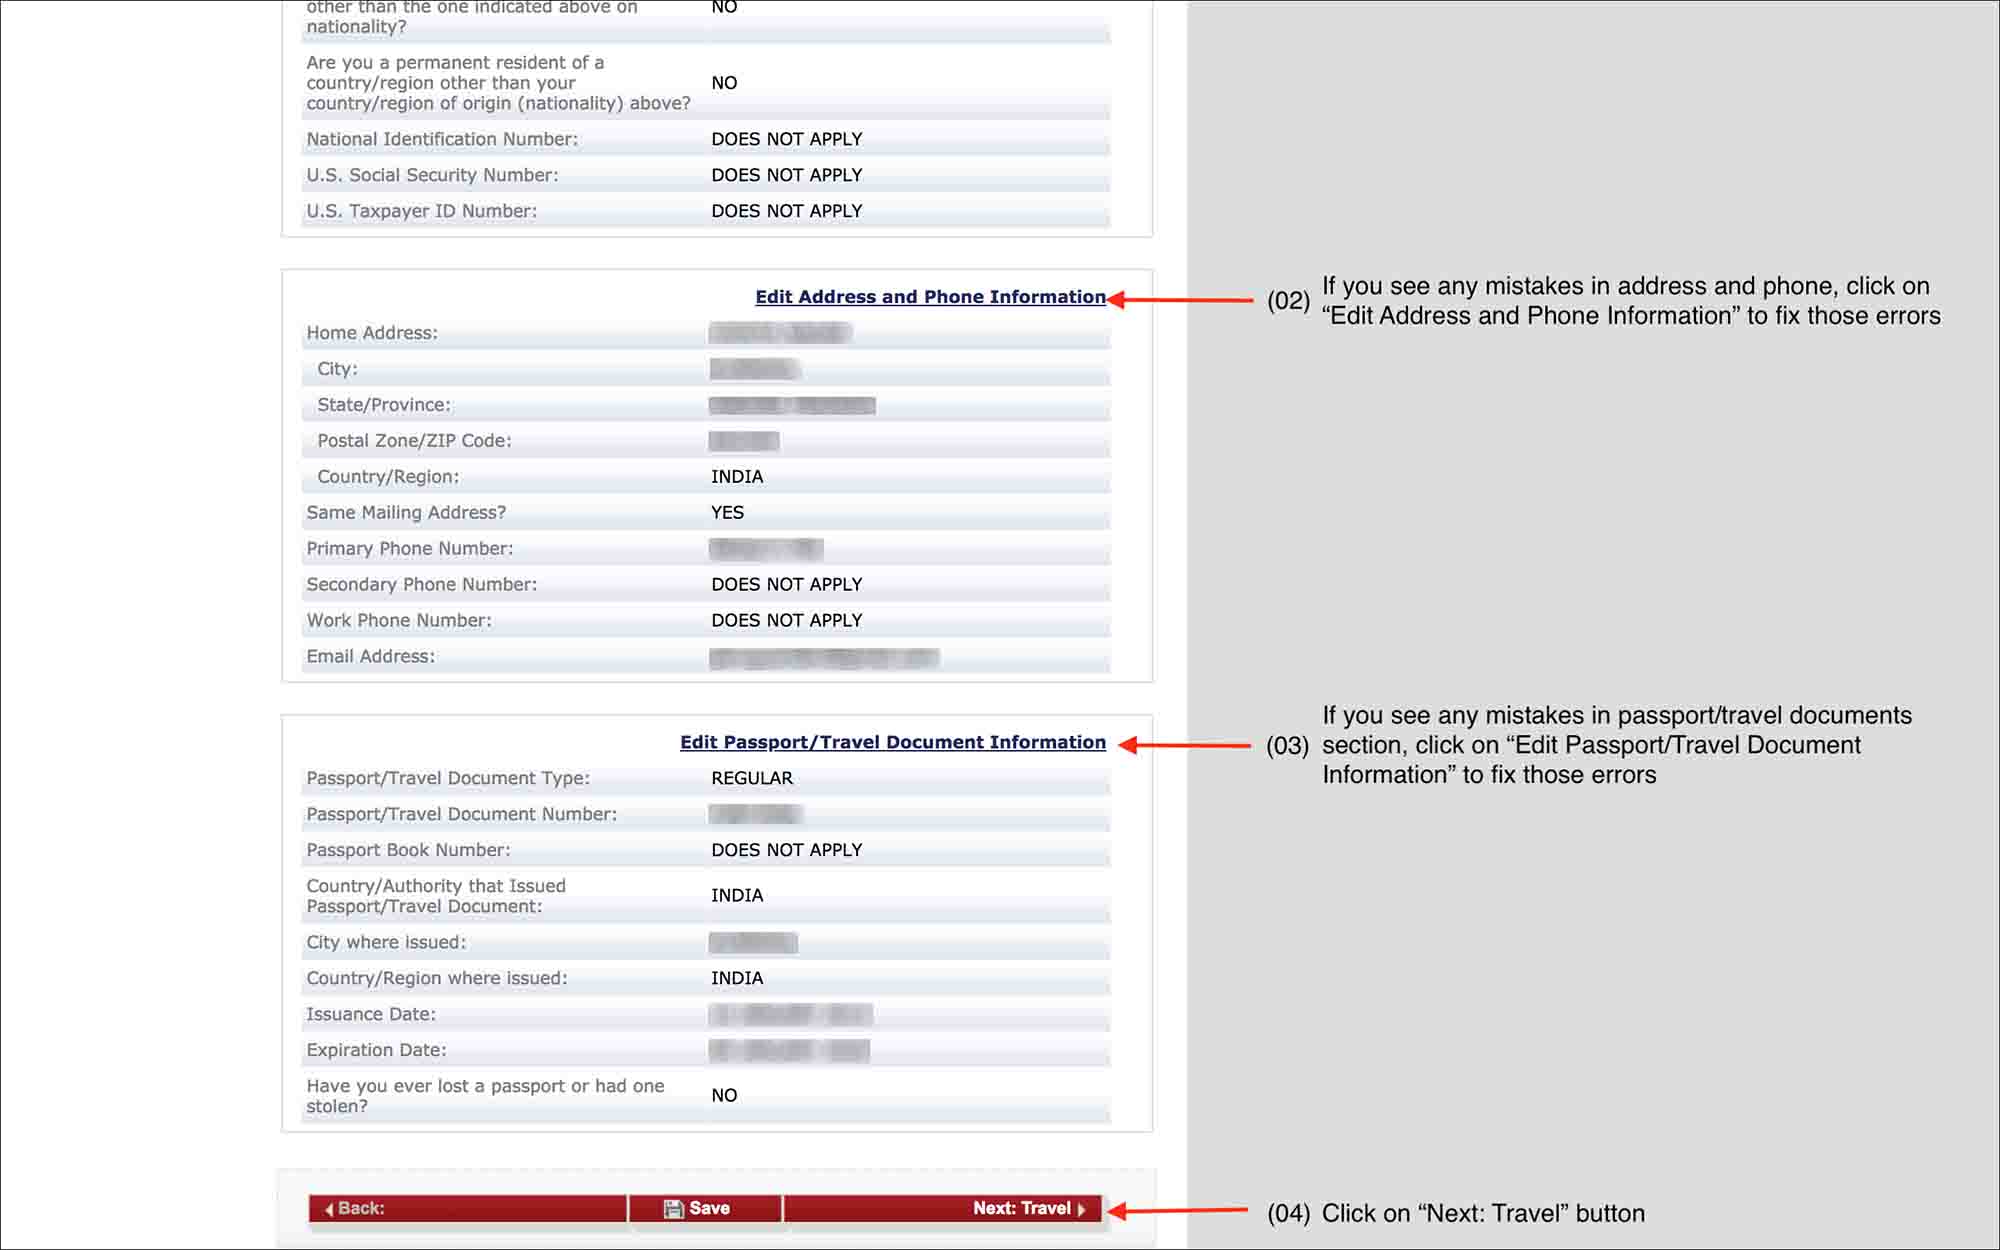
3. Address and Phone
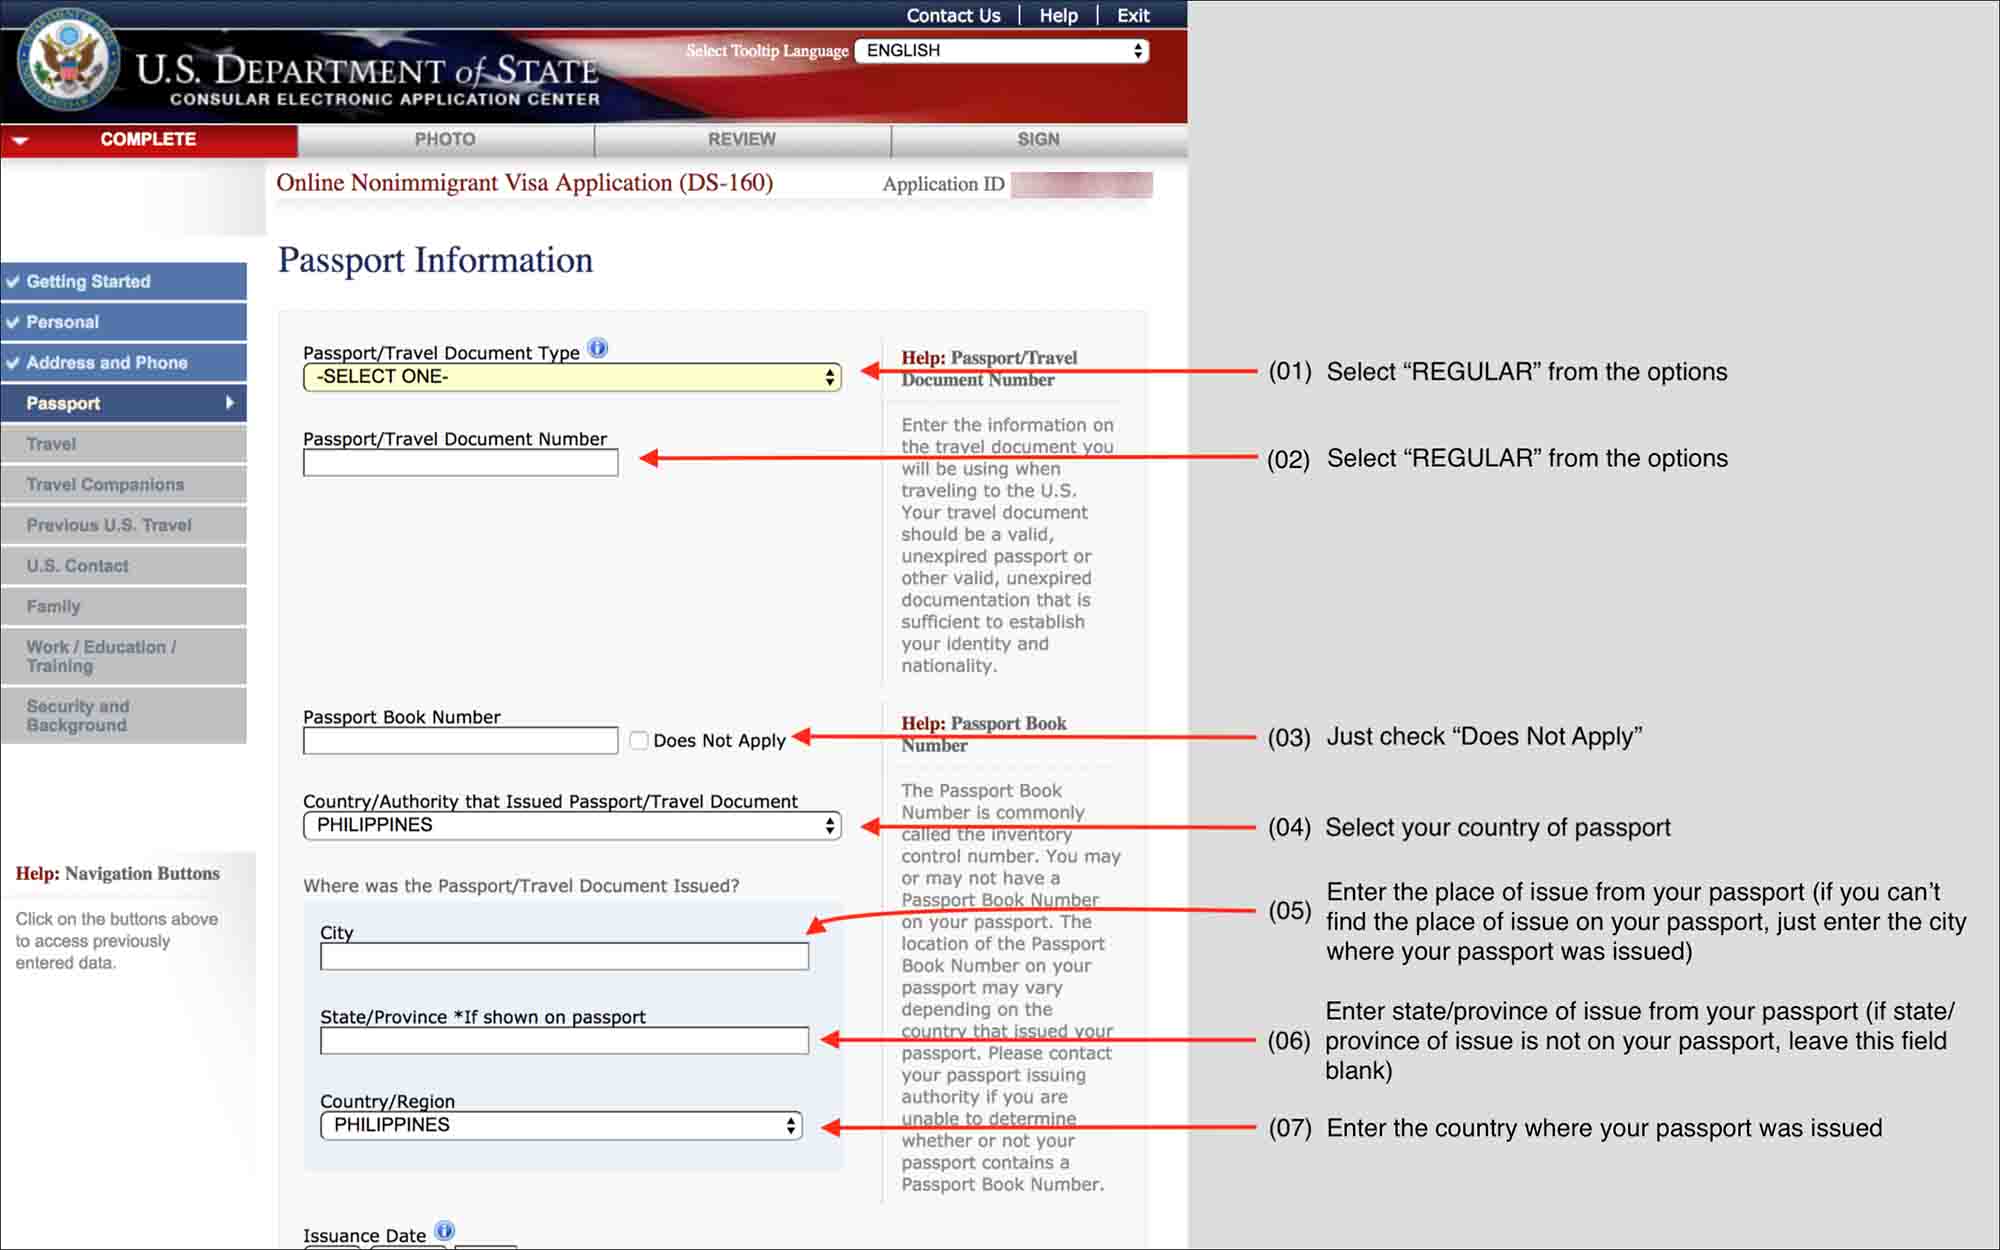
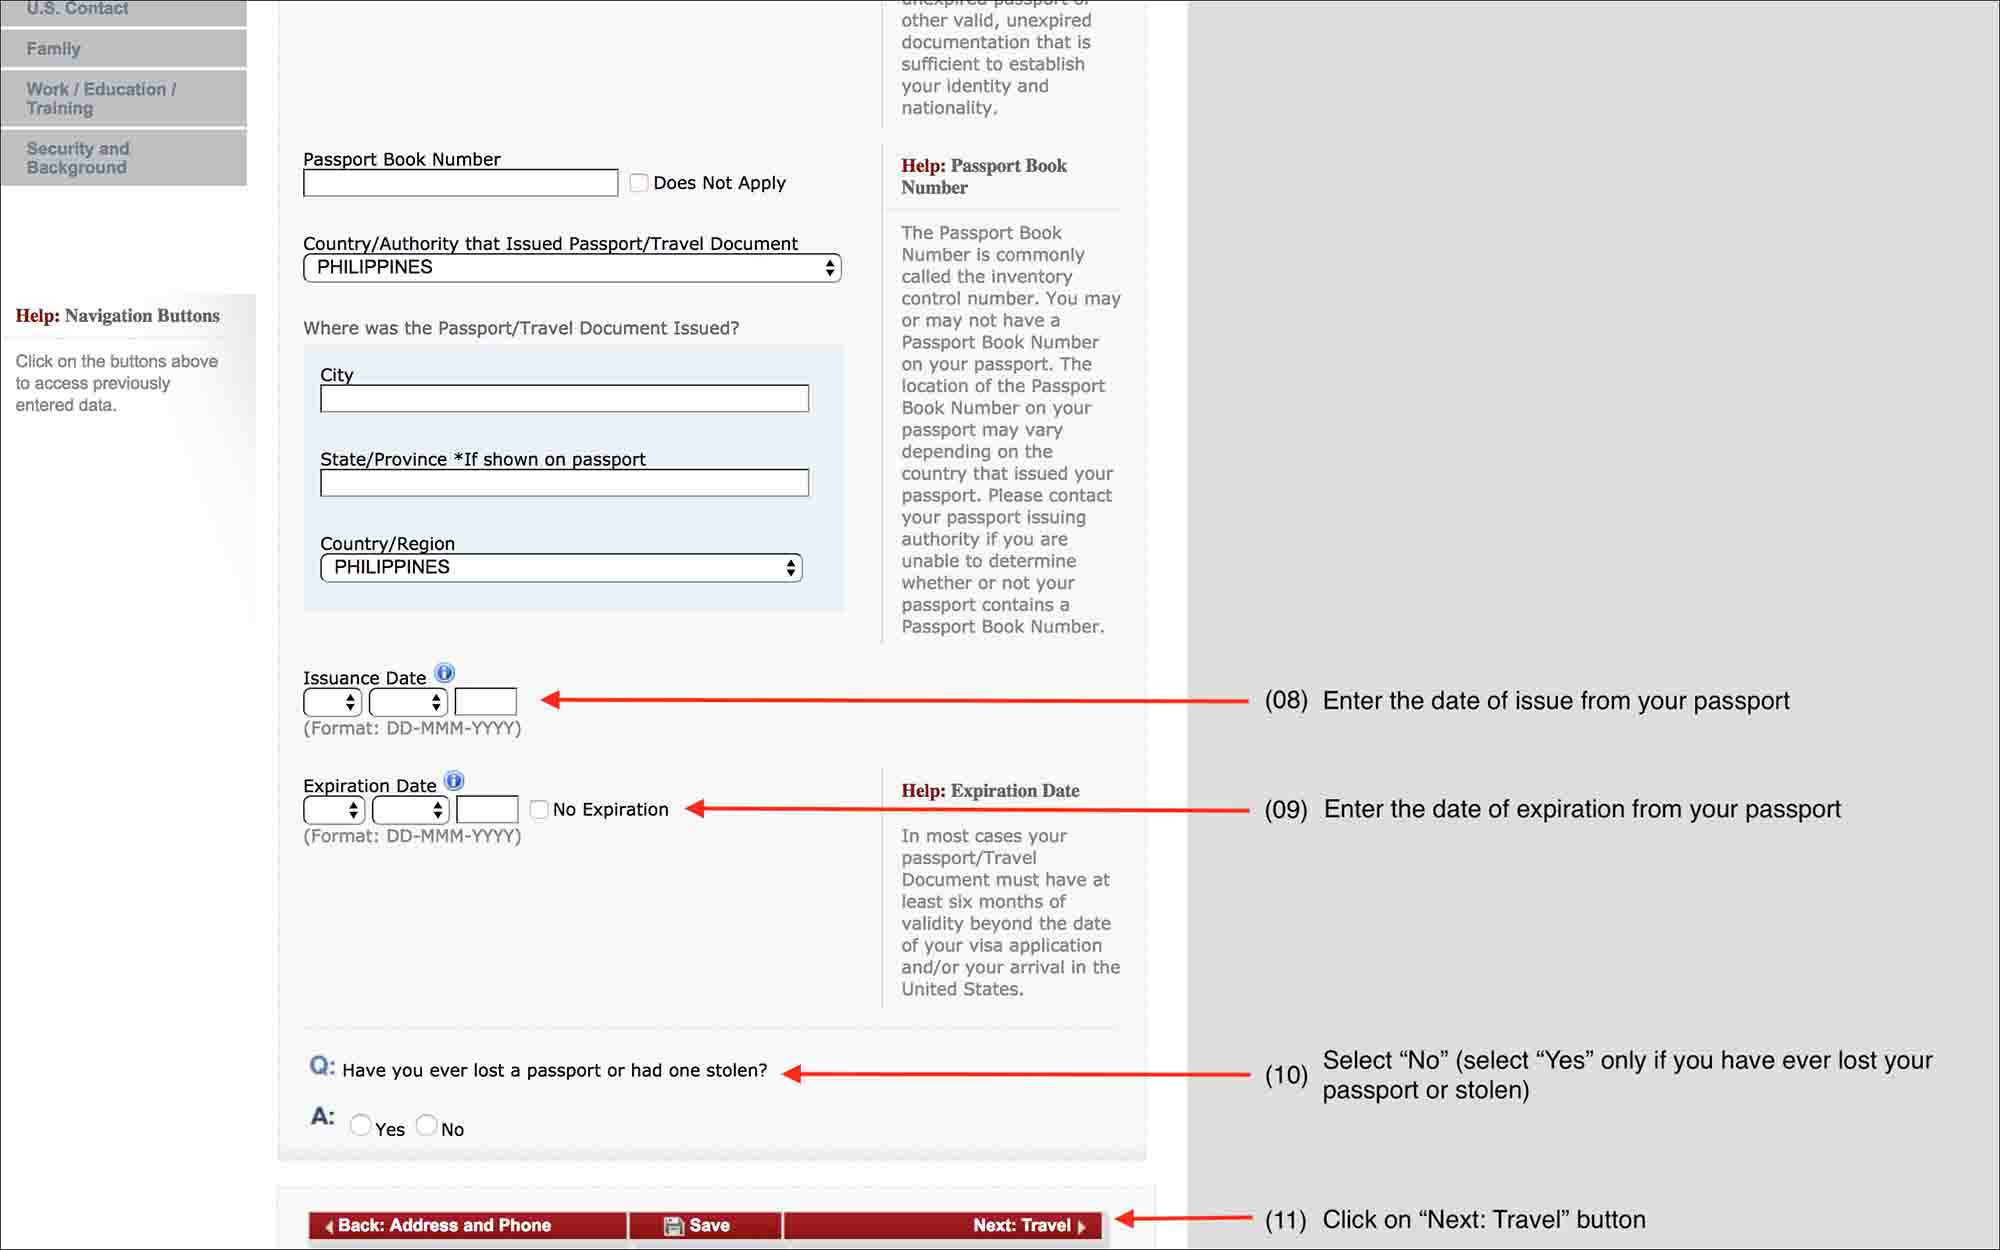
4. Passport
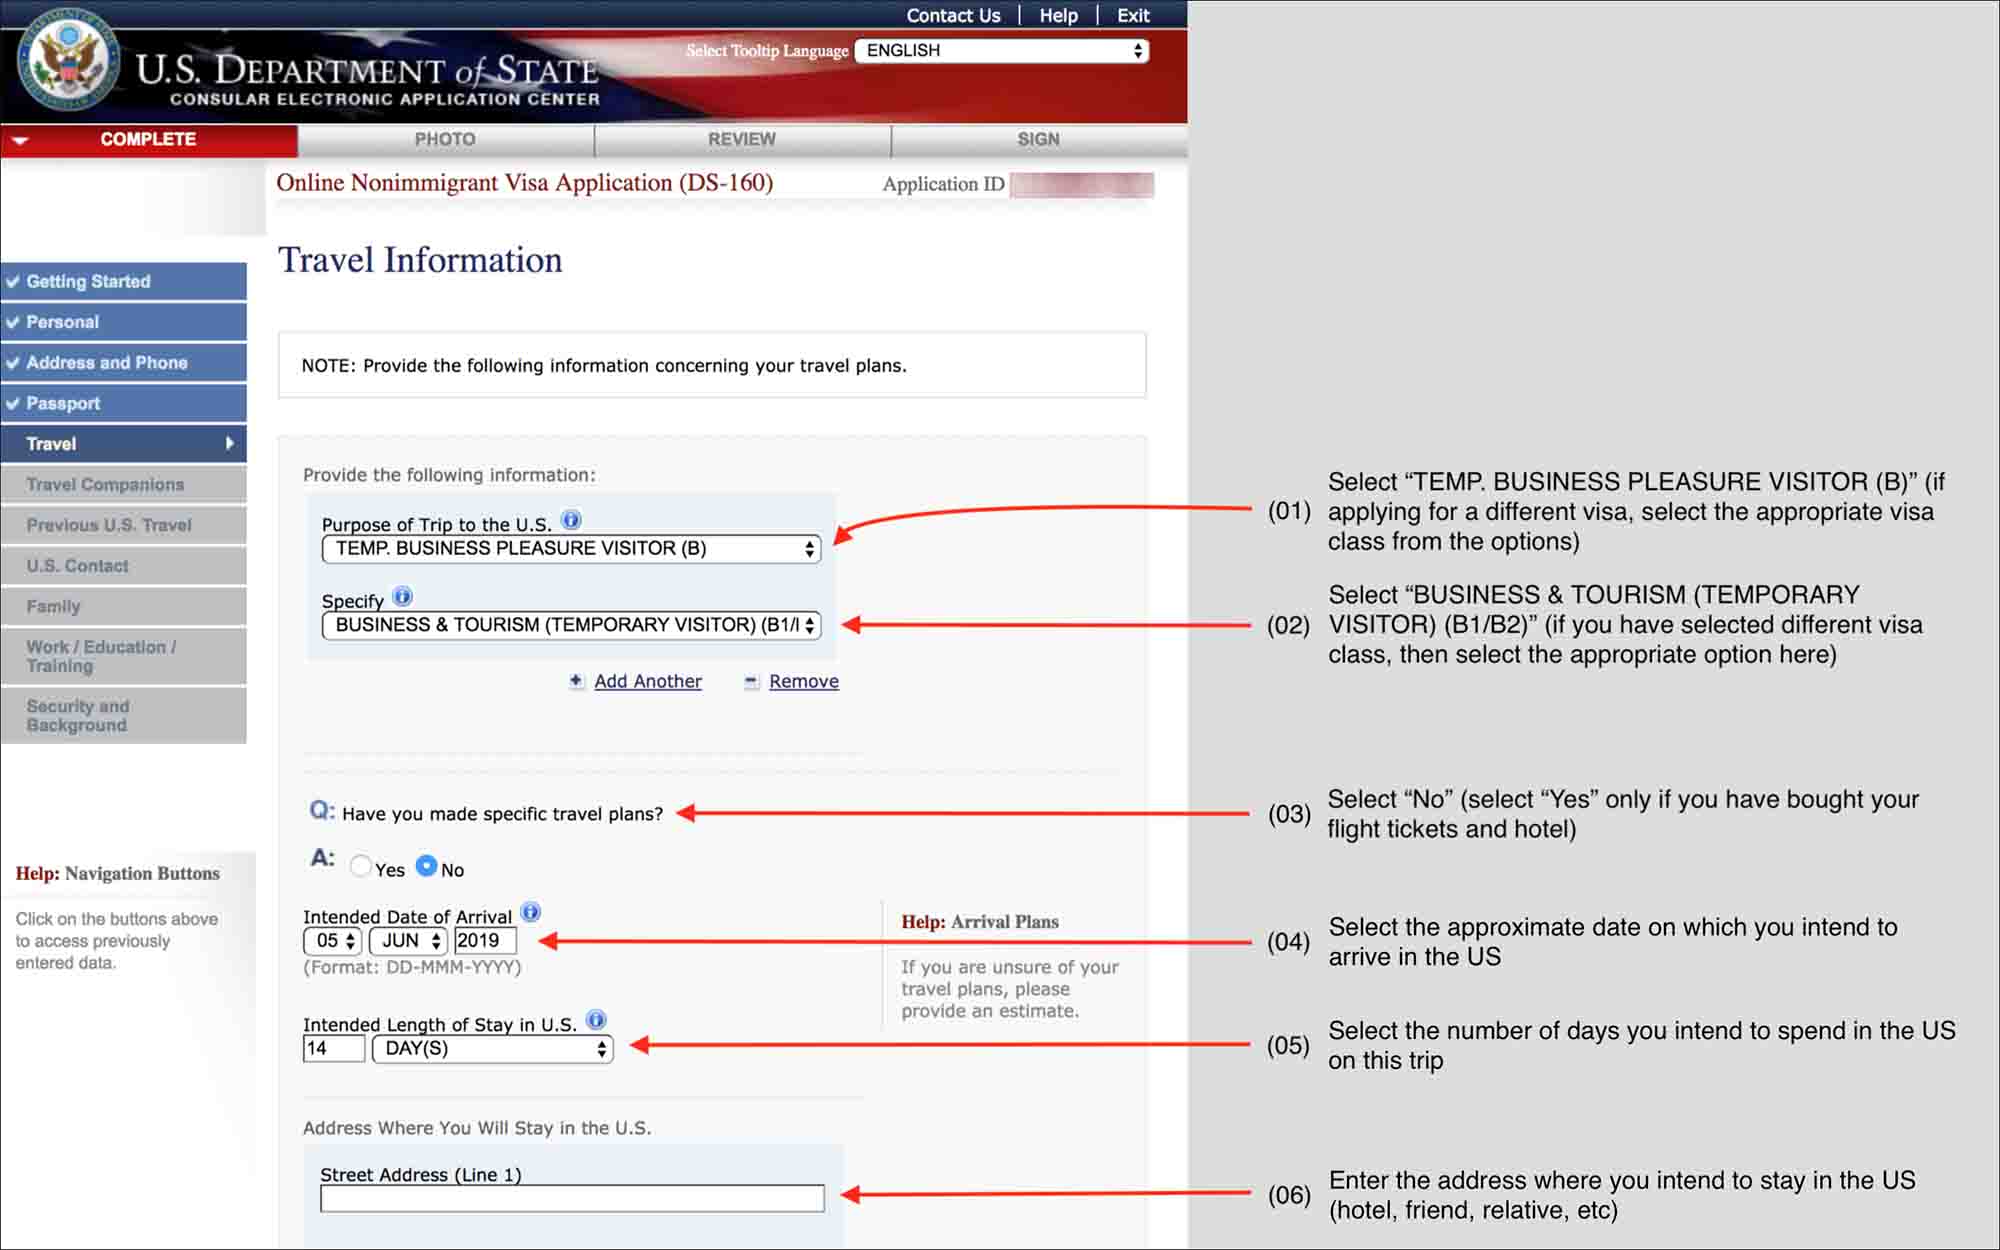
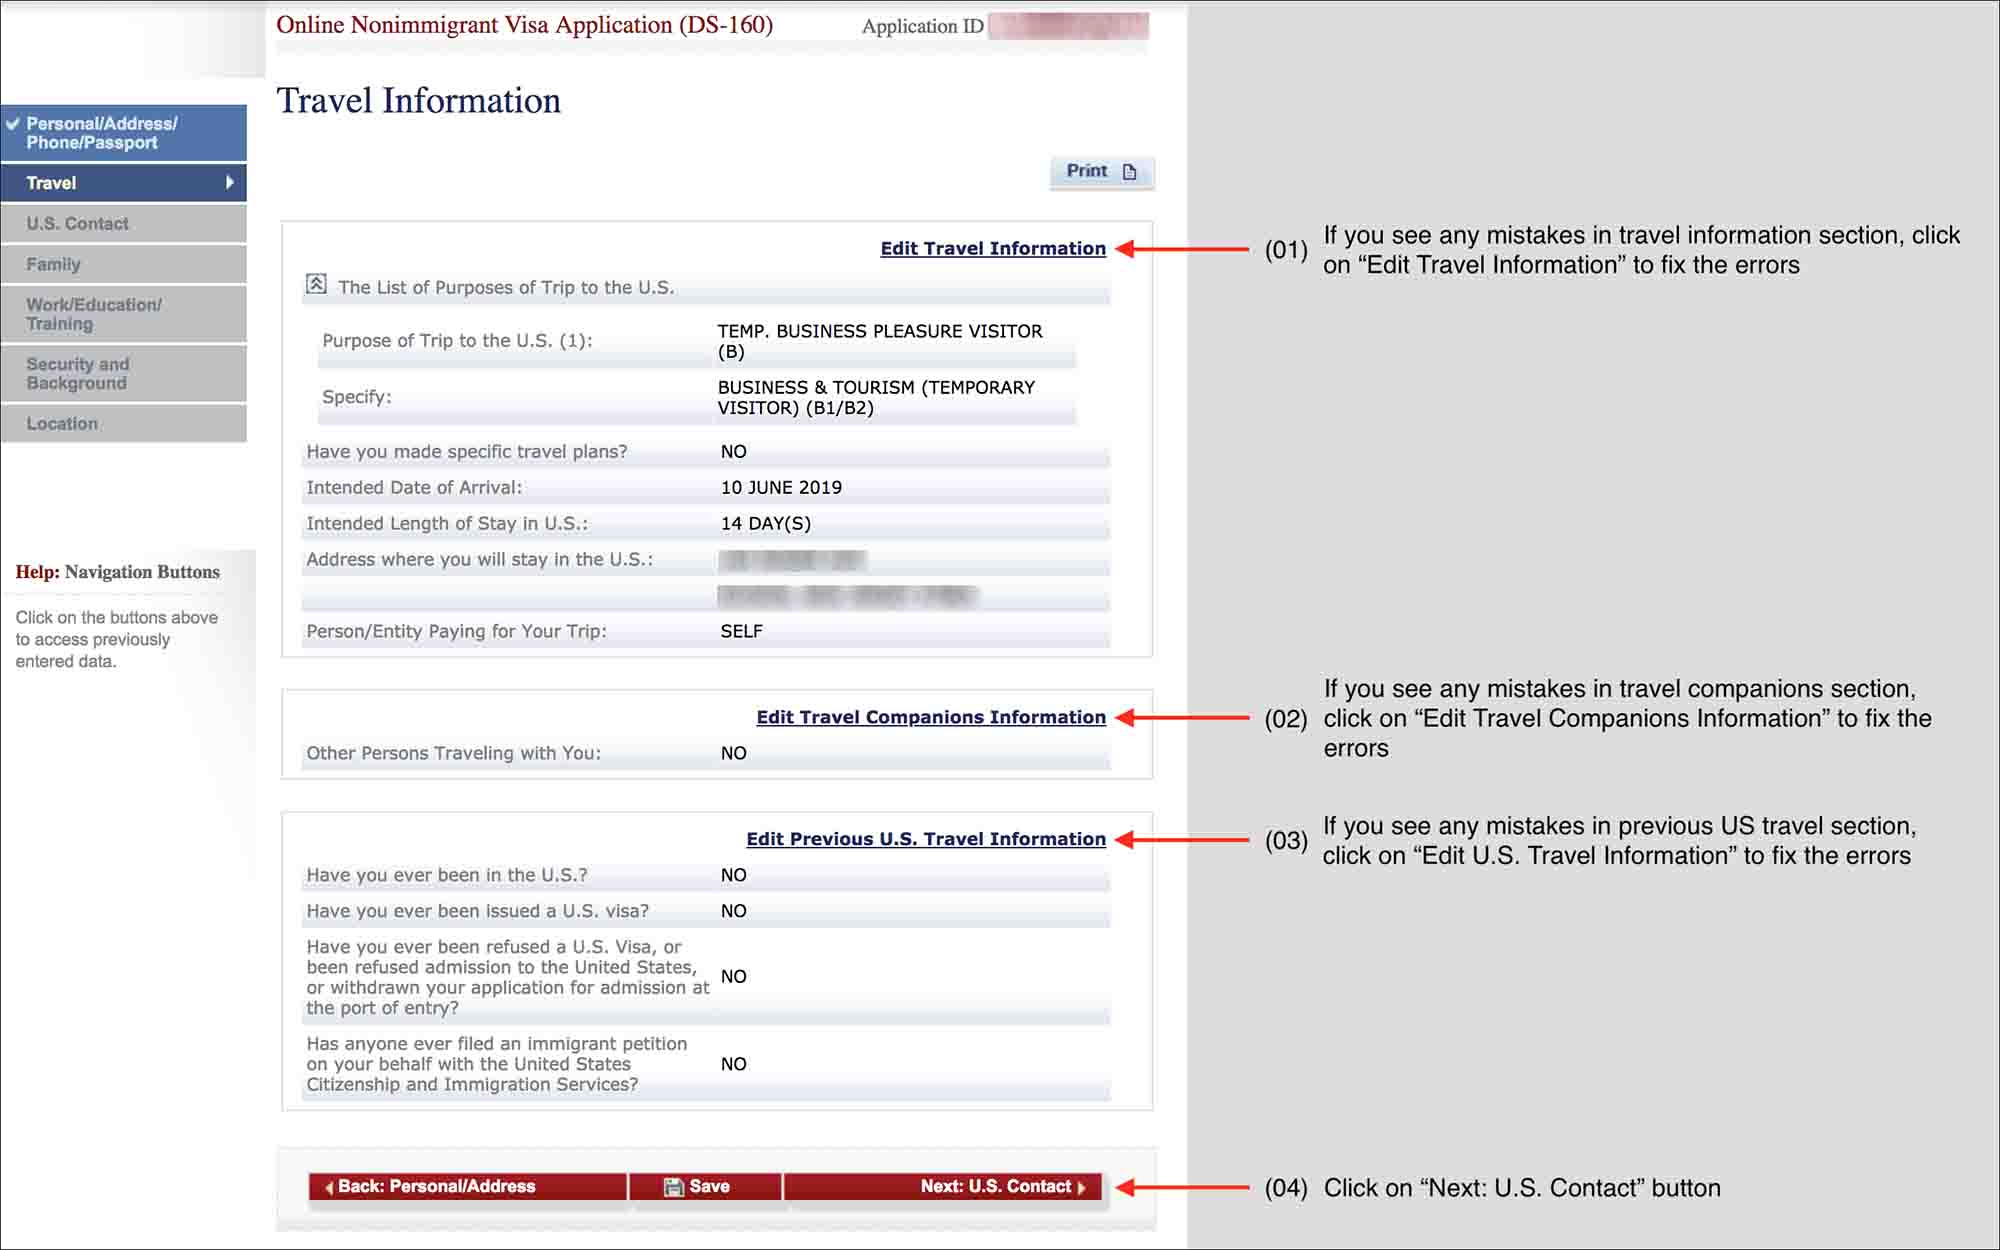
5. Travel

NOTE:
Even if you have selected “B1” or “B2” as your choice, US would mostly issue “B1/B2”. In very rare cases, they issue a “B1” or a “B2”.
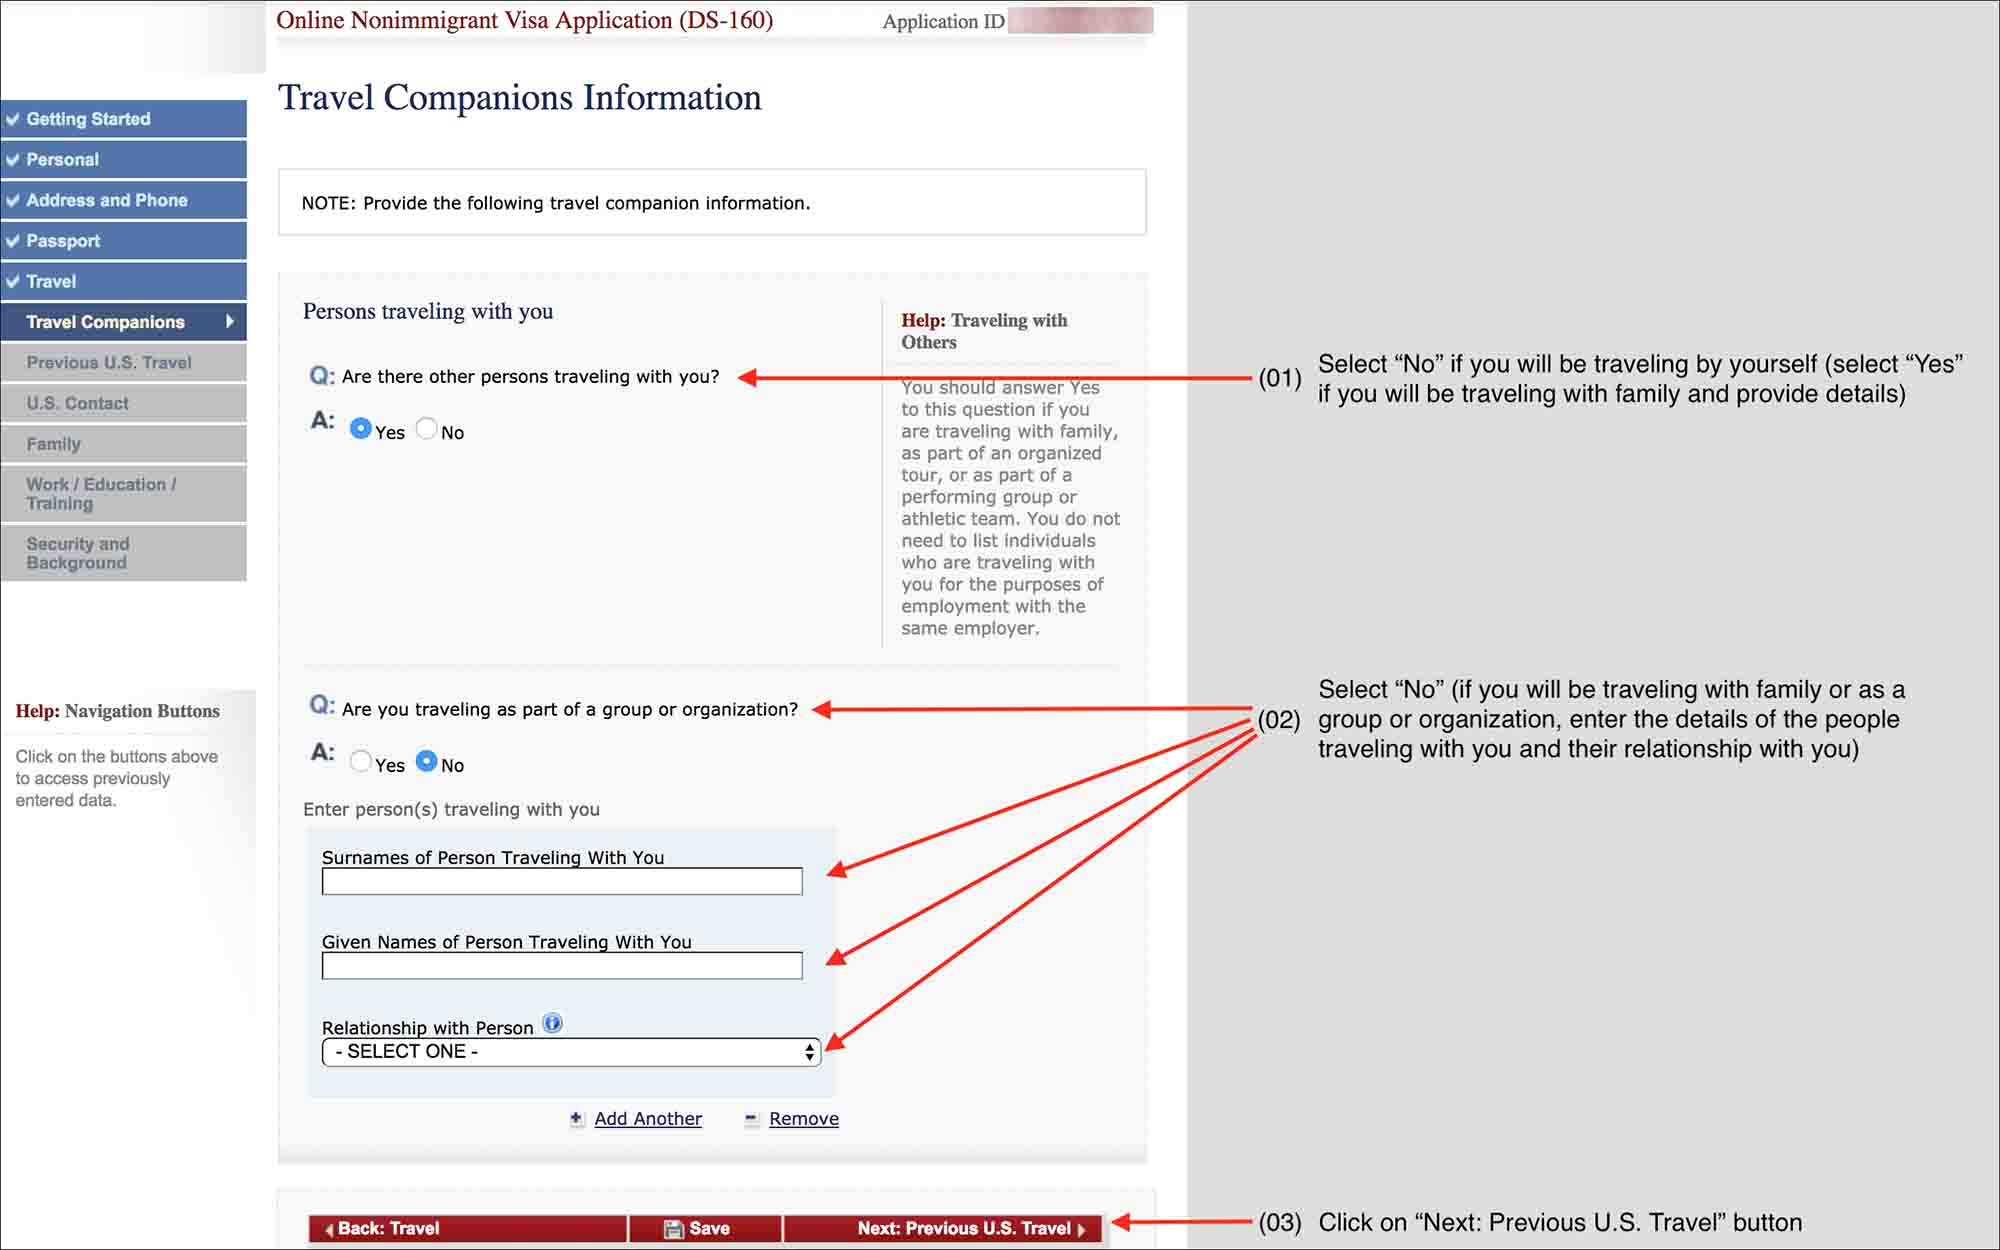
6. Travel Companions
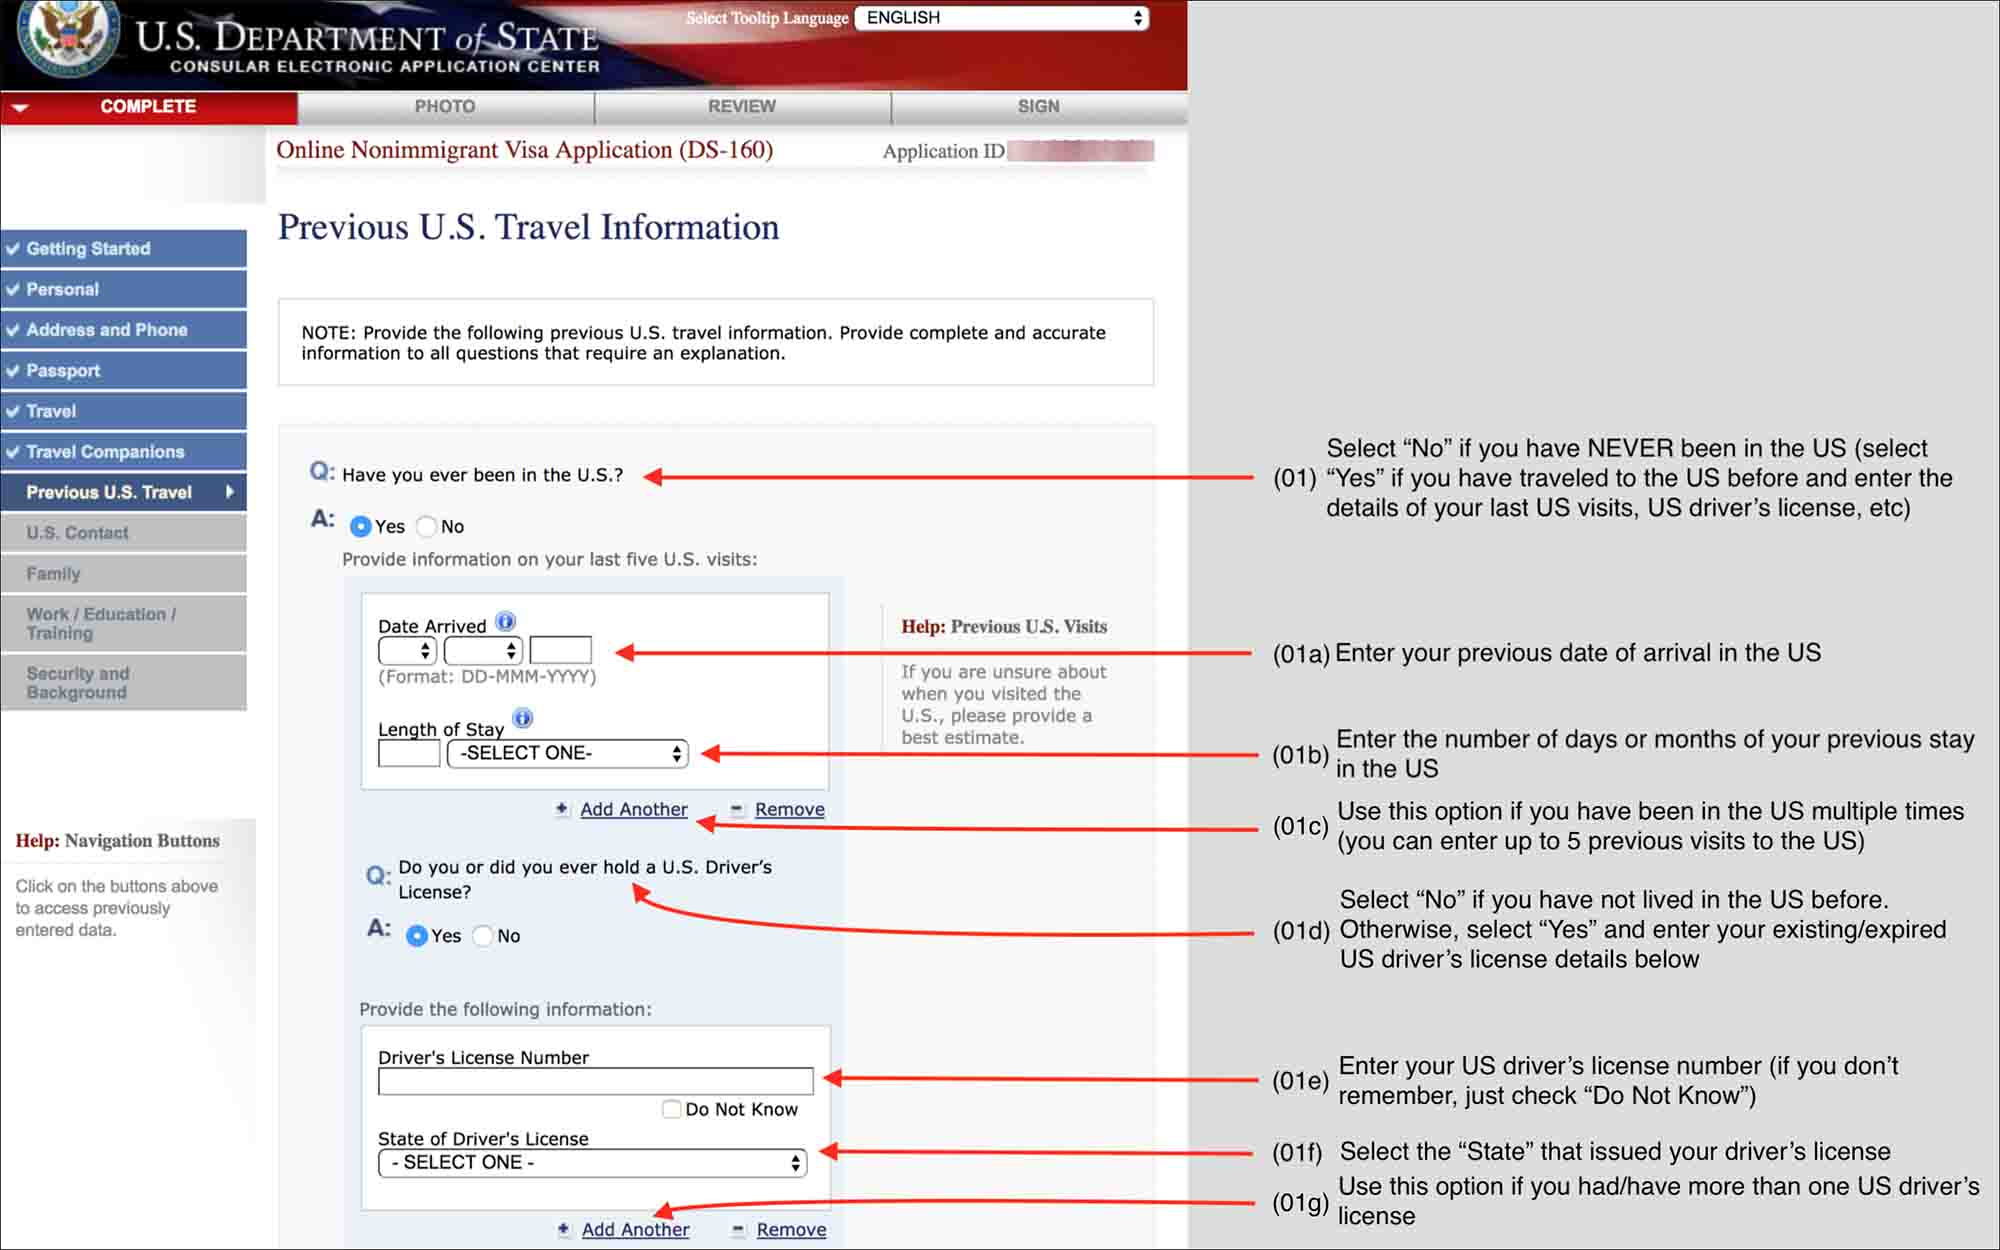
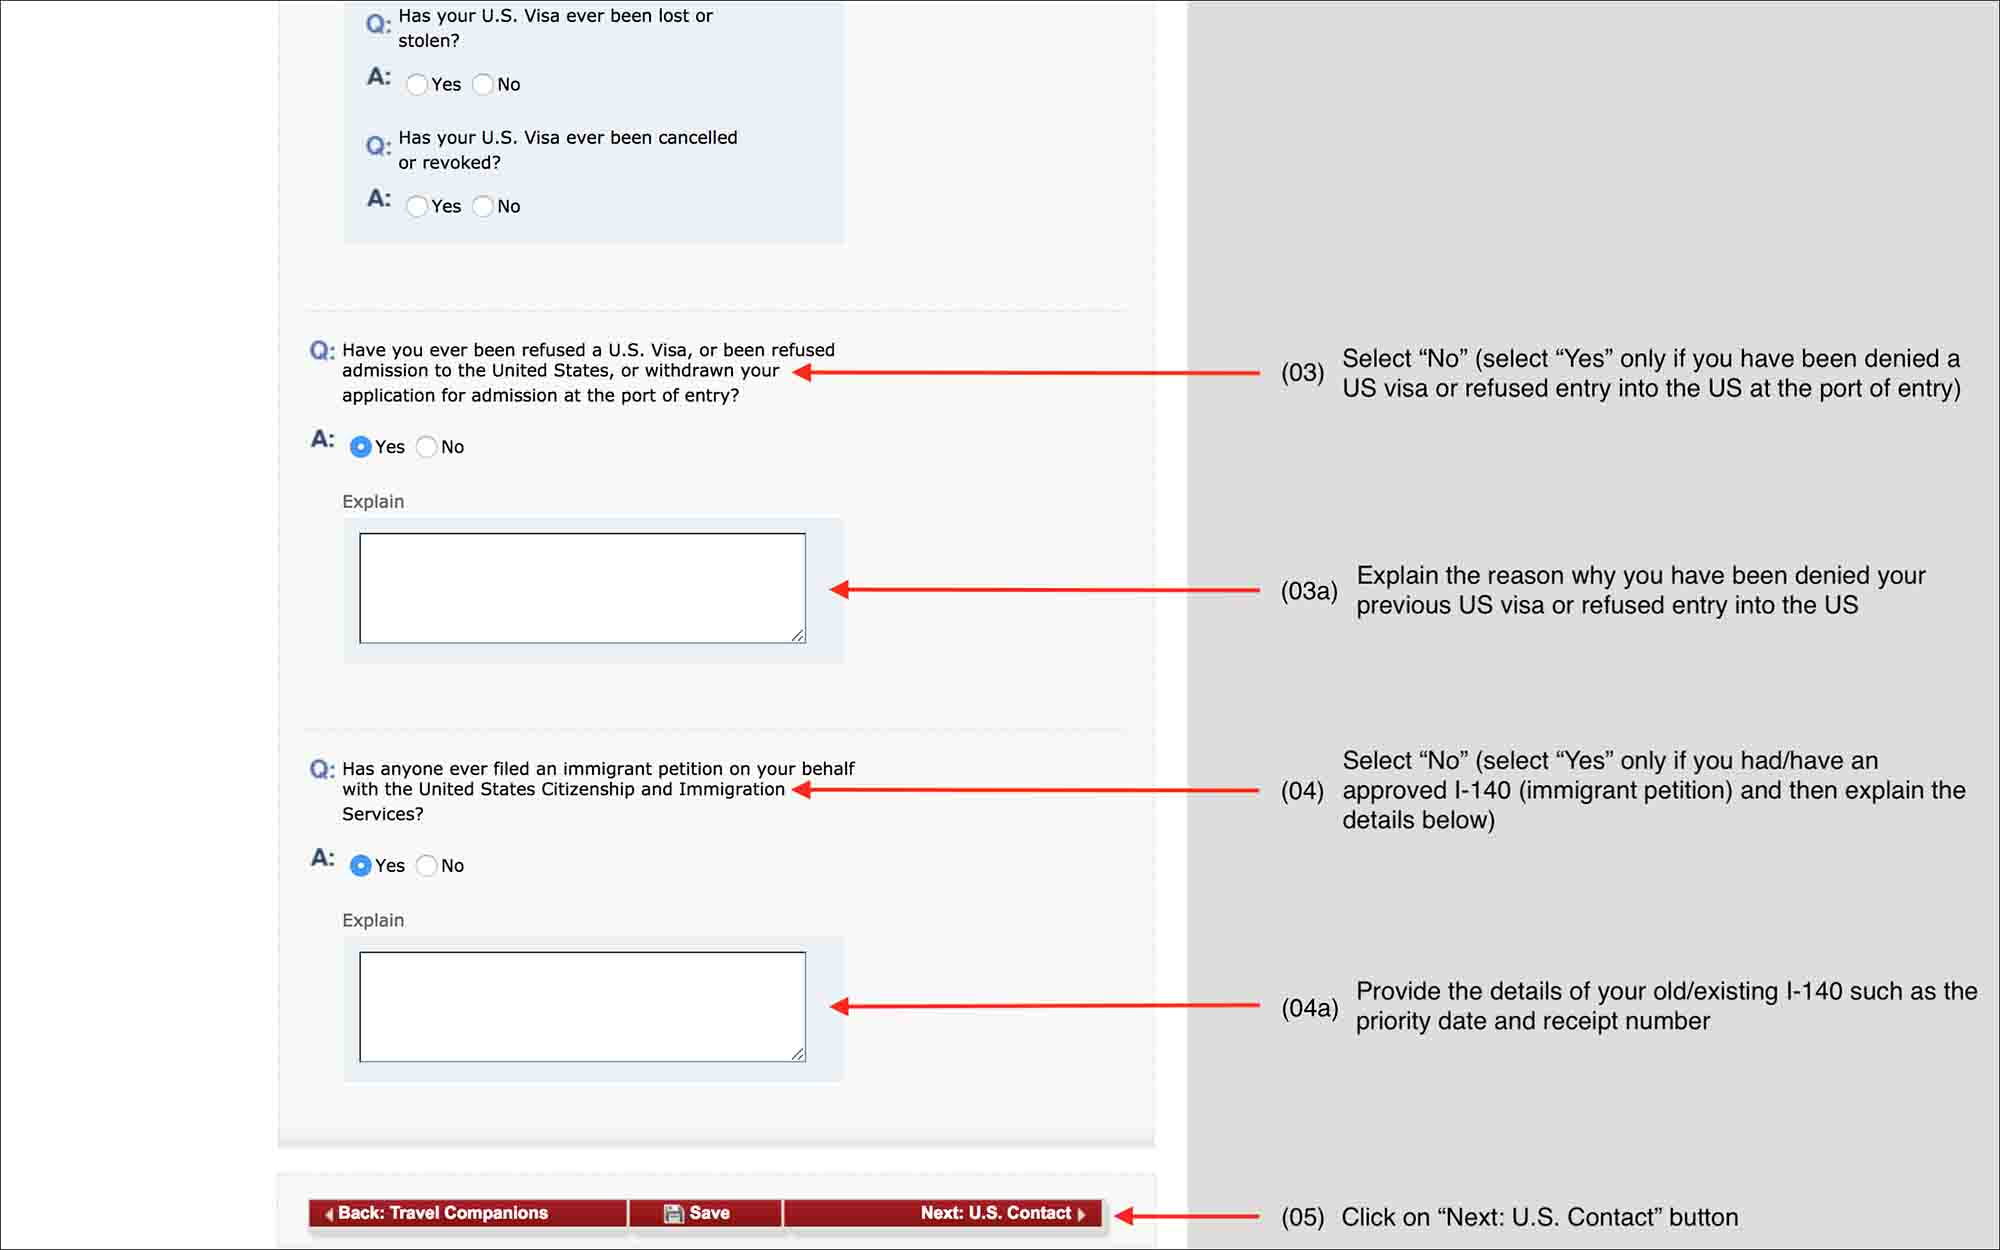
7. Previous U.S. Travel
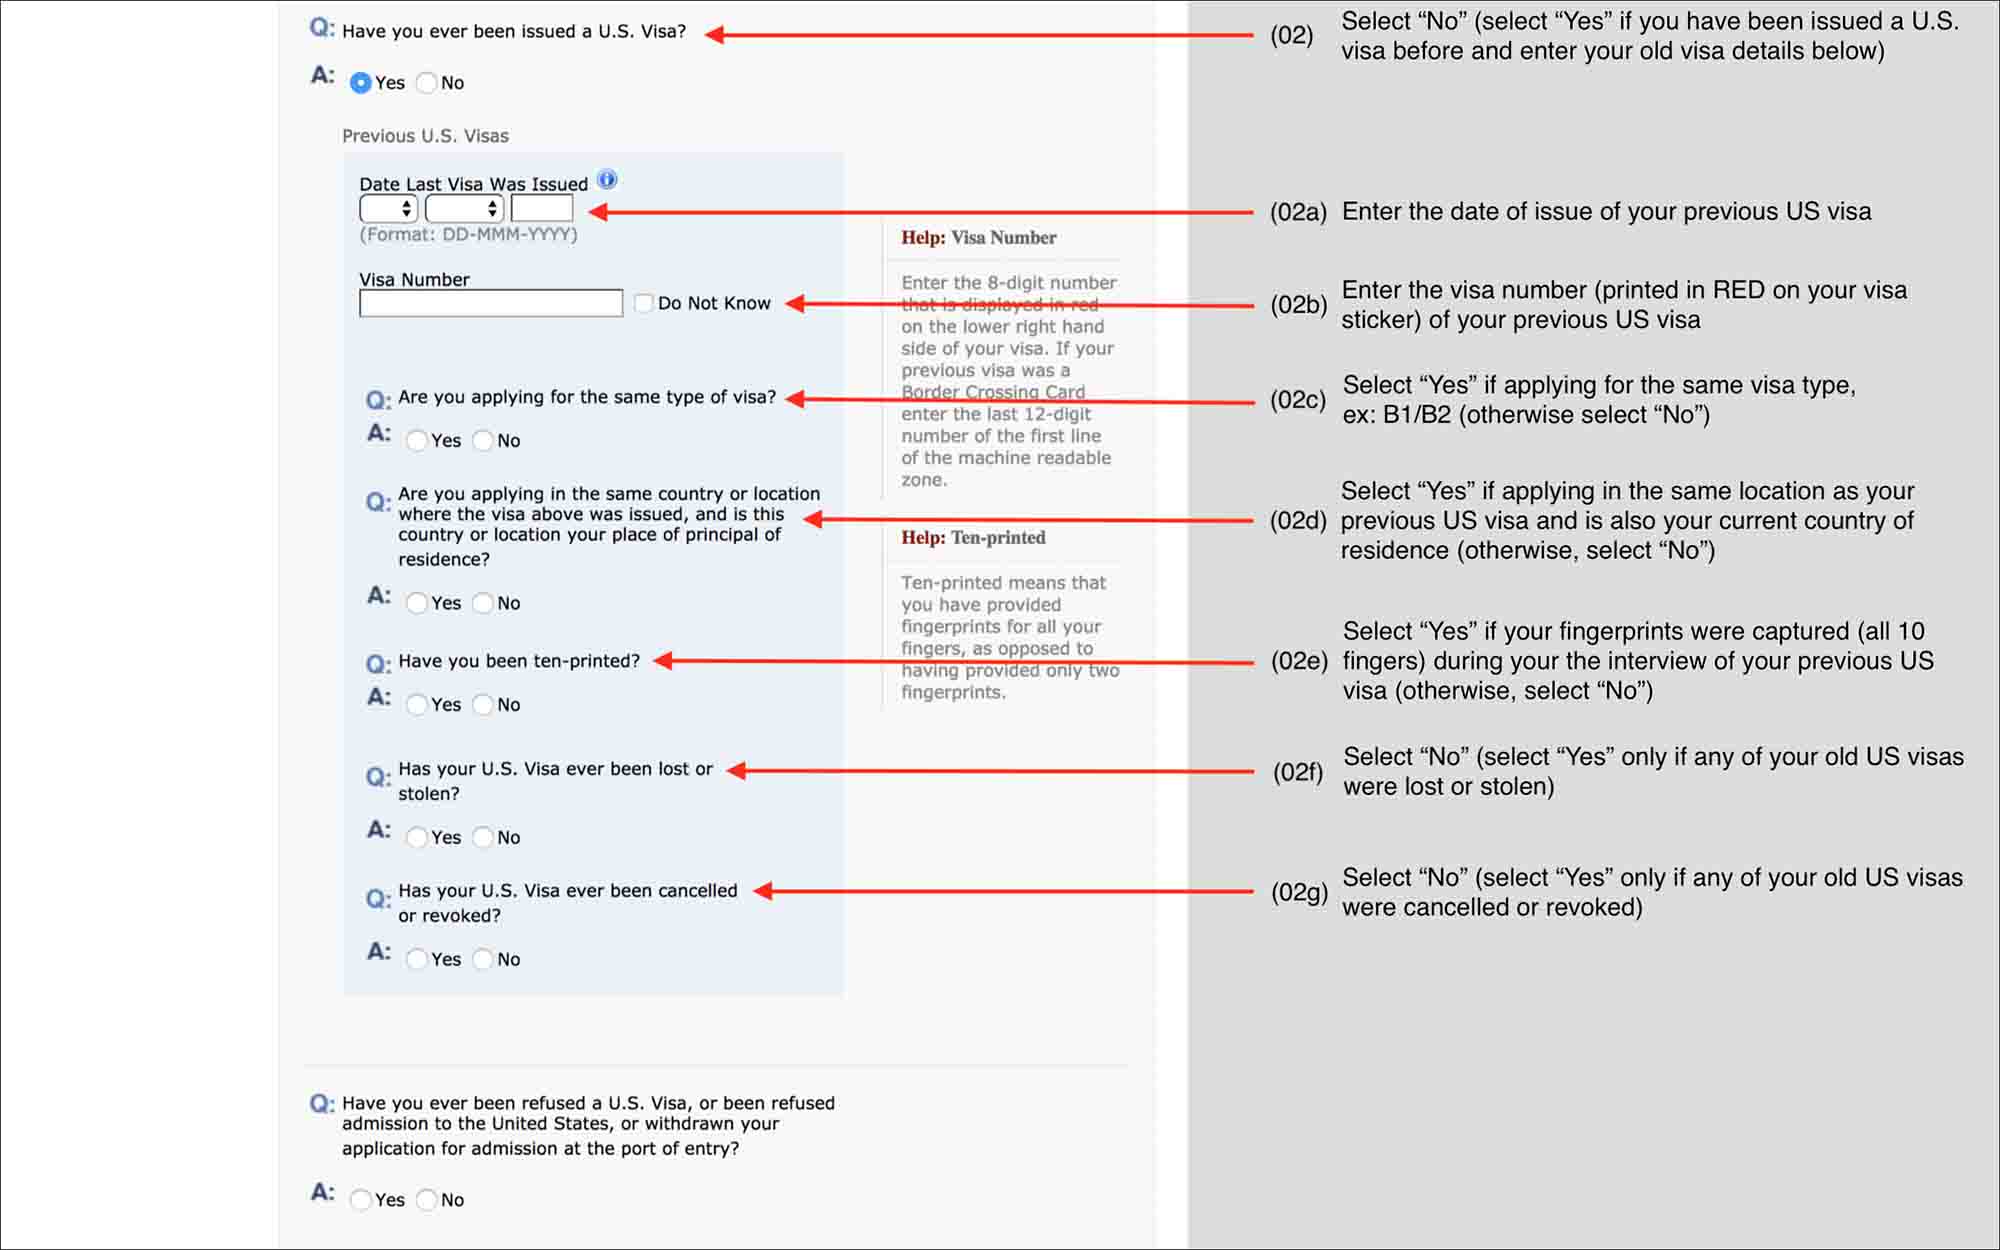
NOTE:
If you have been in the US before, you can use the Date and Time’s Days Calculator to calculate your “Length of Stay”.
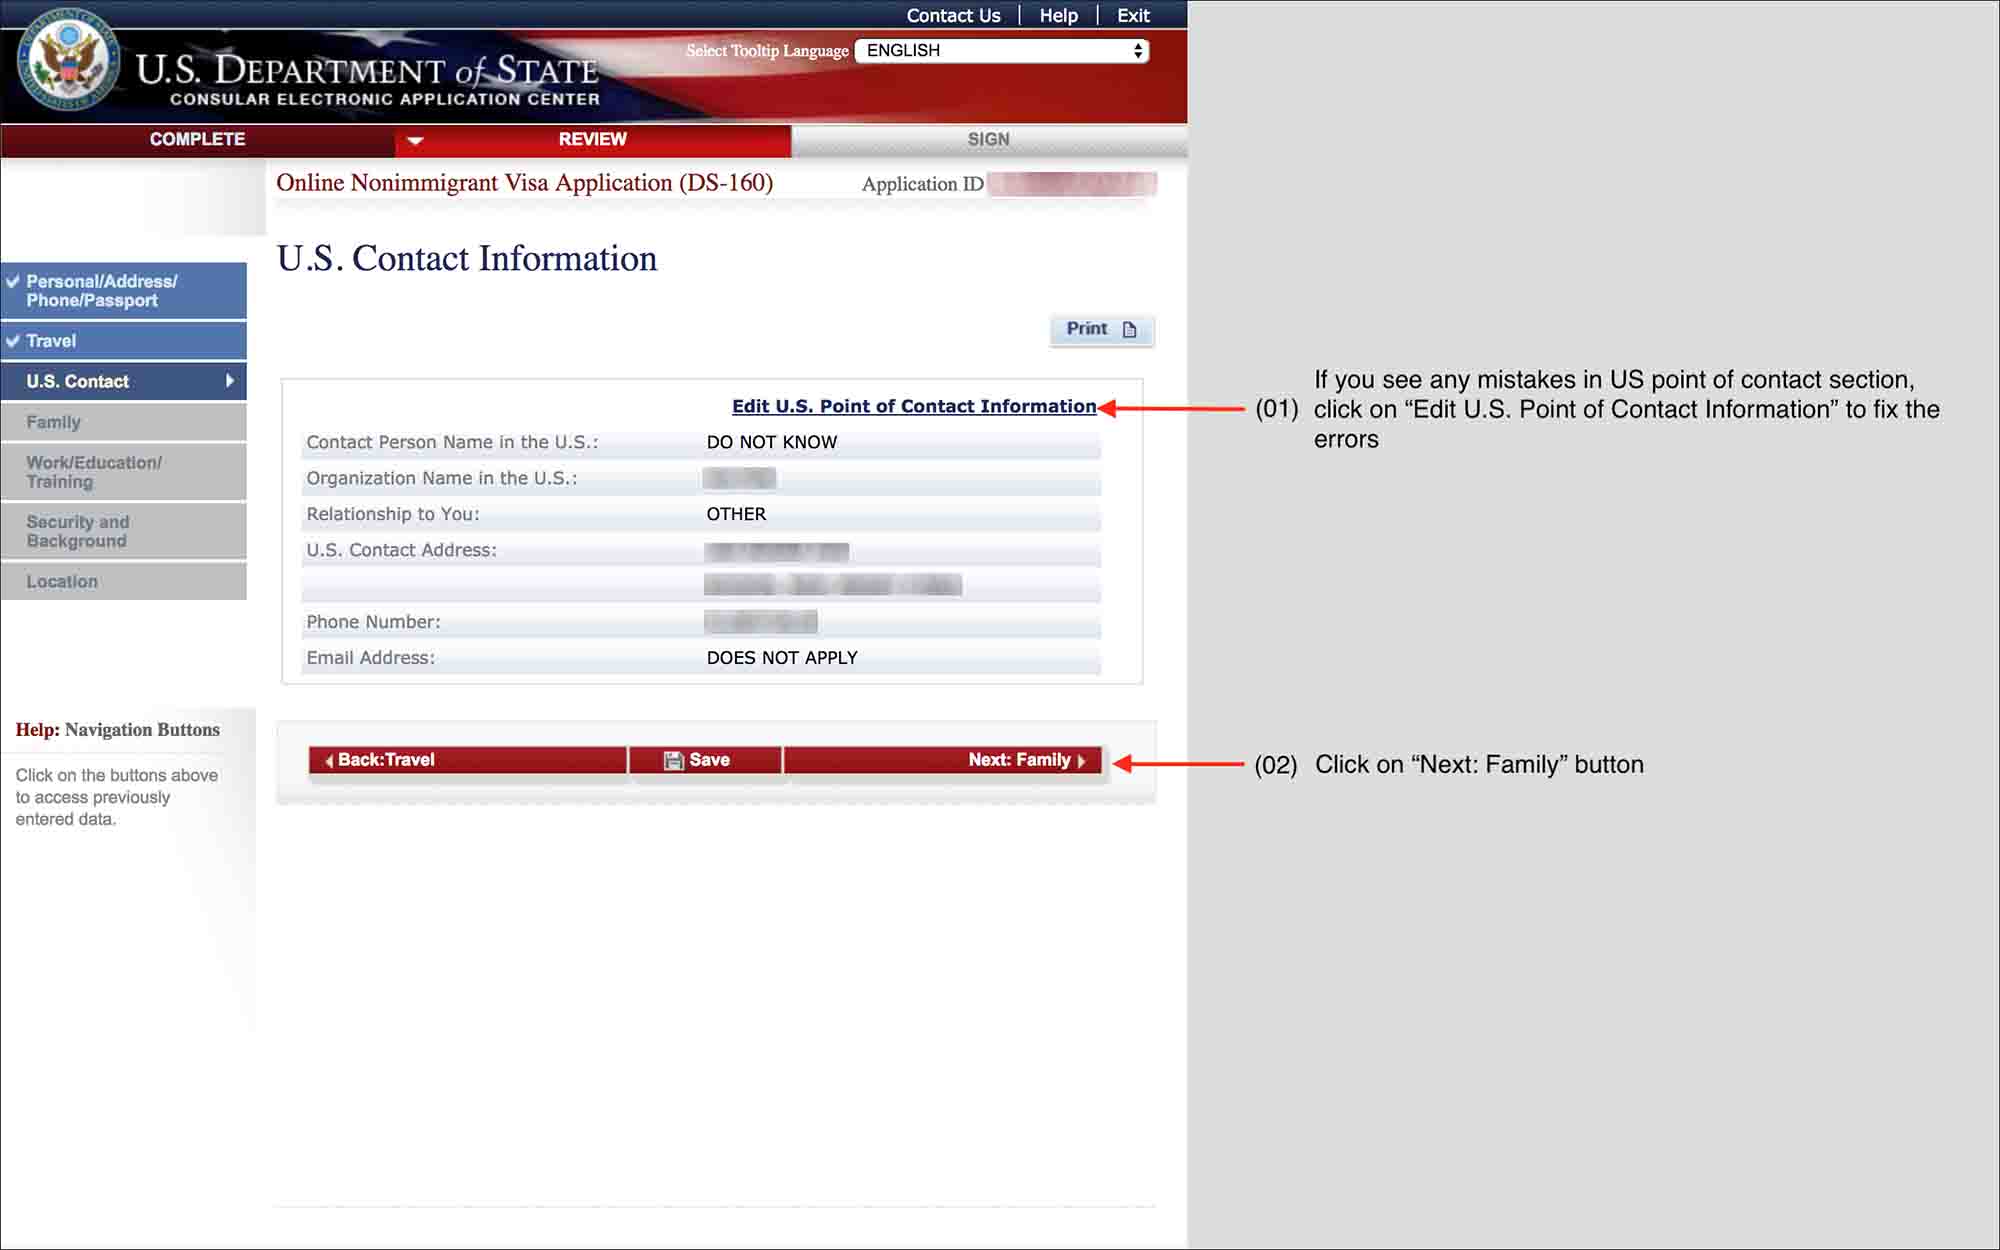
8. U.S. Contact
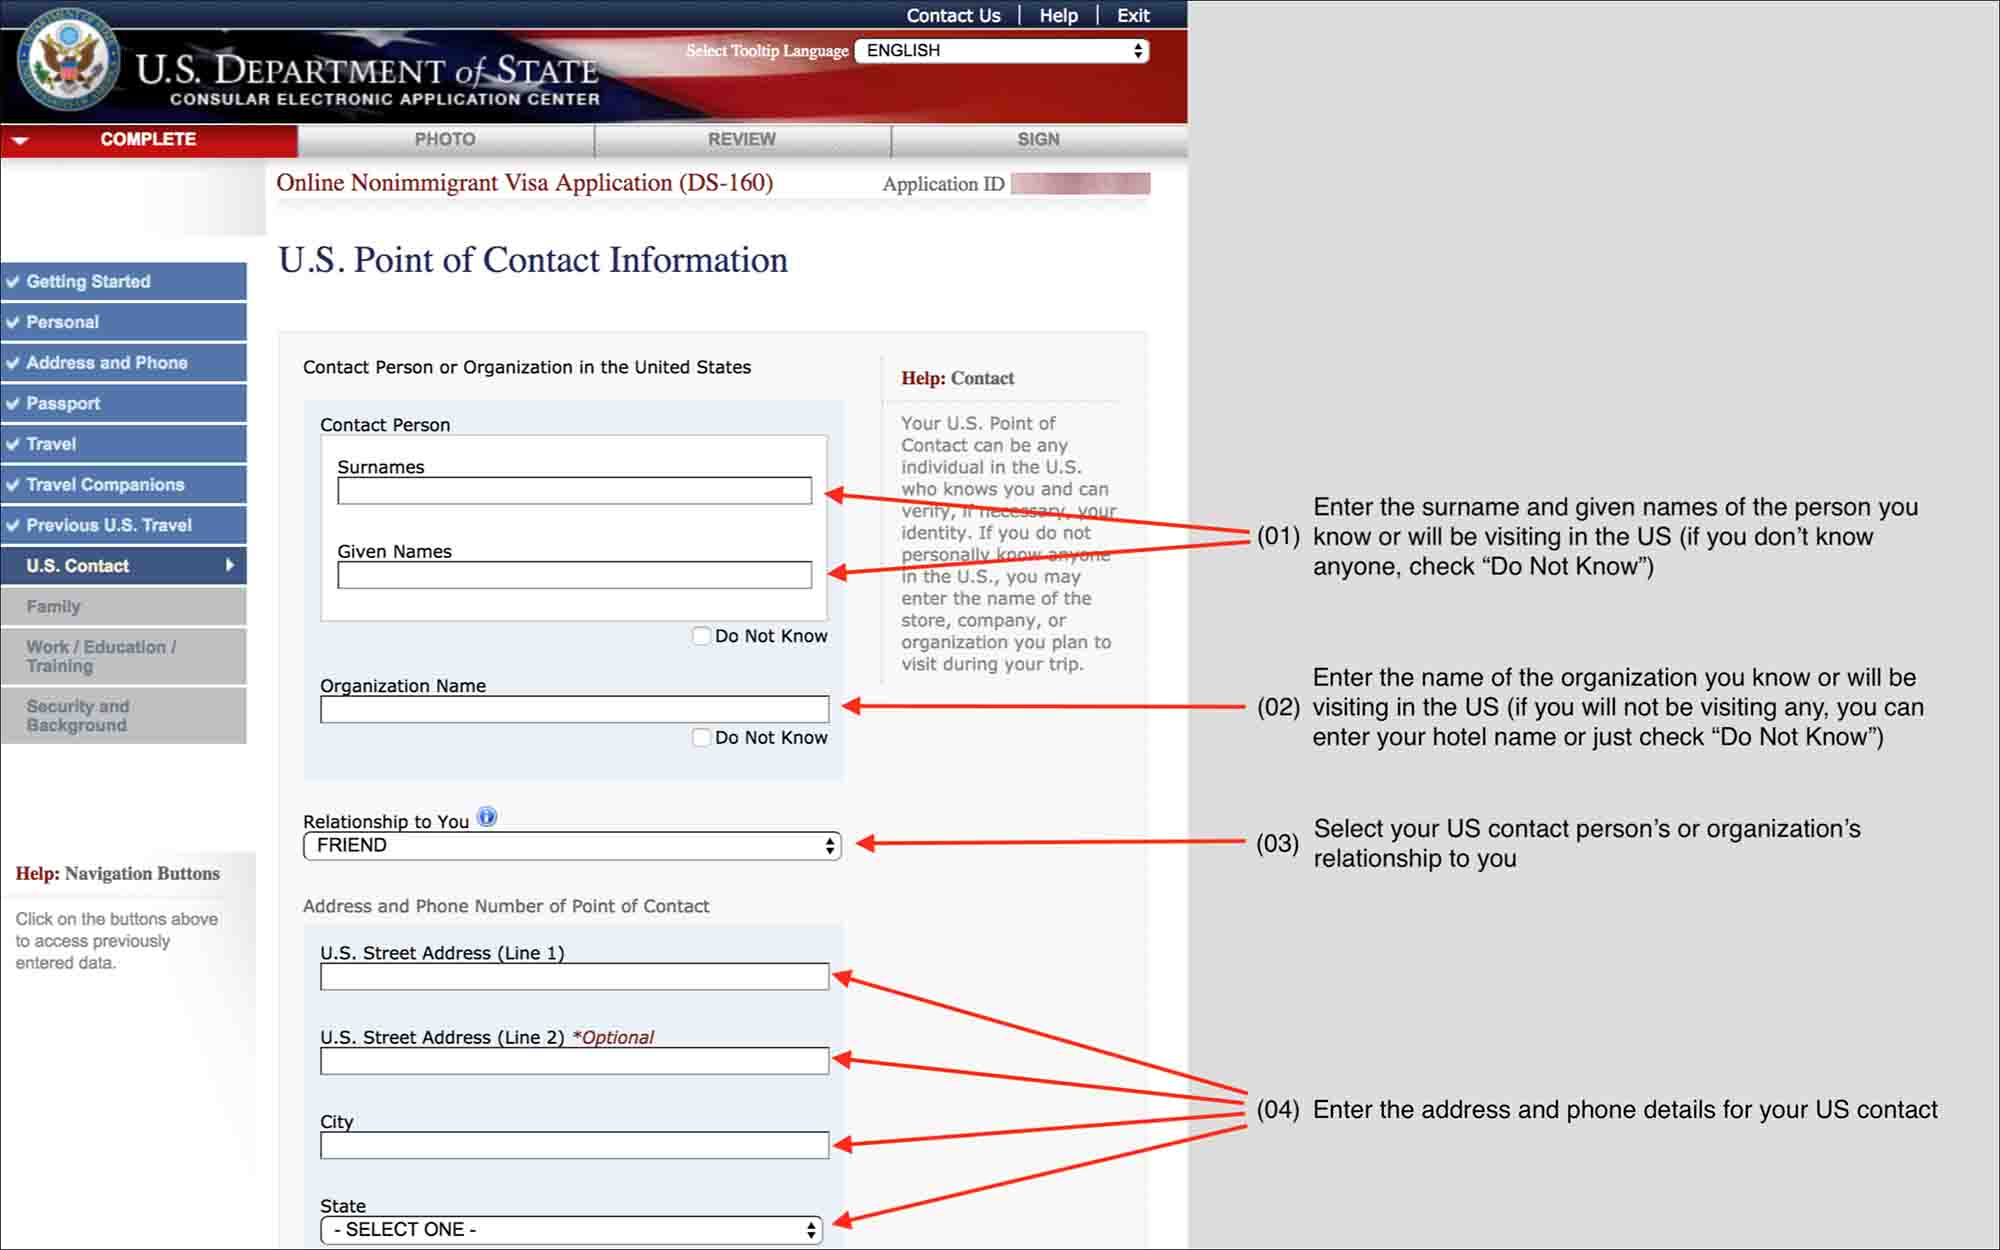
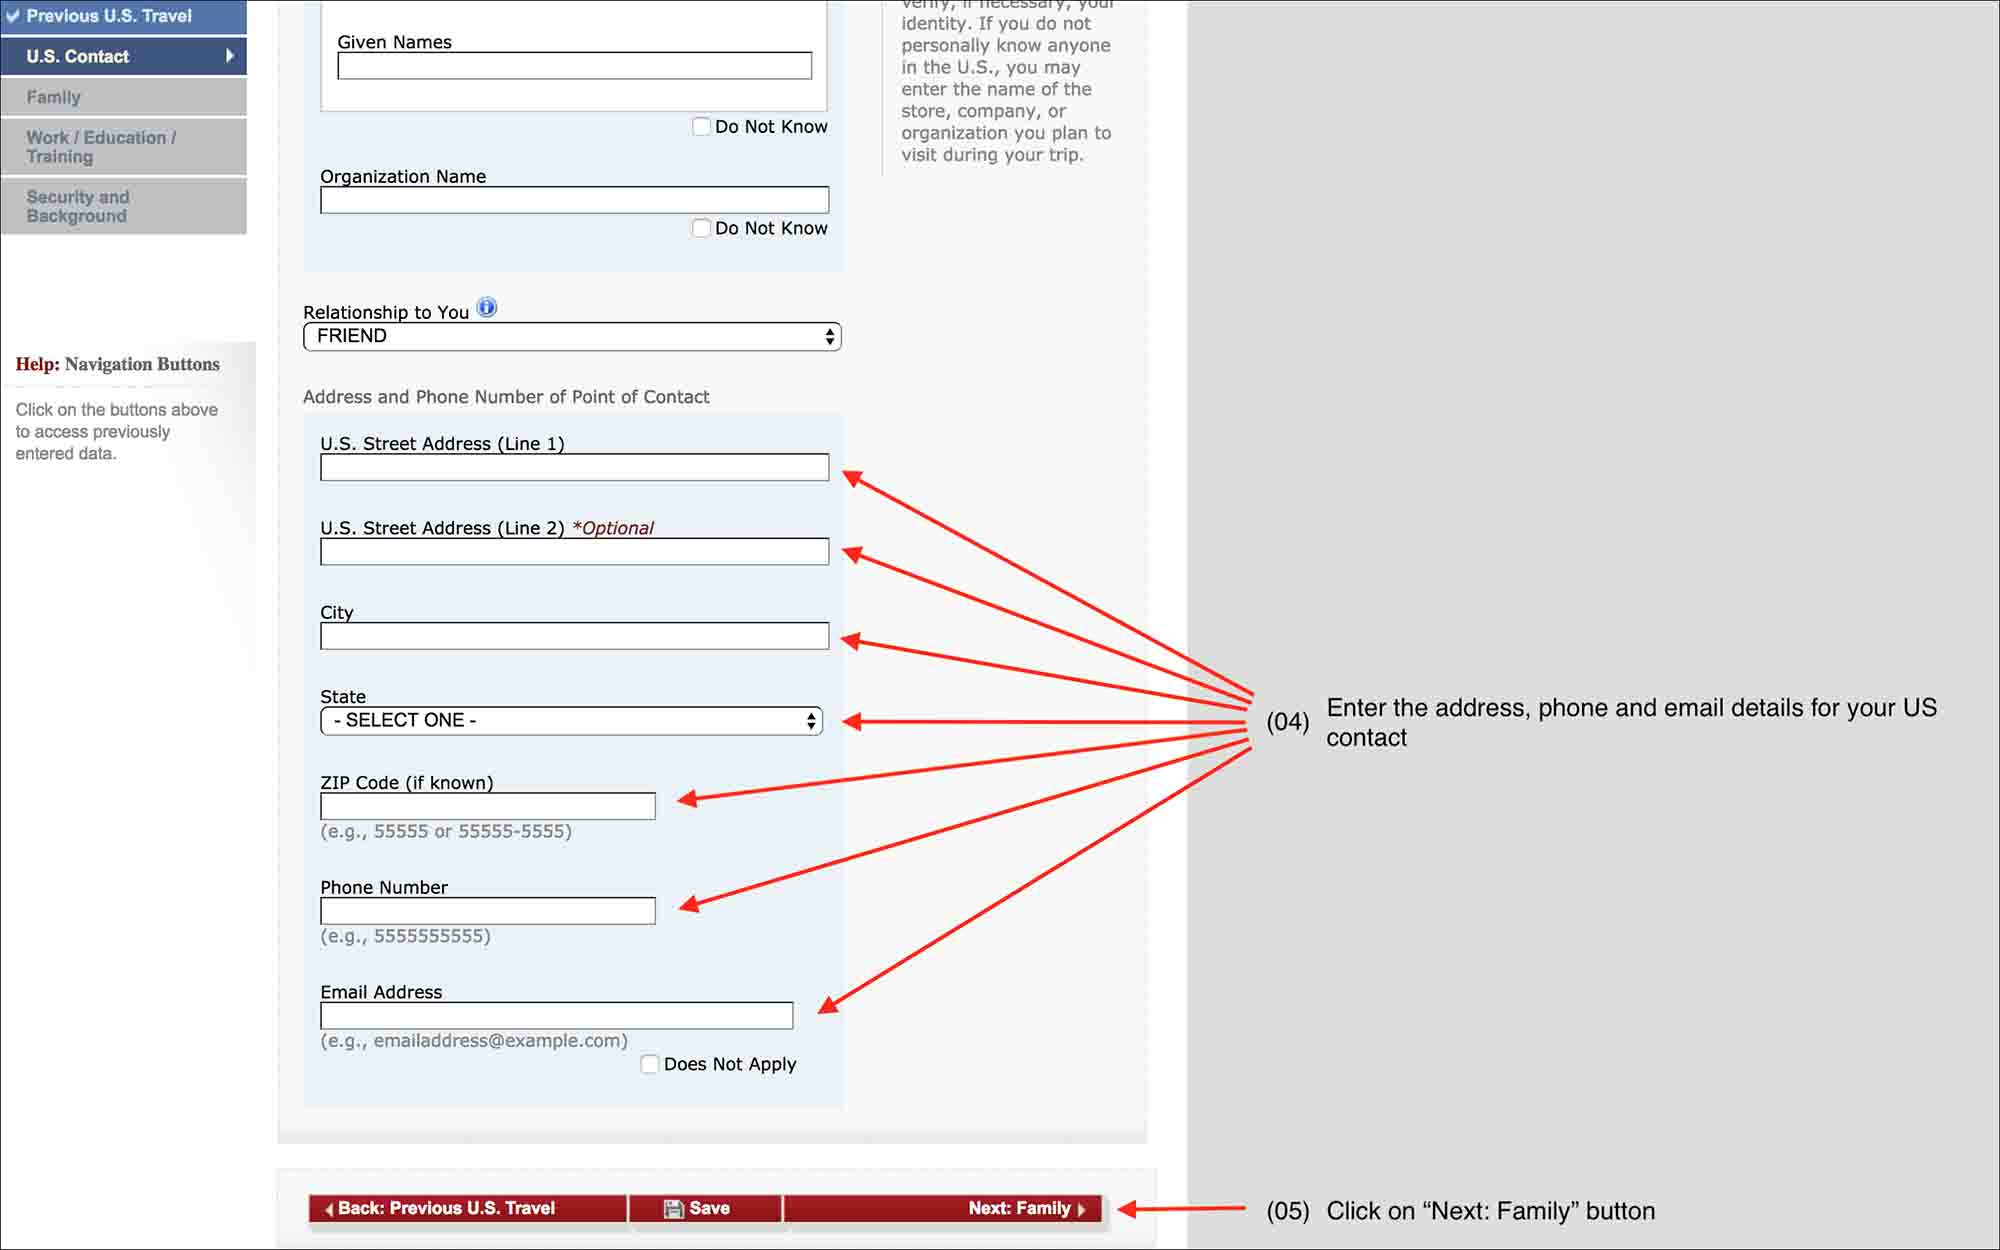
NOTE:
For “Contact Person or Organization in the United States”, you would need to enter AT LEAST one, either a “Contact Person” or an “Organization”. I suggest entering the hotel where you will be staying.
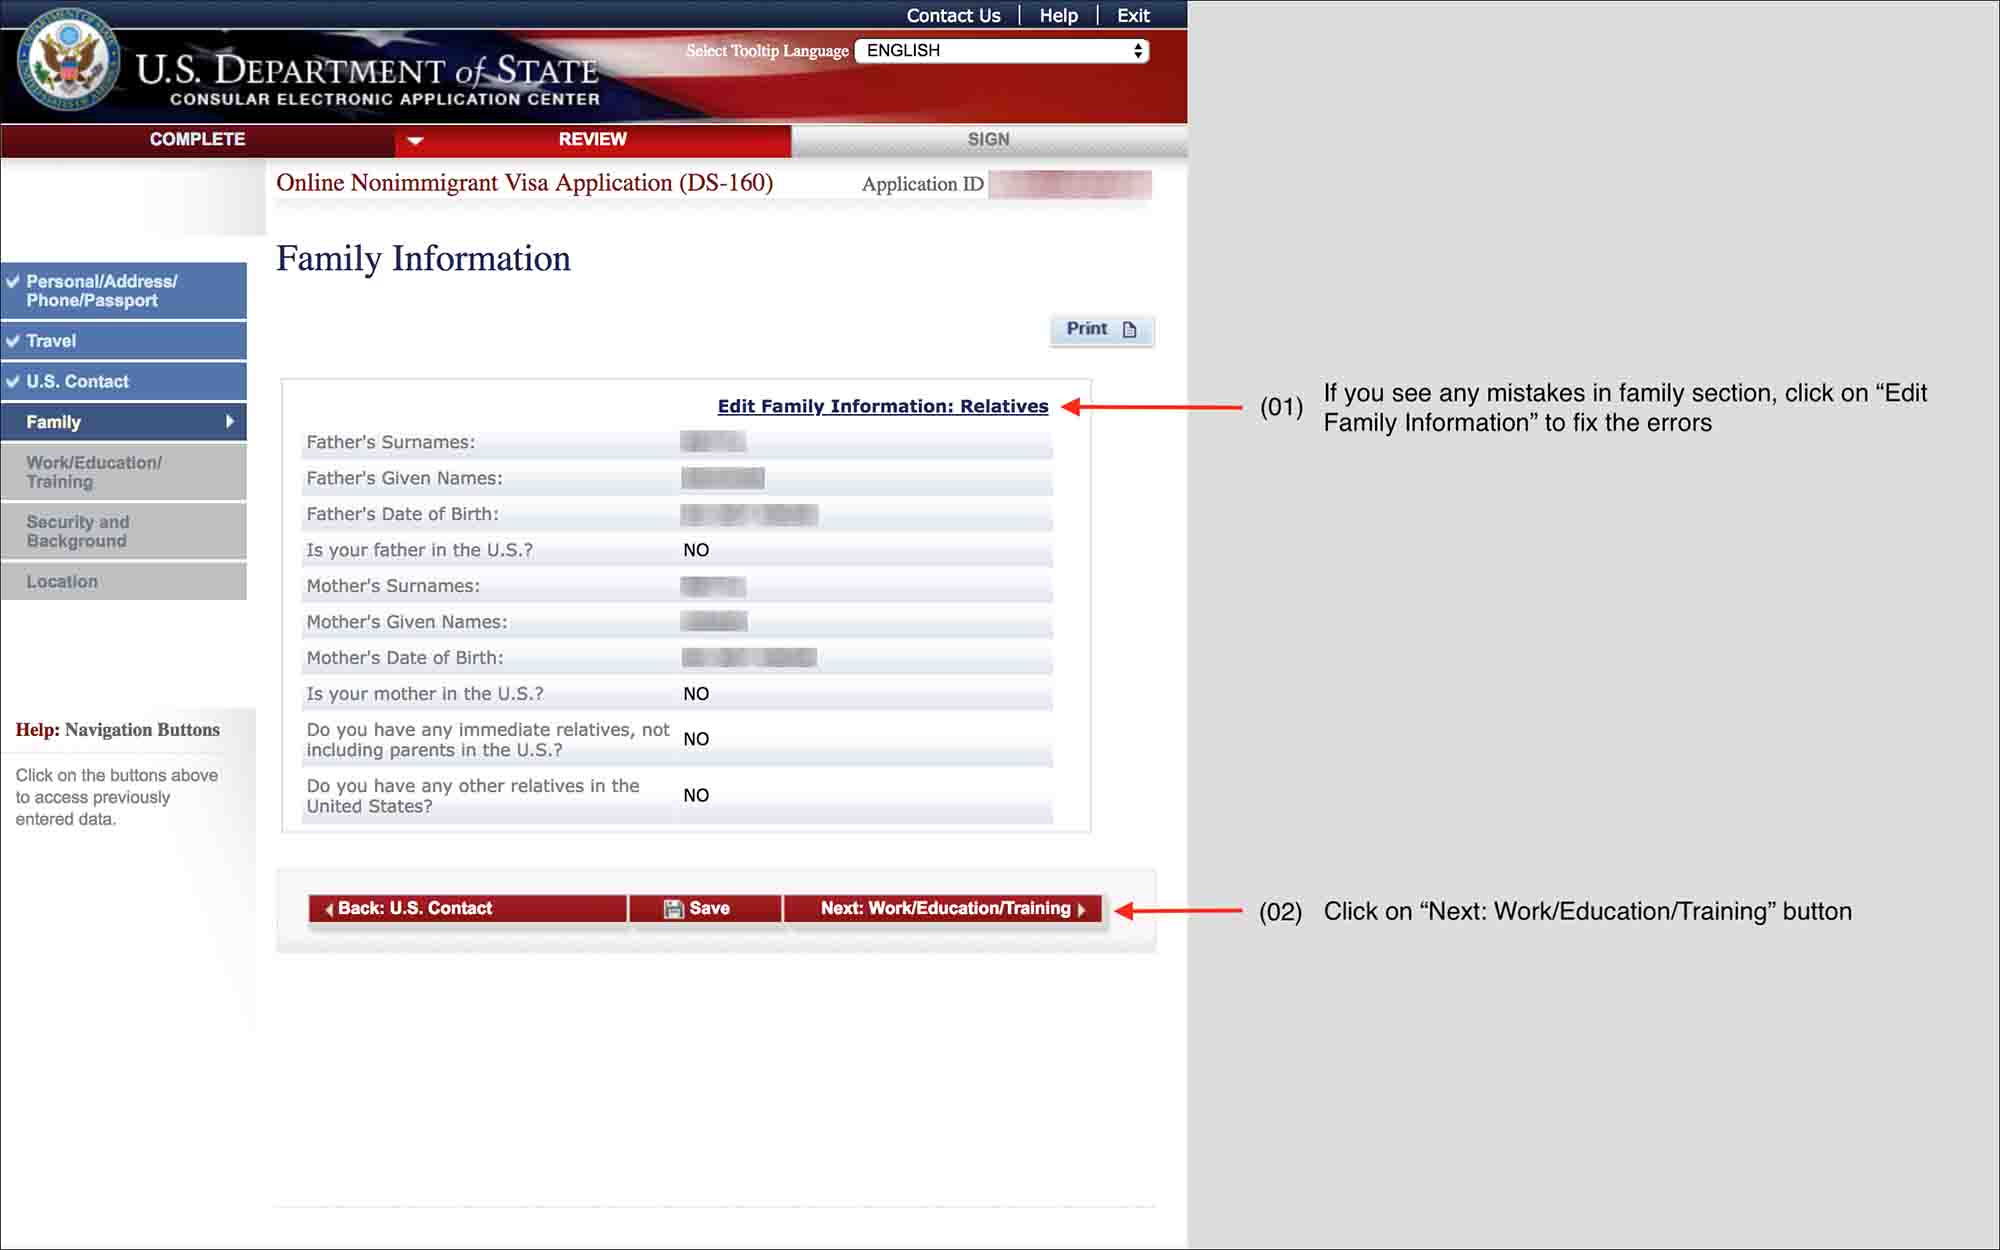
9. Family

NOTE:
For “Other Relatives”, select “Yes” only if you have relatives that you keep in touch regularly and knows that you will be visiting the US soon.
The “Spouse” section is only available if you have selected “MARRIED” as the “Marital Status” in “02. Personal” above.
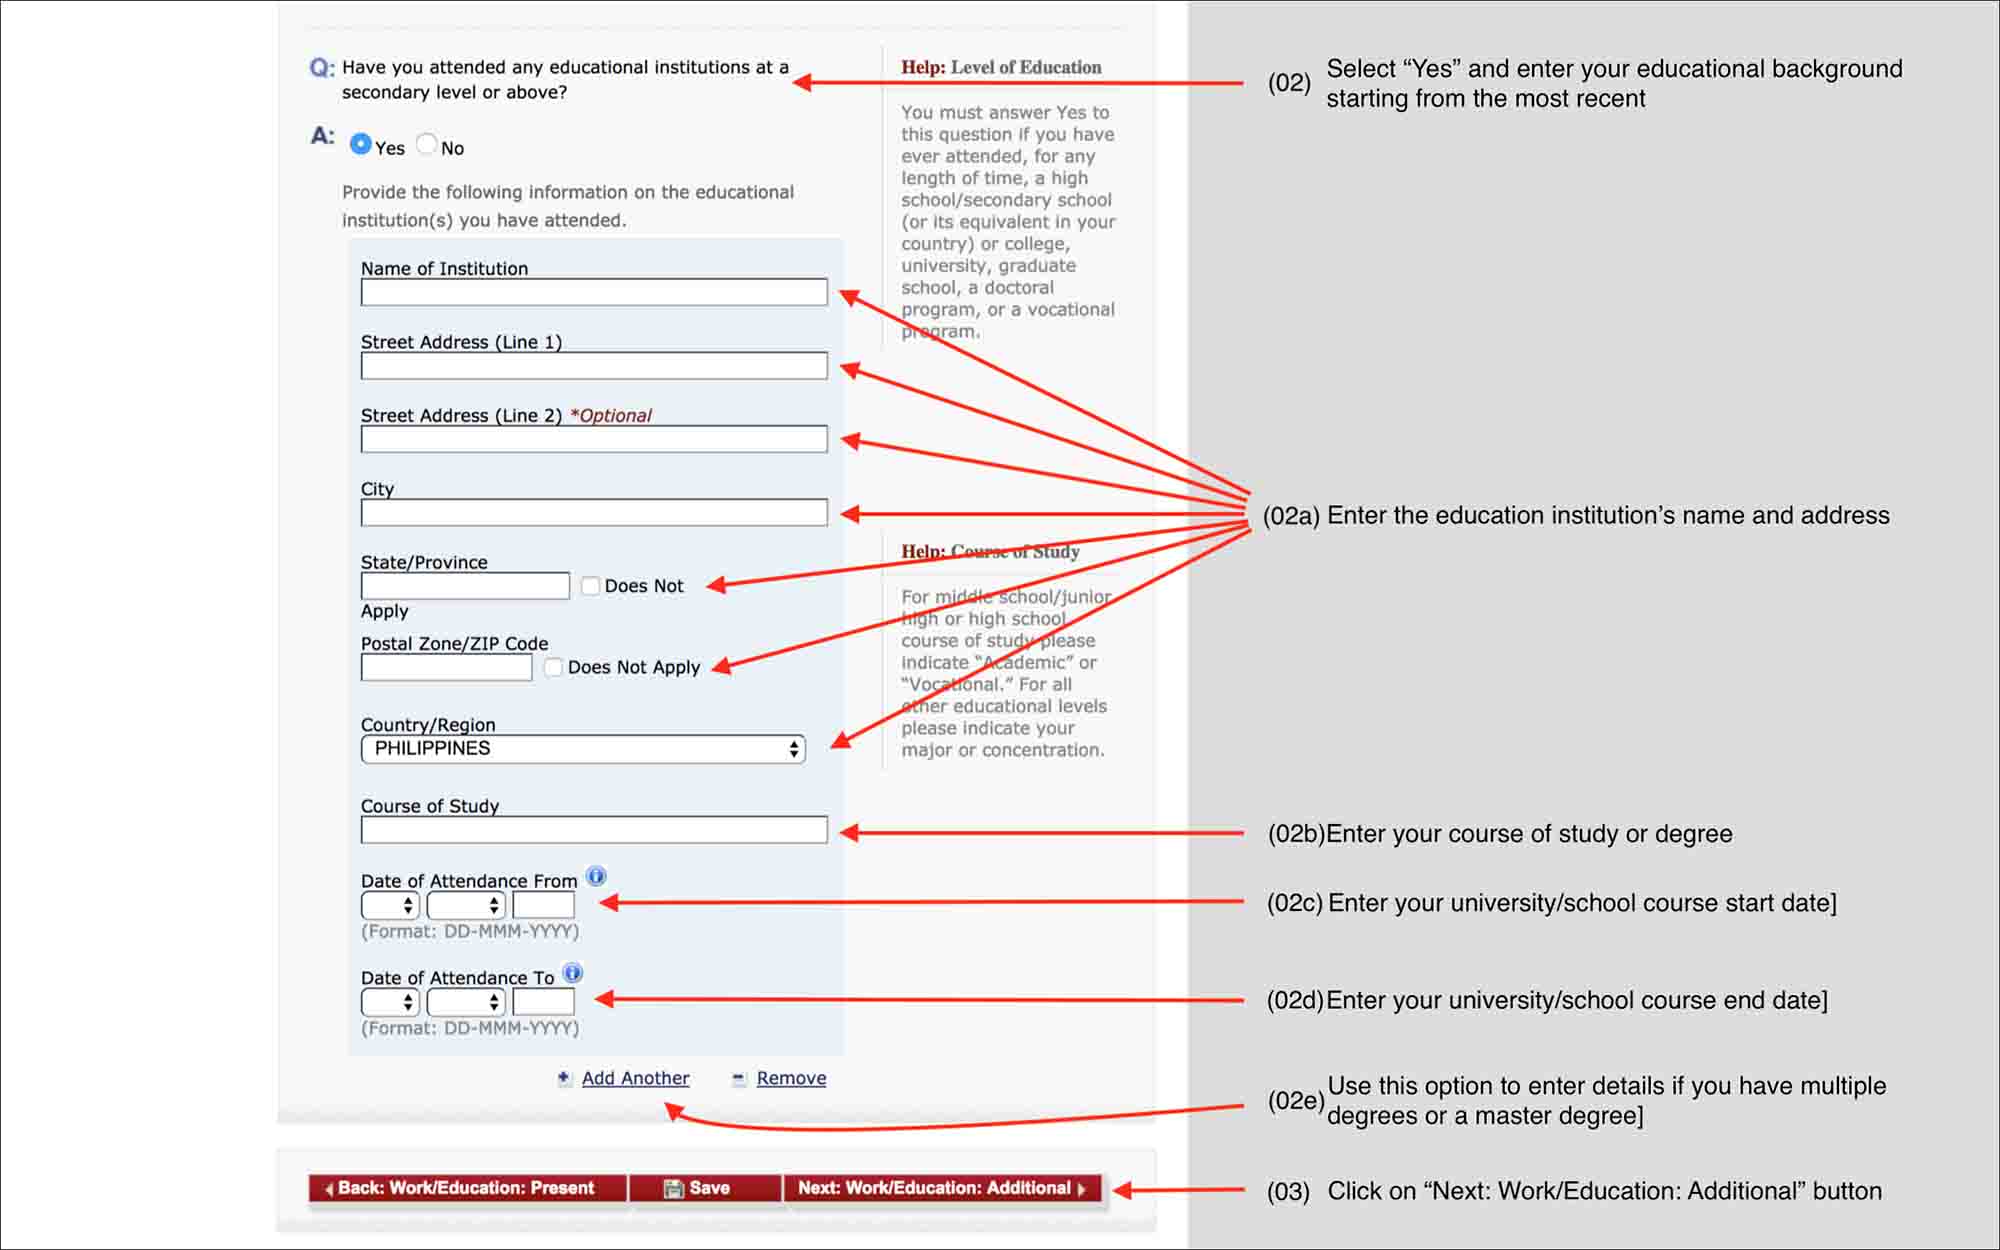
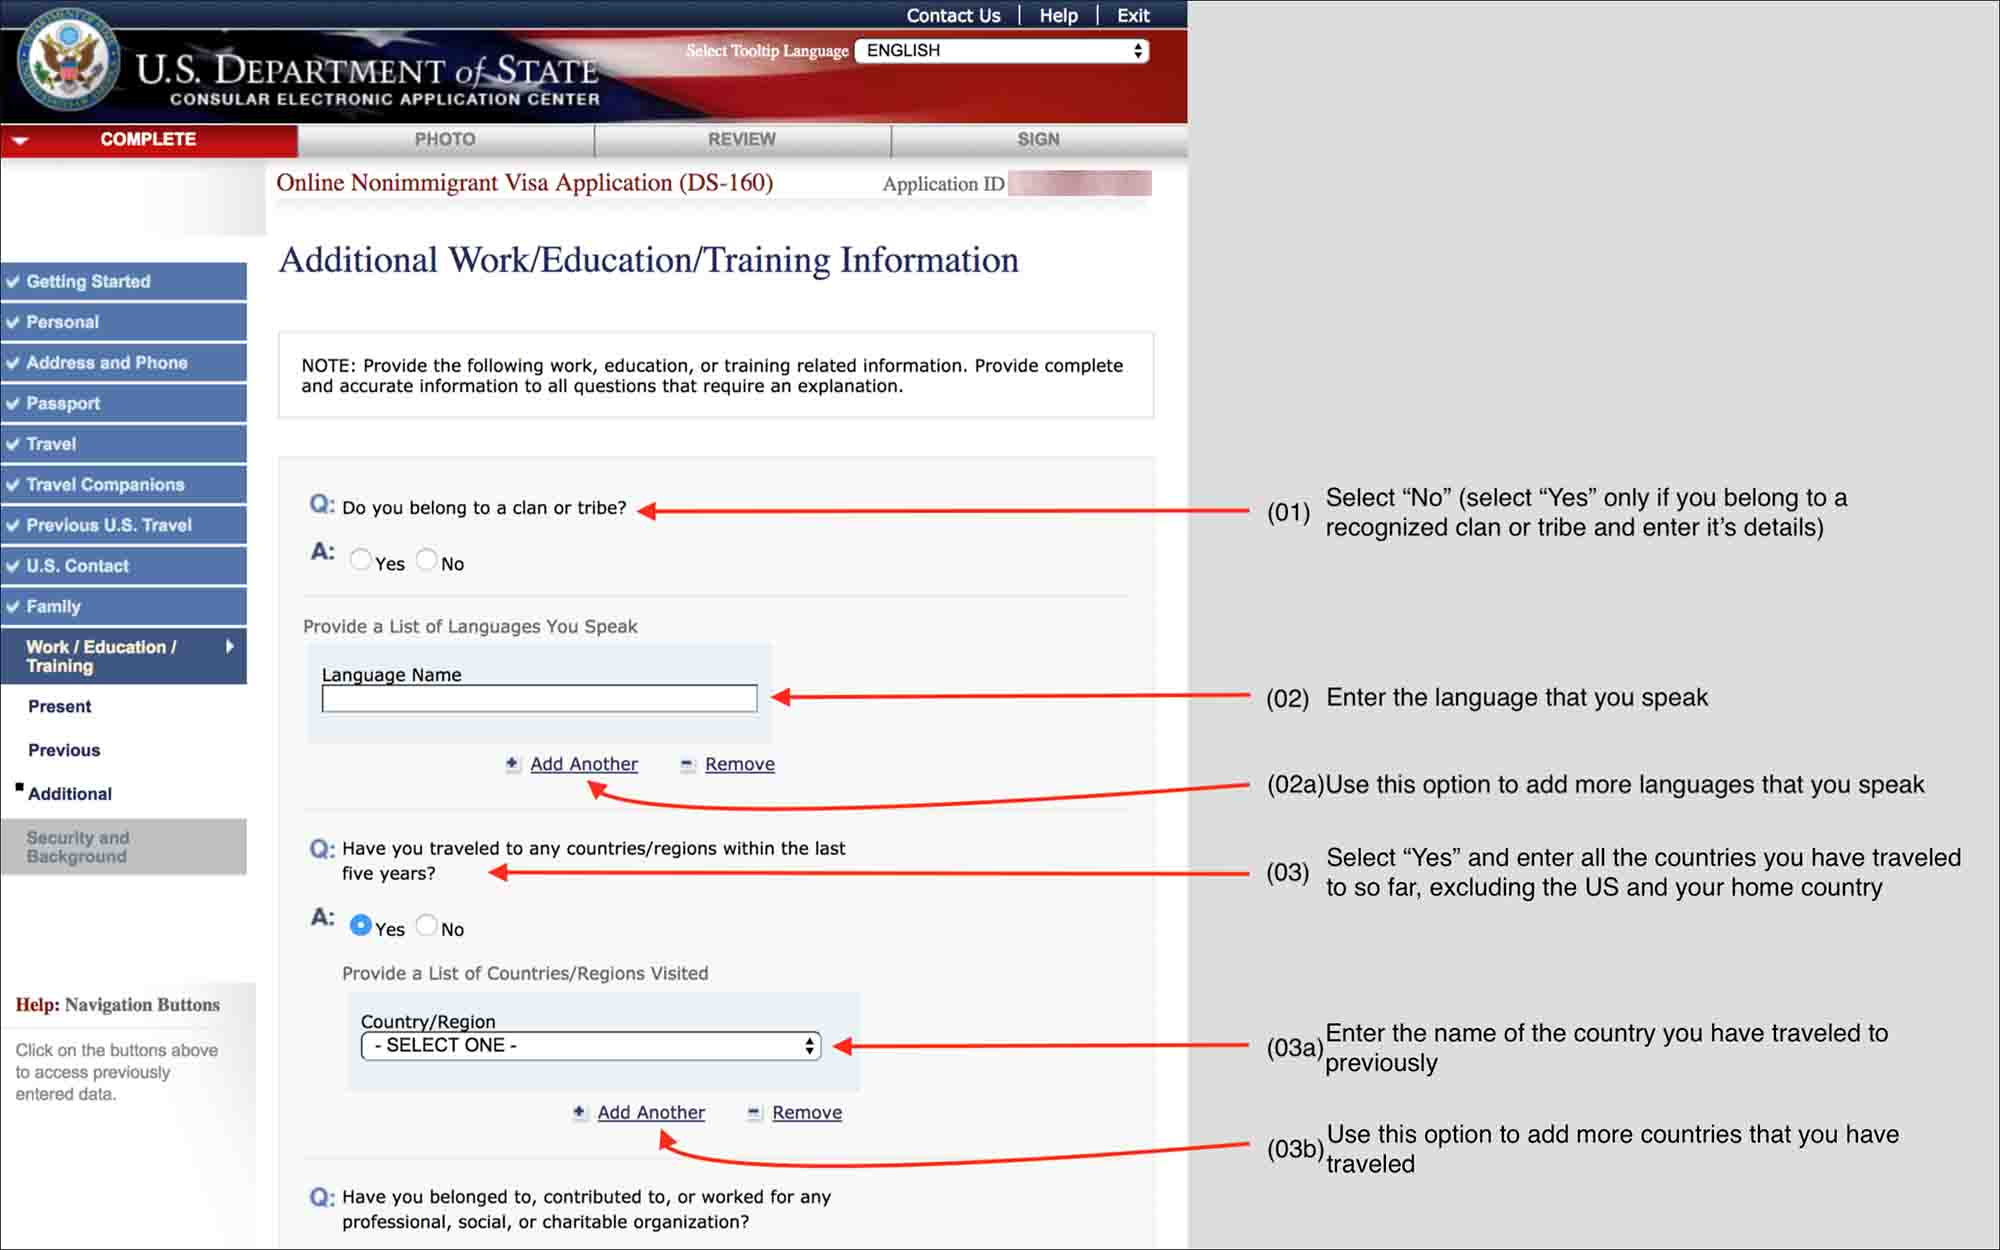
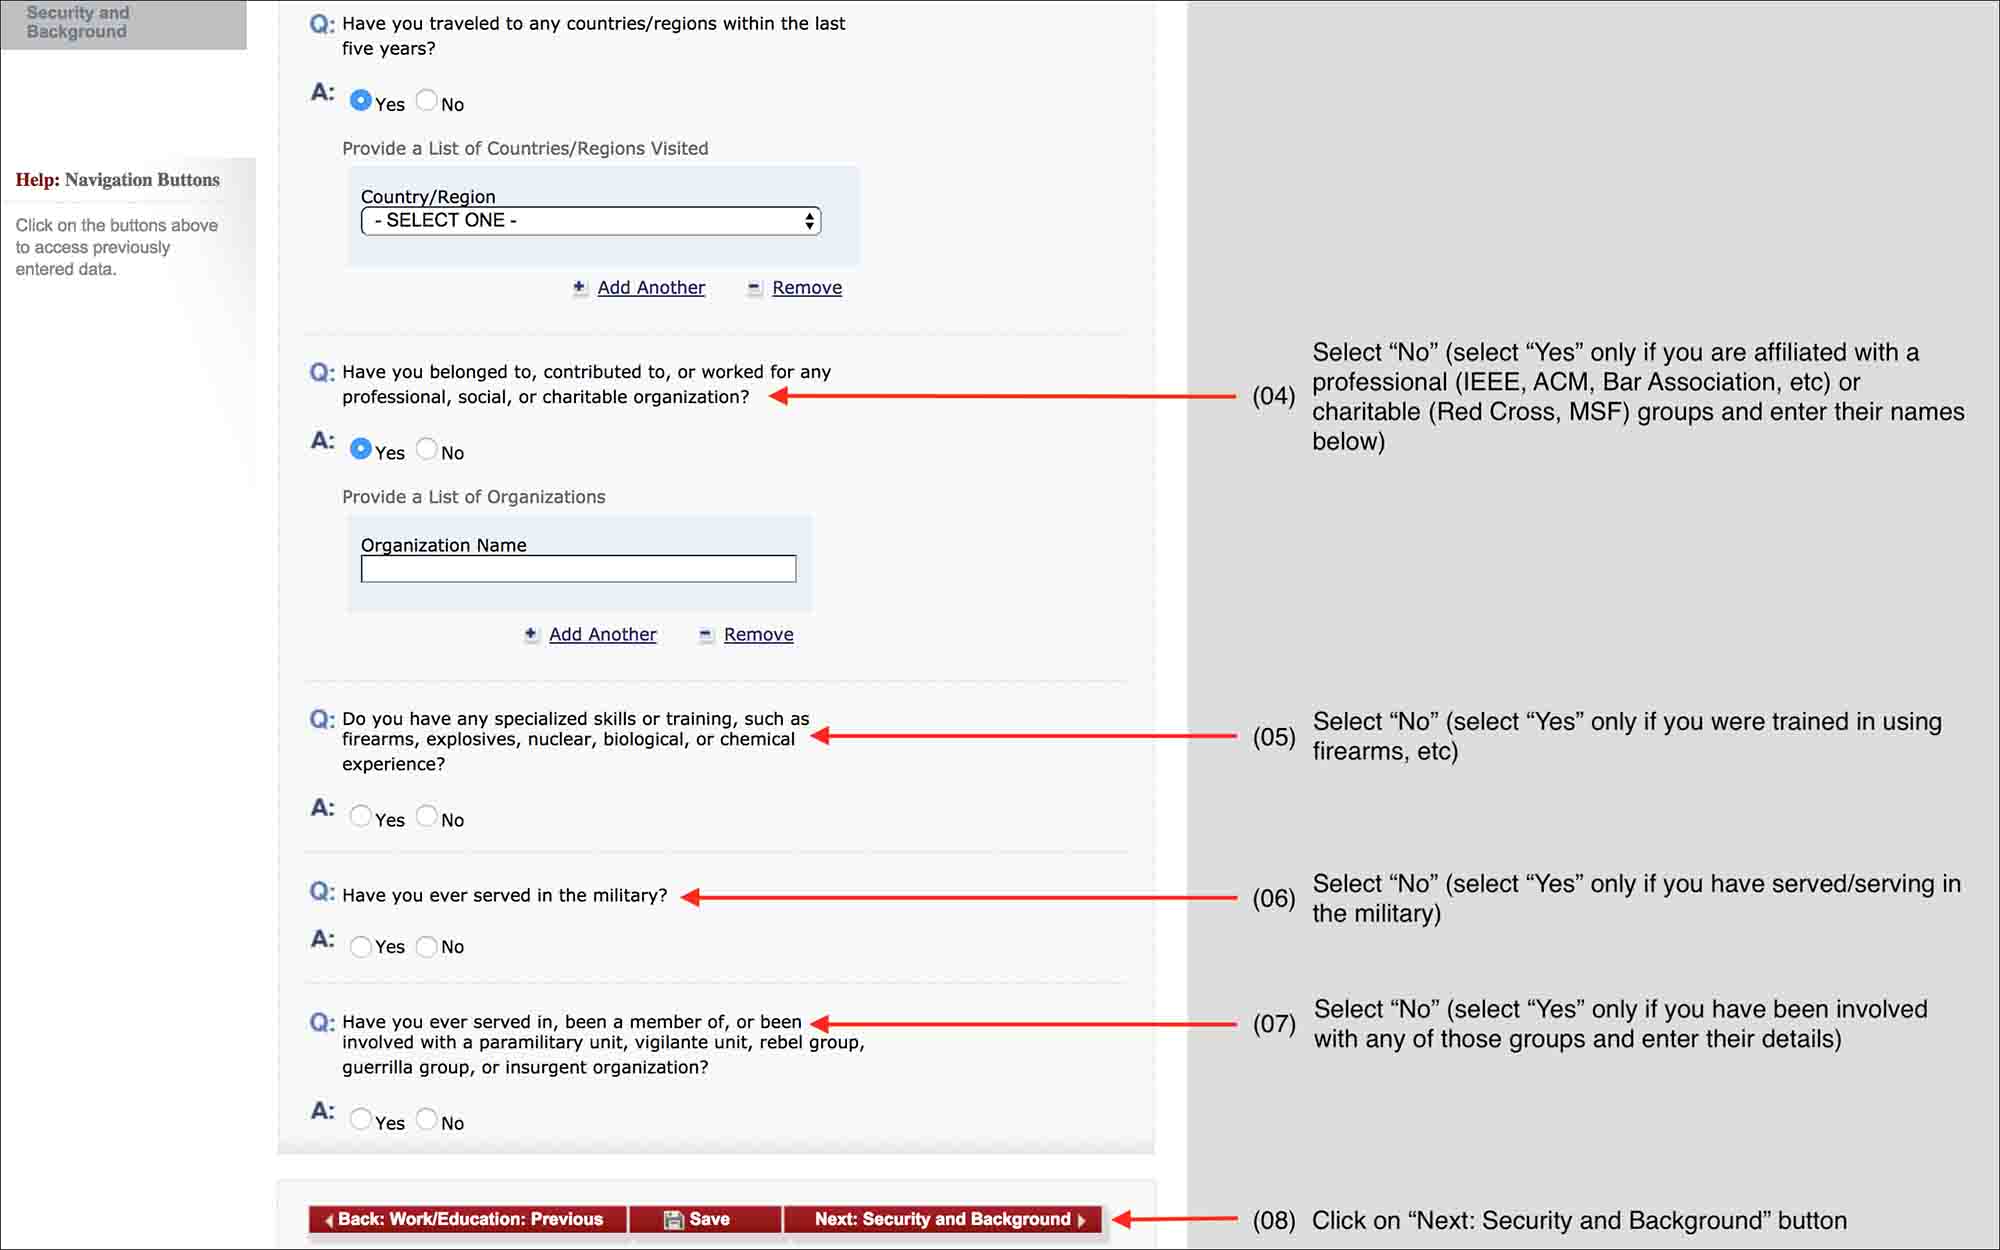
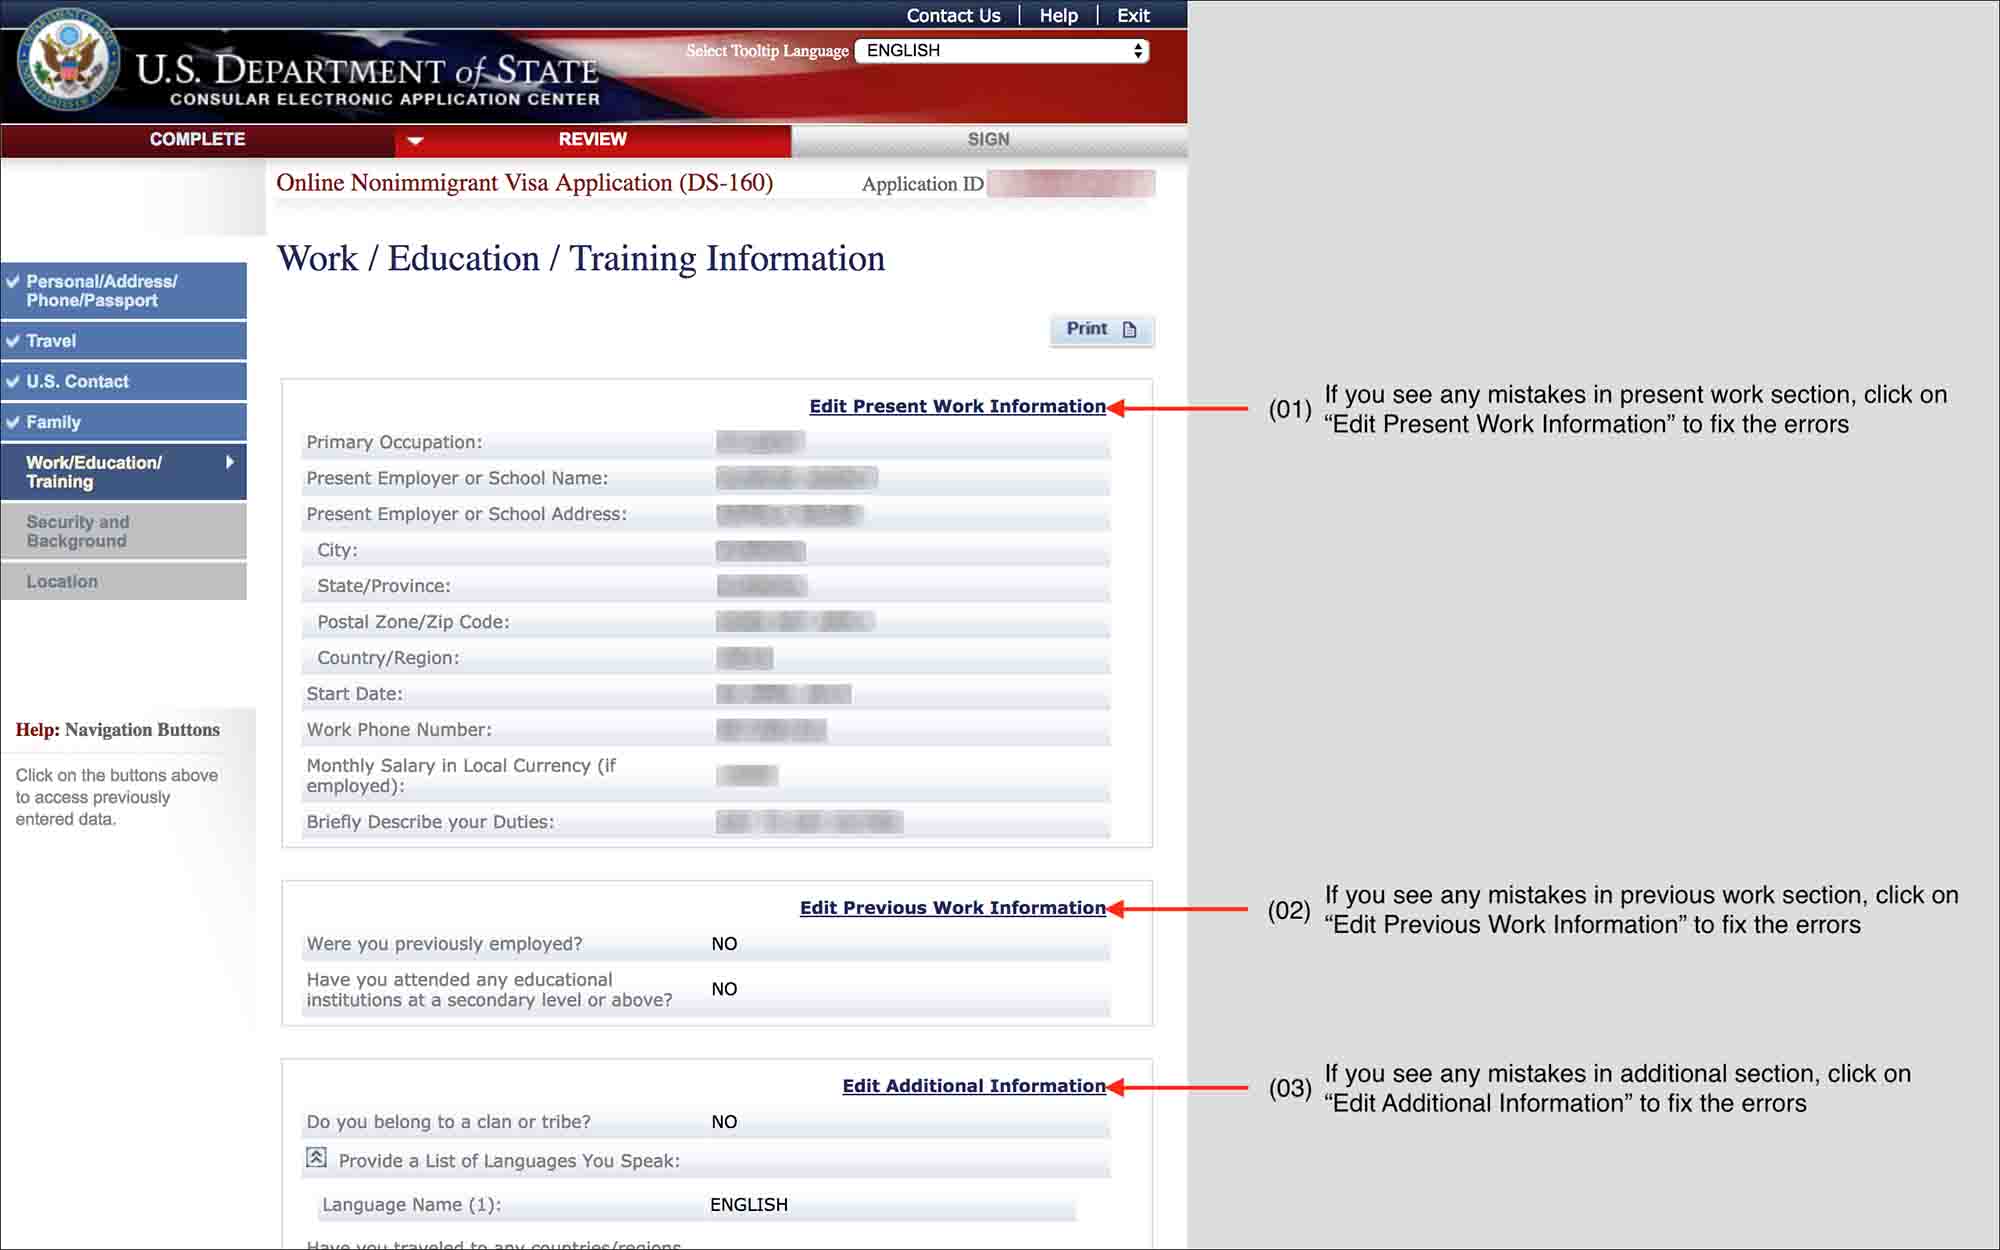
10. Work / Education / Training
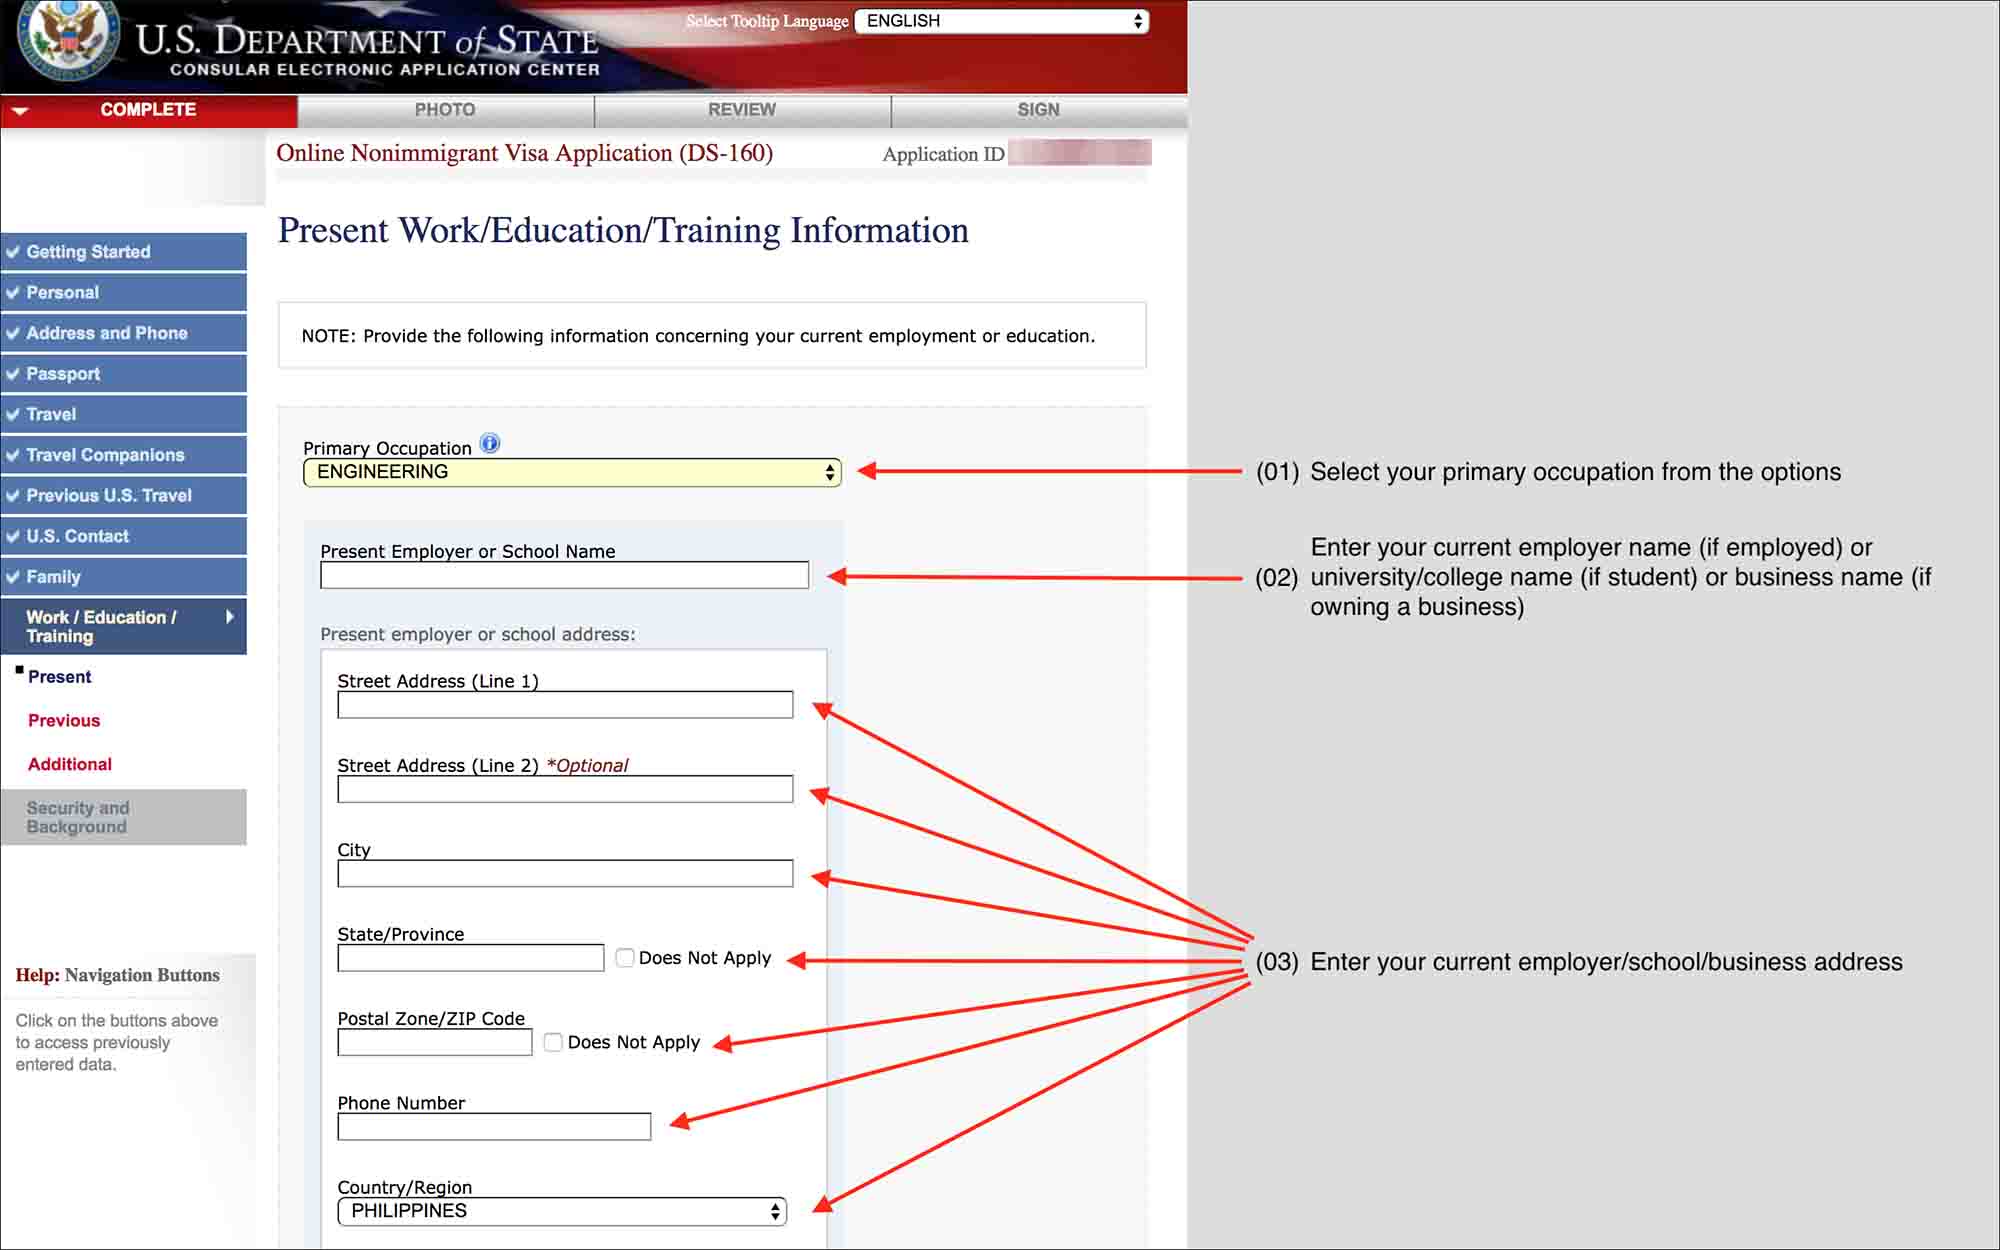
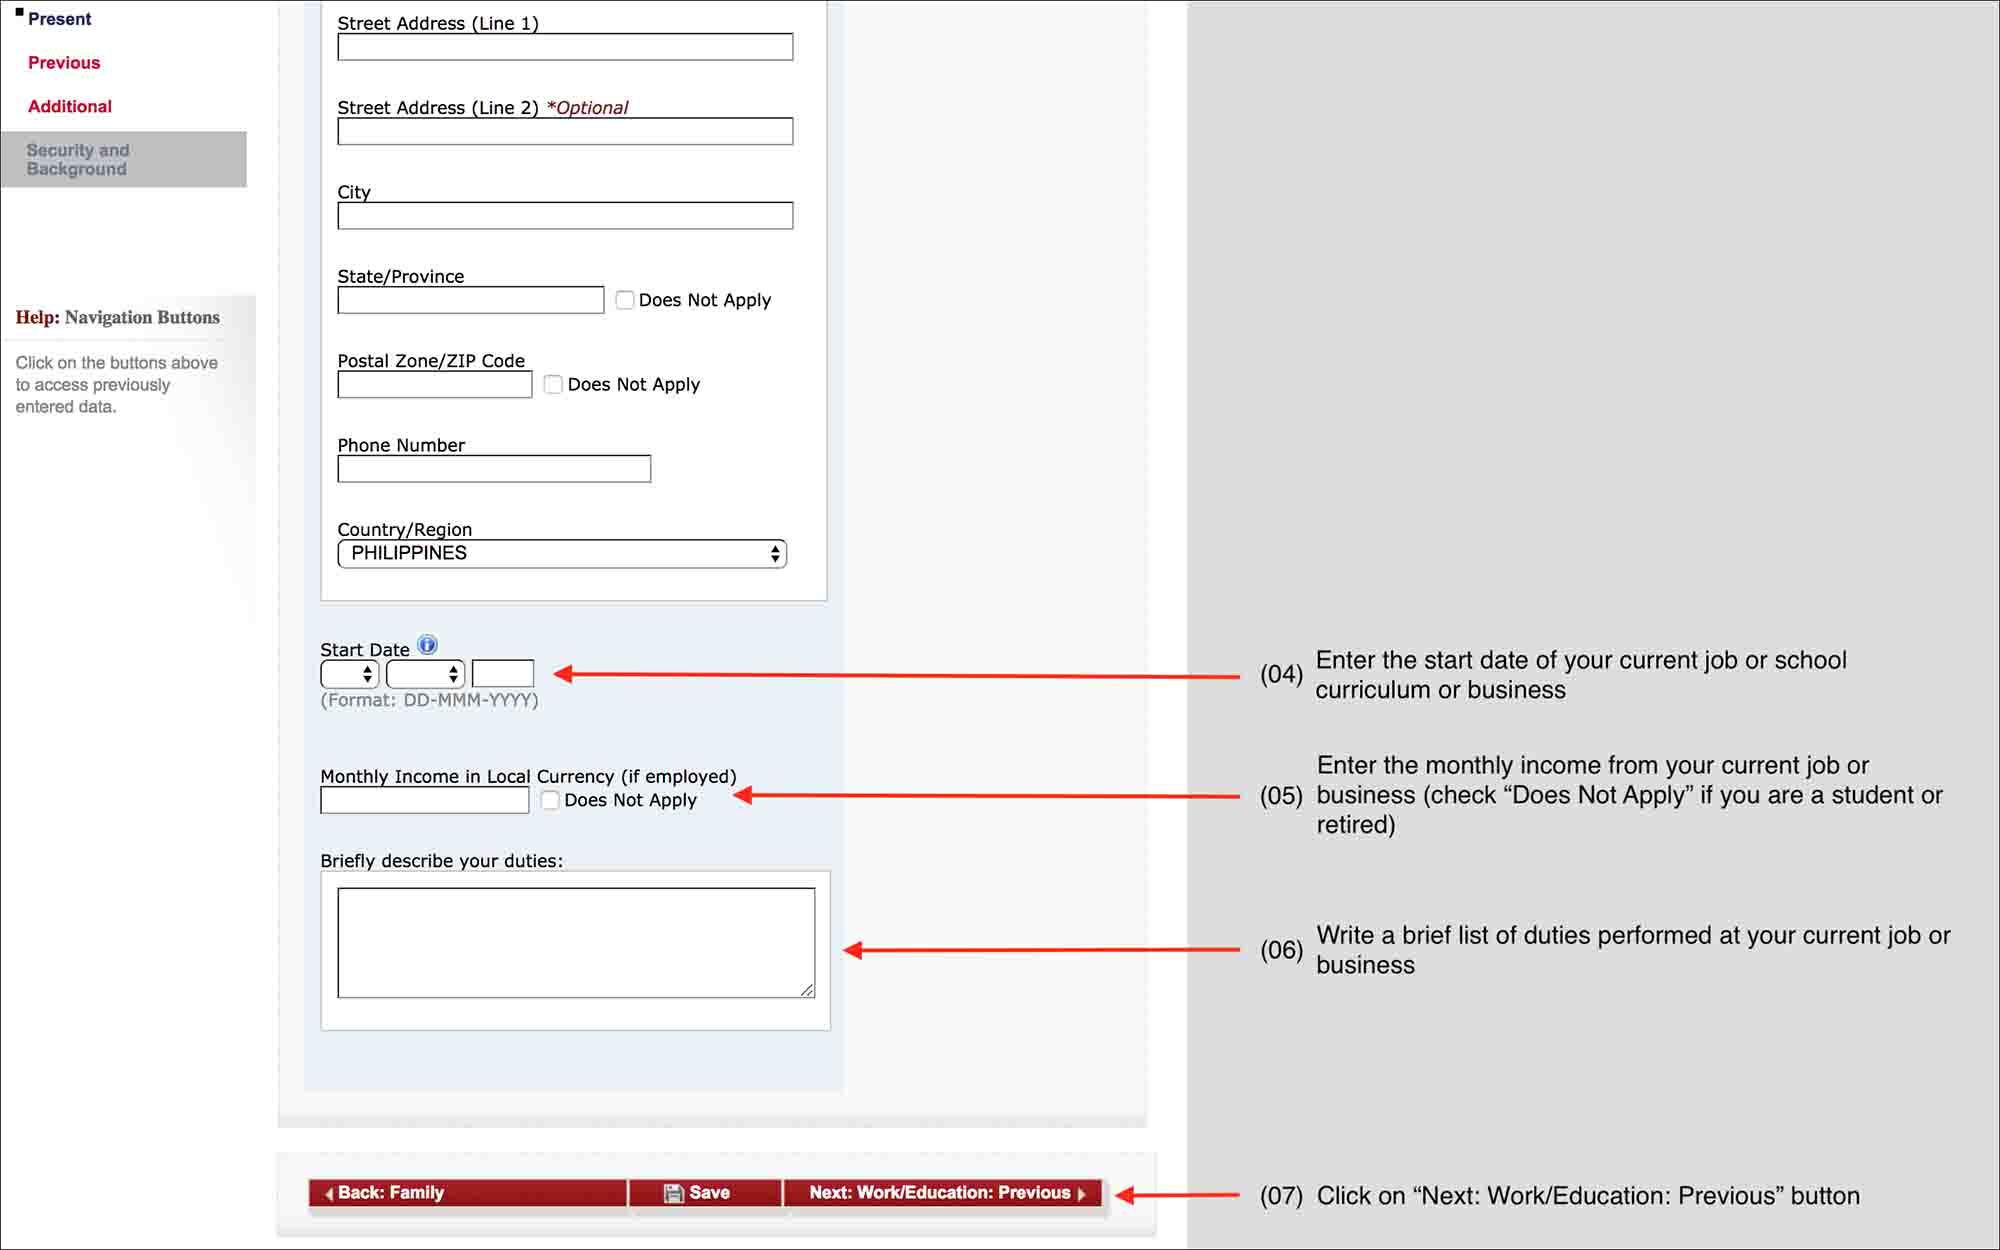
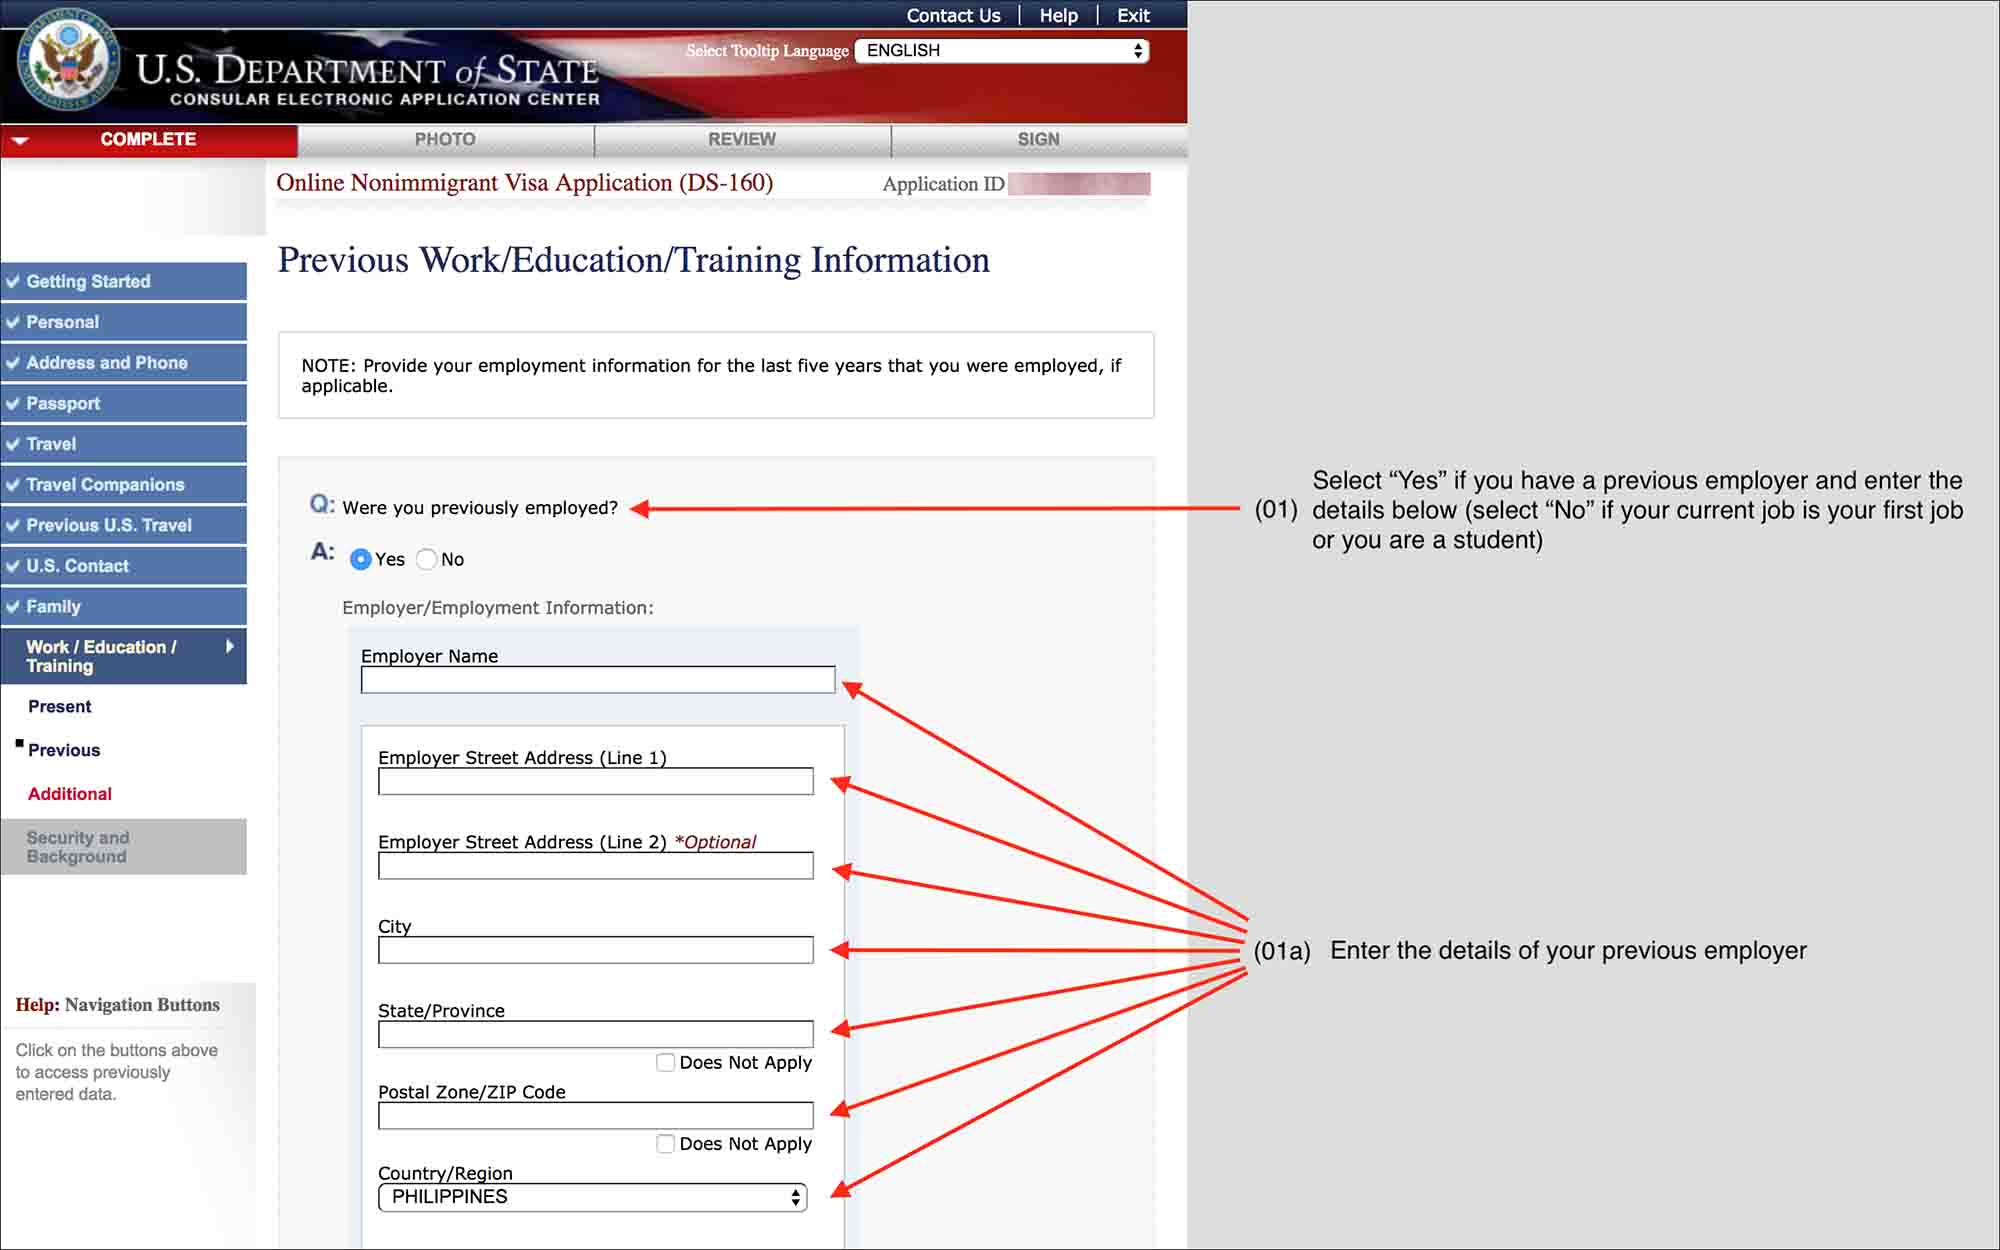
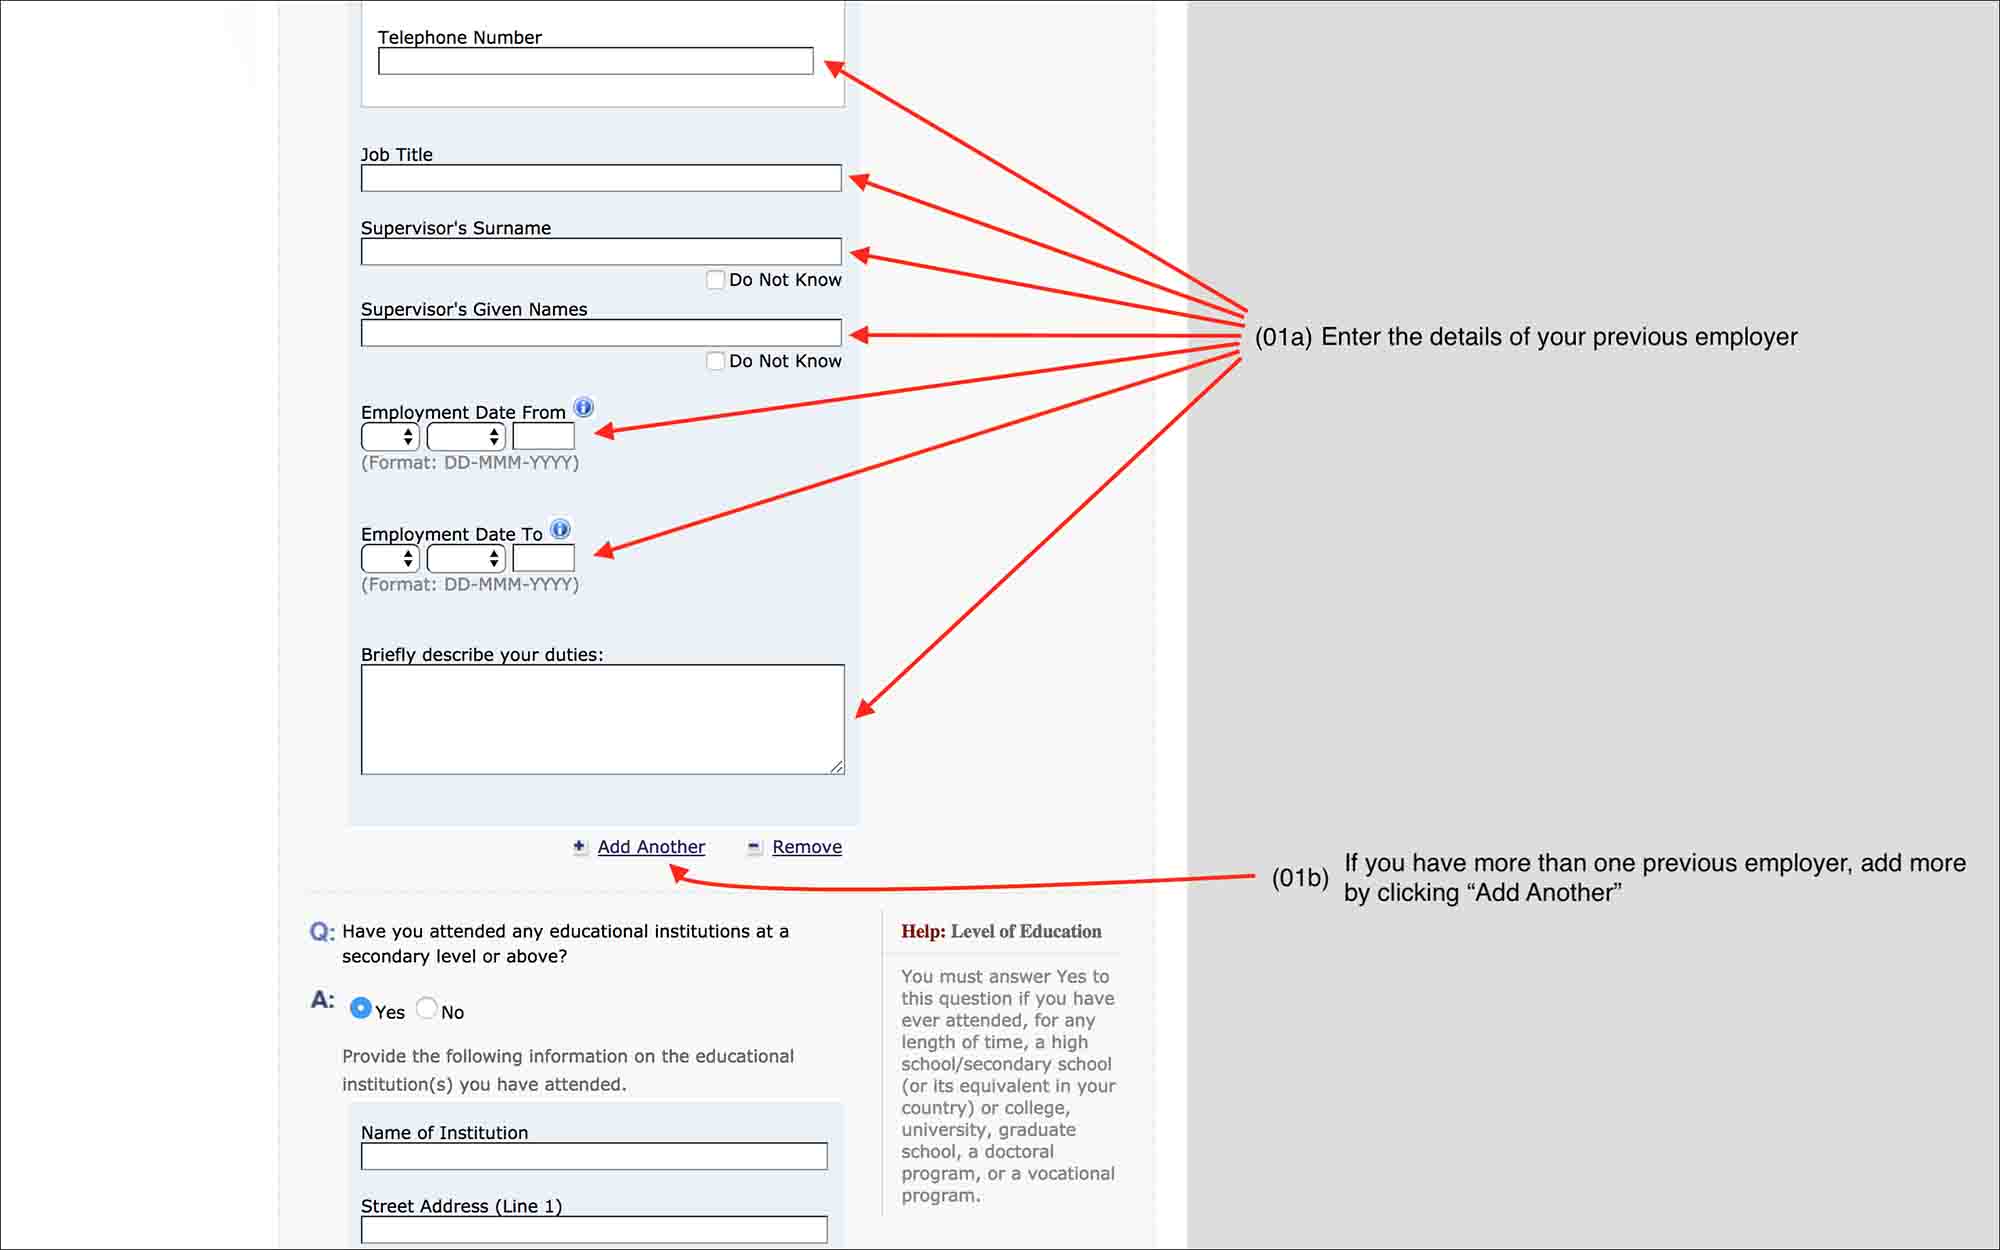
IMPORTANT
Previous (previous work and education) and Additional (languages and travel history) are only asked for (1) all male applicants and (2) all applicants (male and female) from countries considered as questionable. Therefore, if you are a female applicant and you do not see these sections, it means you are not required to fill those sections. It’s normal, so do not panic.
NOTE
For “Provide a List of Languages You Speak”, enter all languages that you speak, even if you speak at a beginner level.
NOTE
For “Provide a List of Countries/Regions Visited”, enter all countries you have traveled to so far including your country of residence (if it’s not your country of passport). Exclude the US (if you have traveled to the US before), your country of passport and any country that you have merely passed through on a layover.
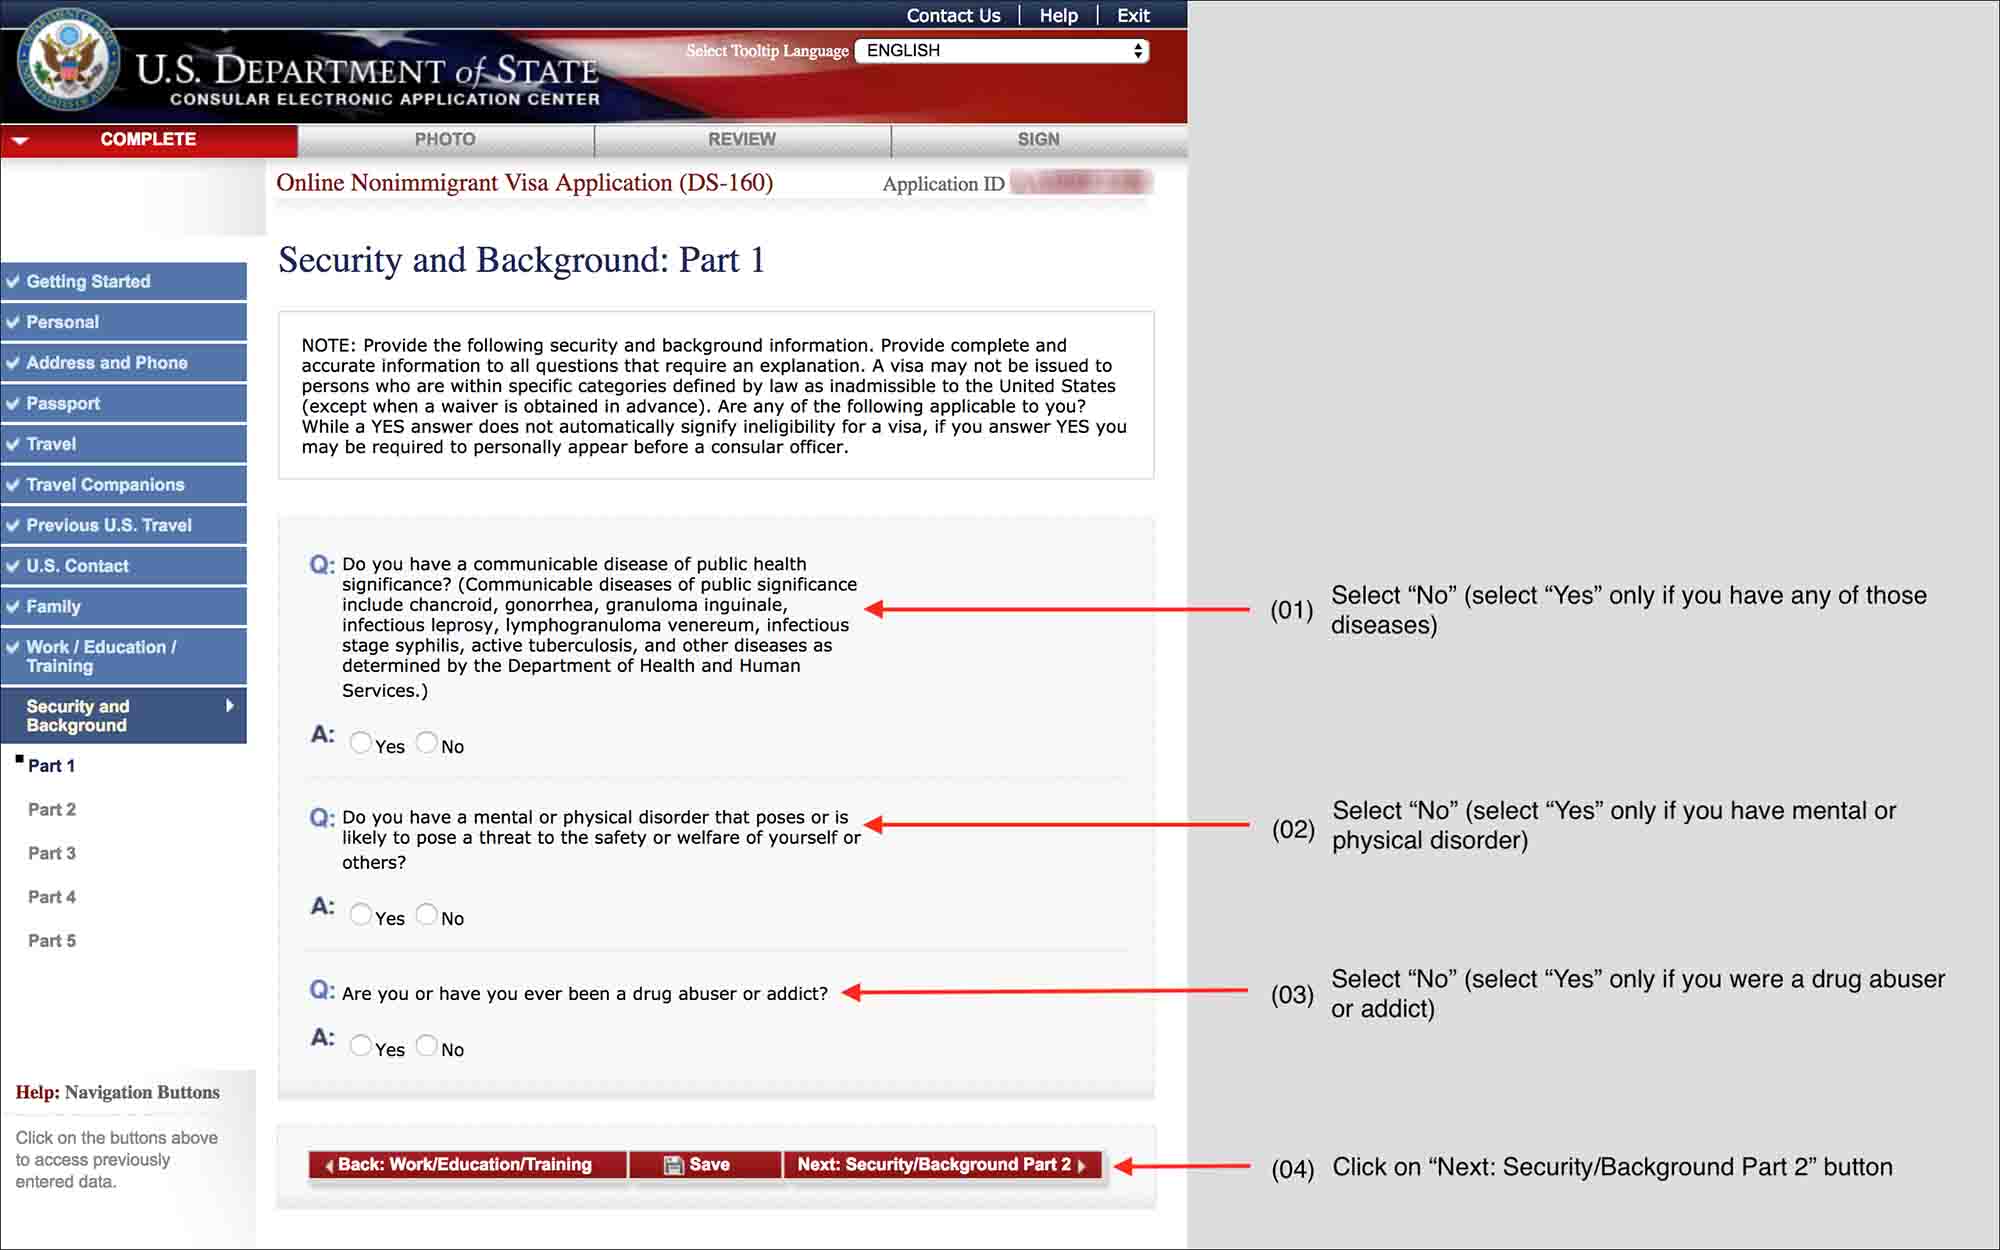
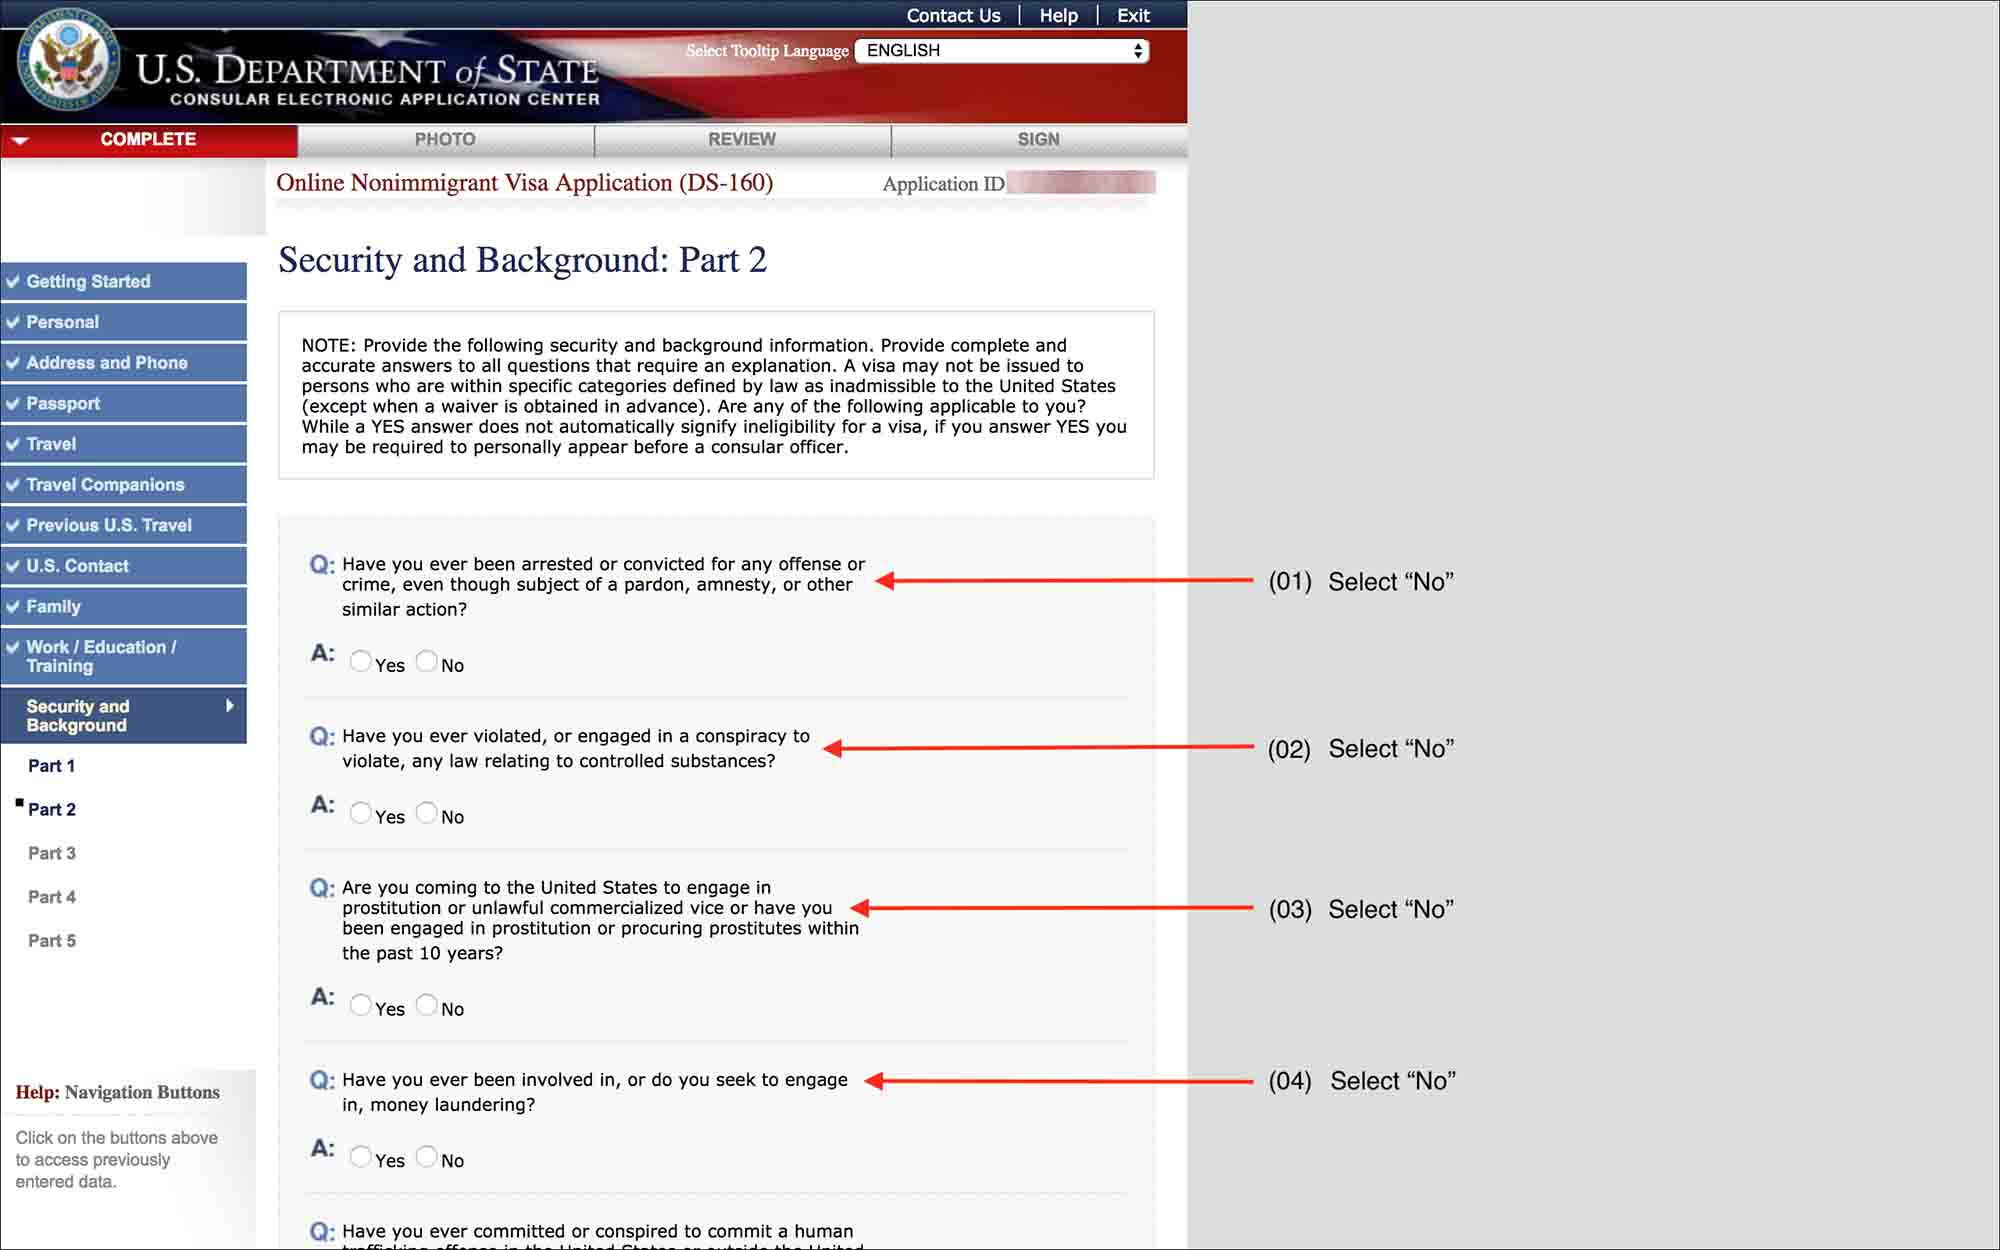
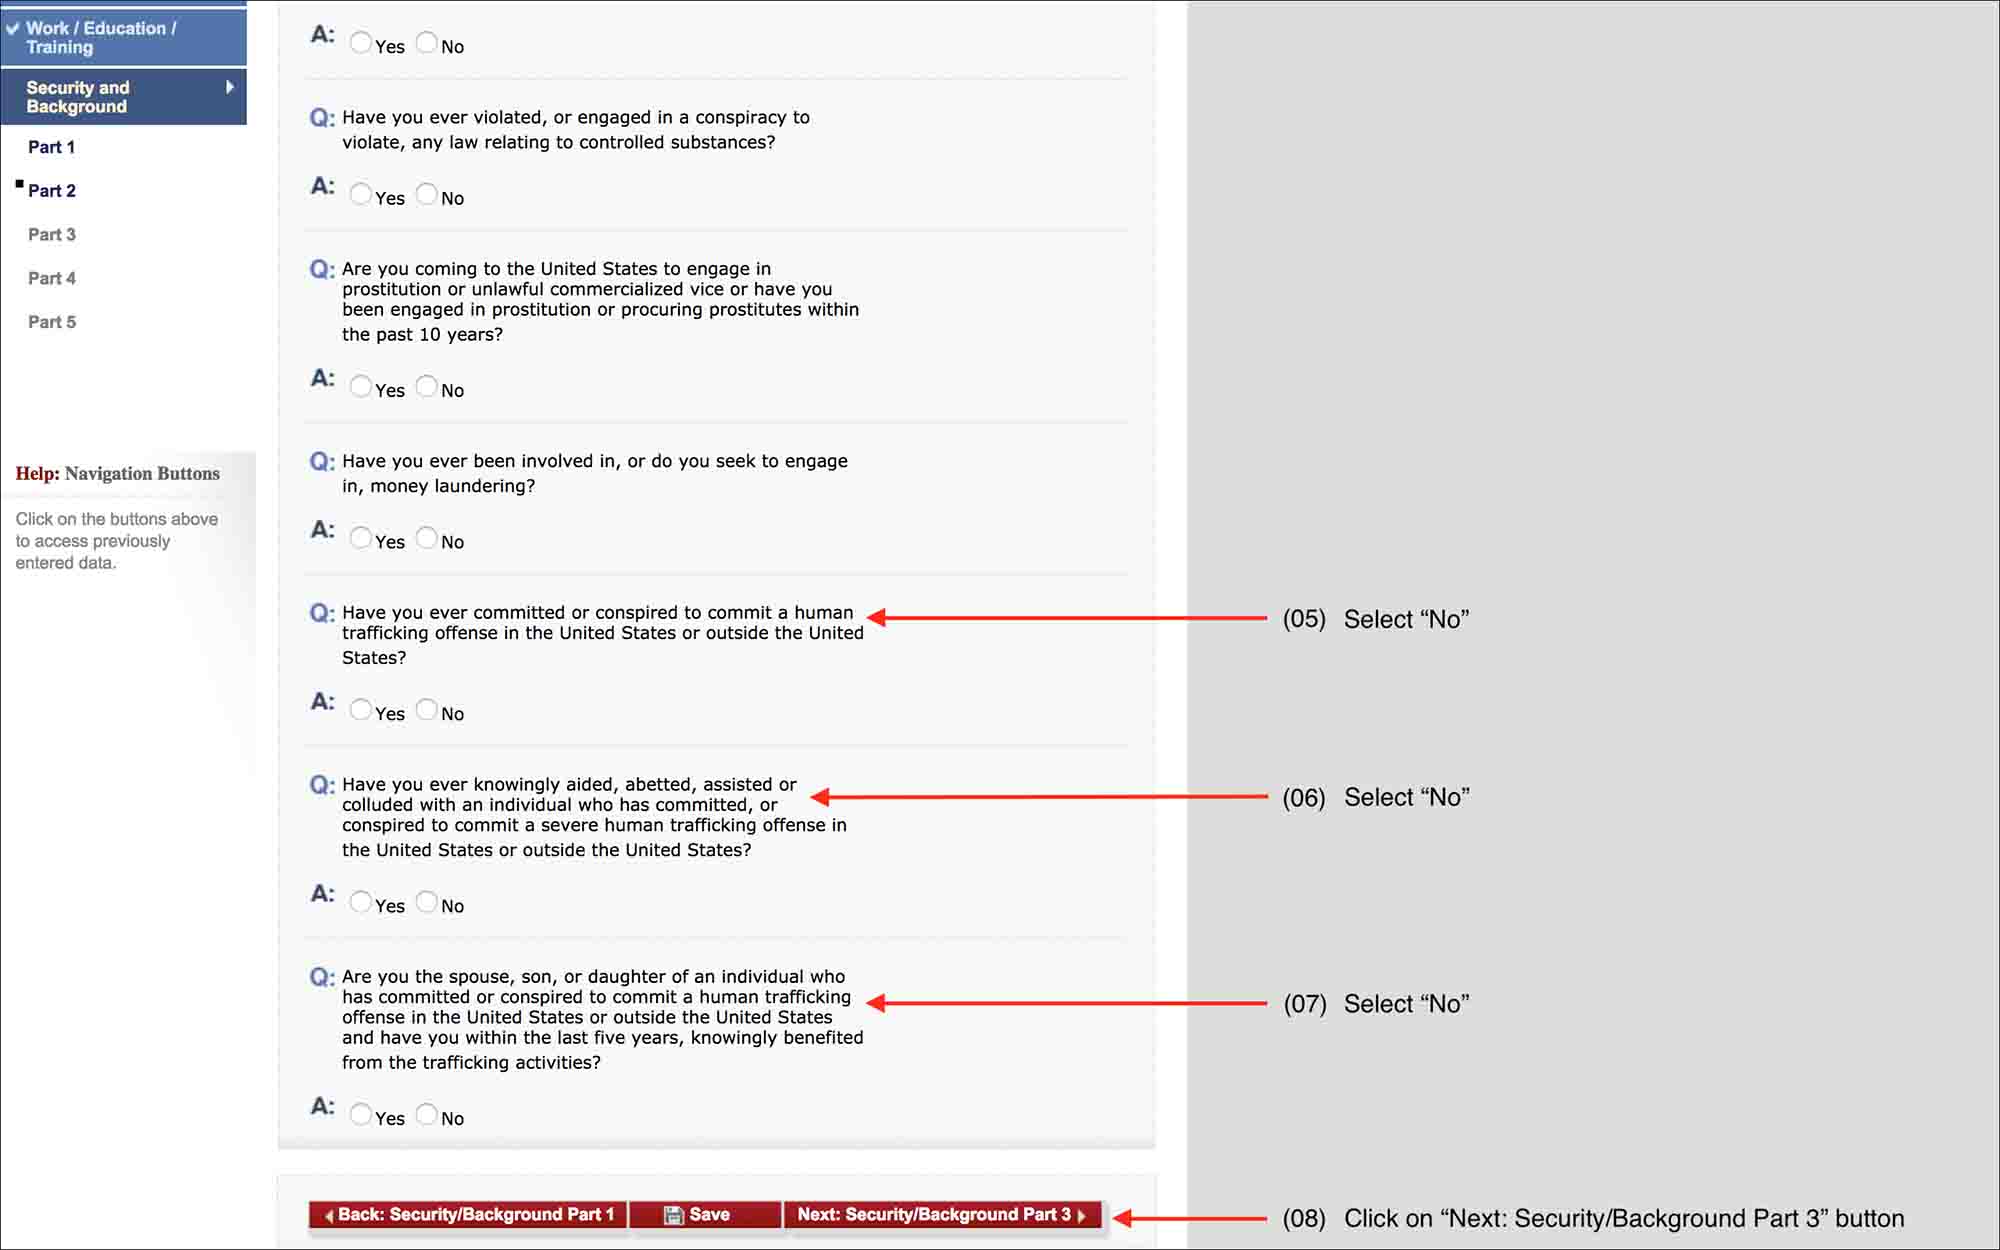
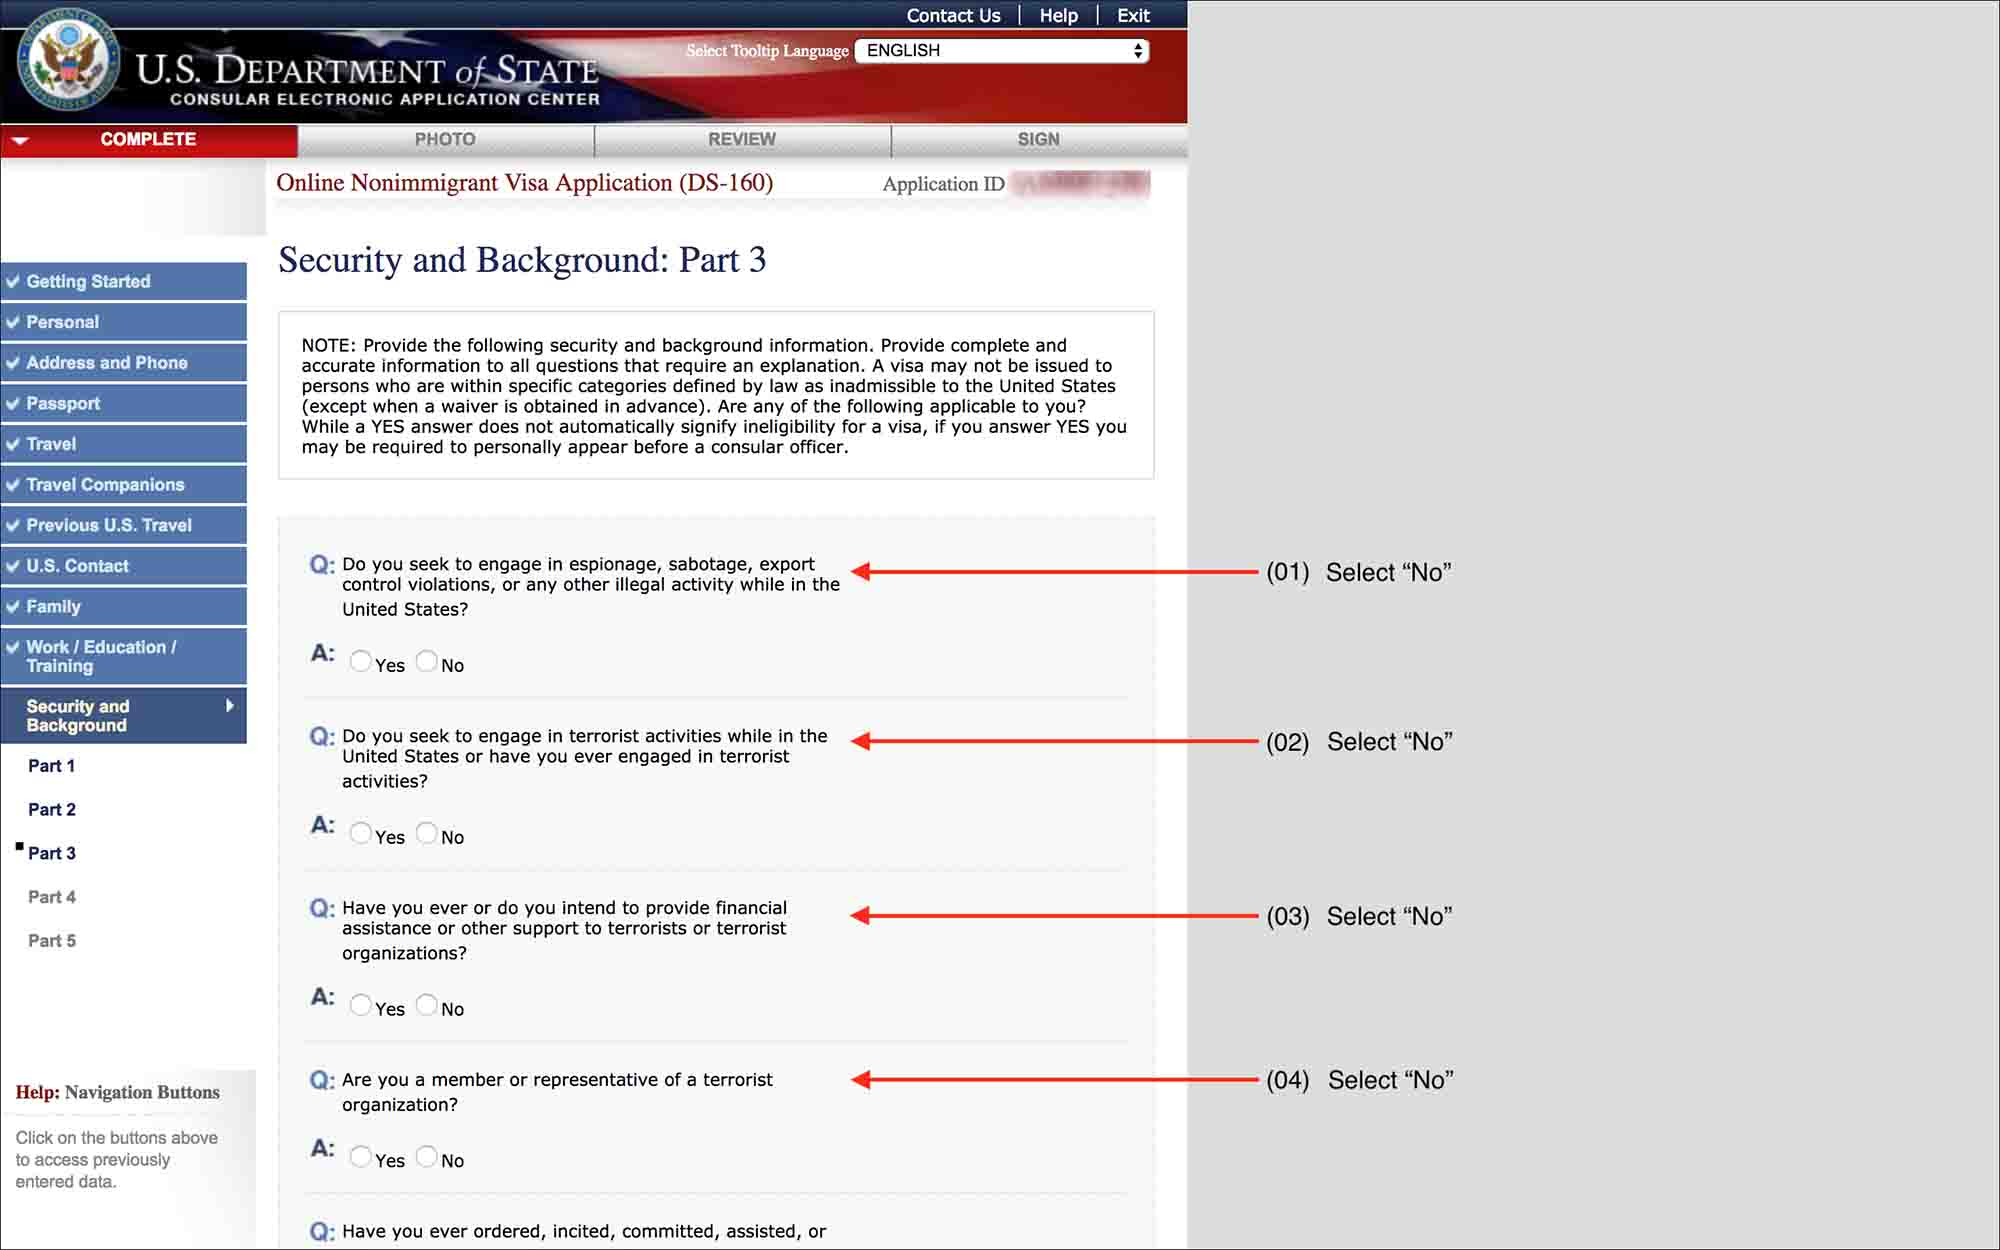
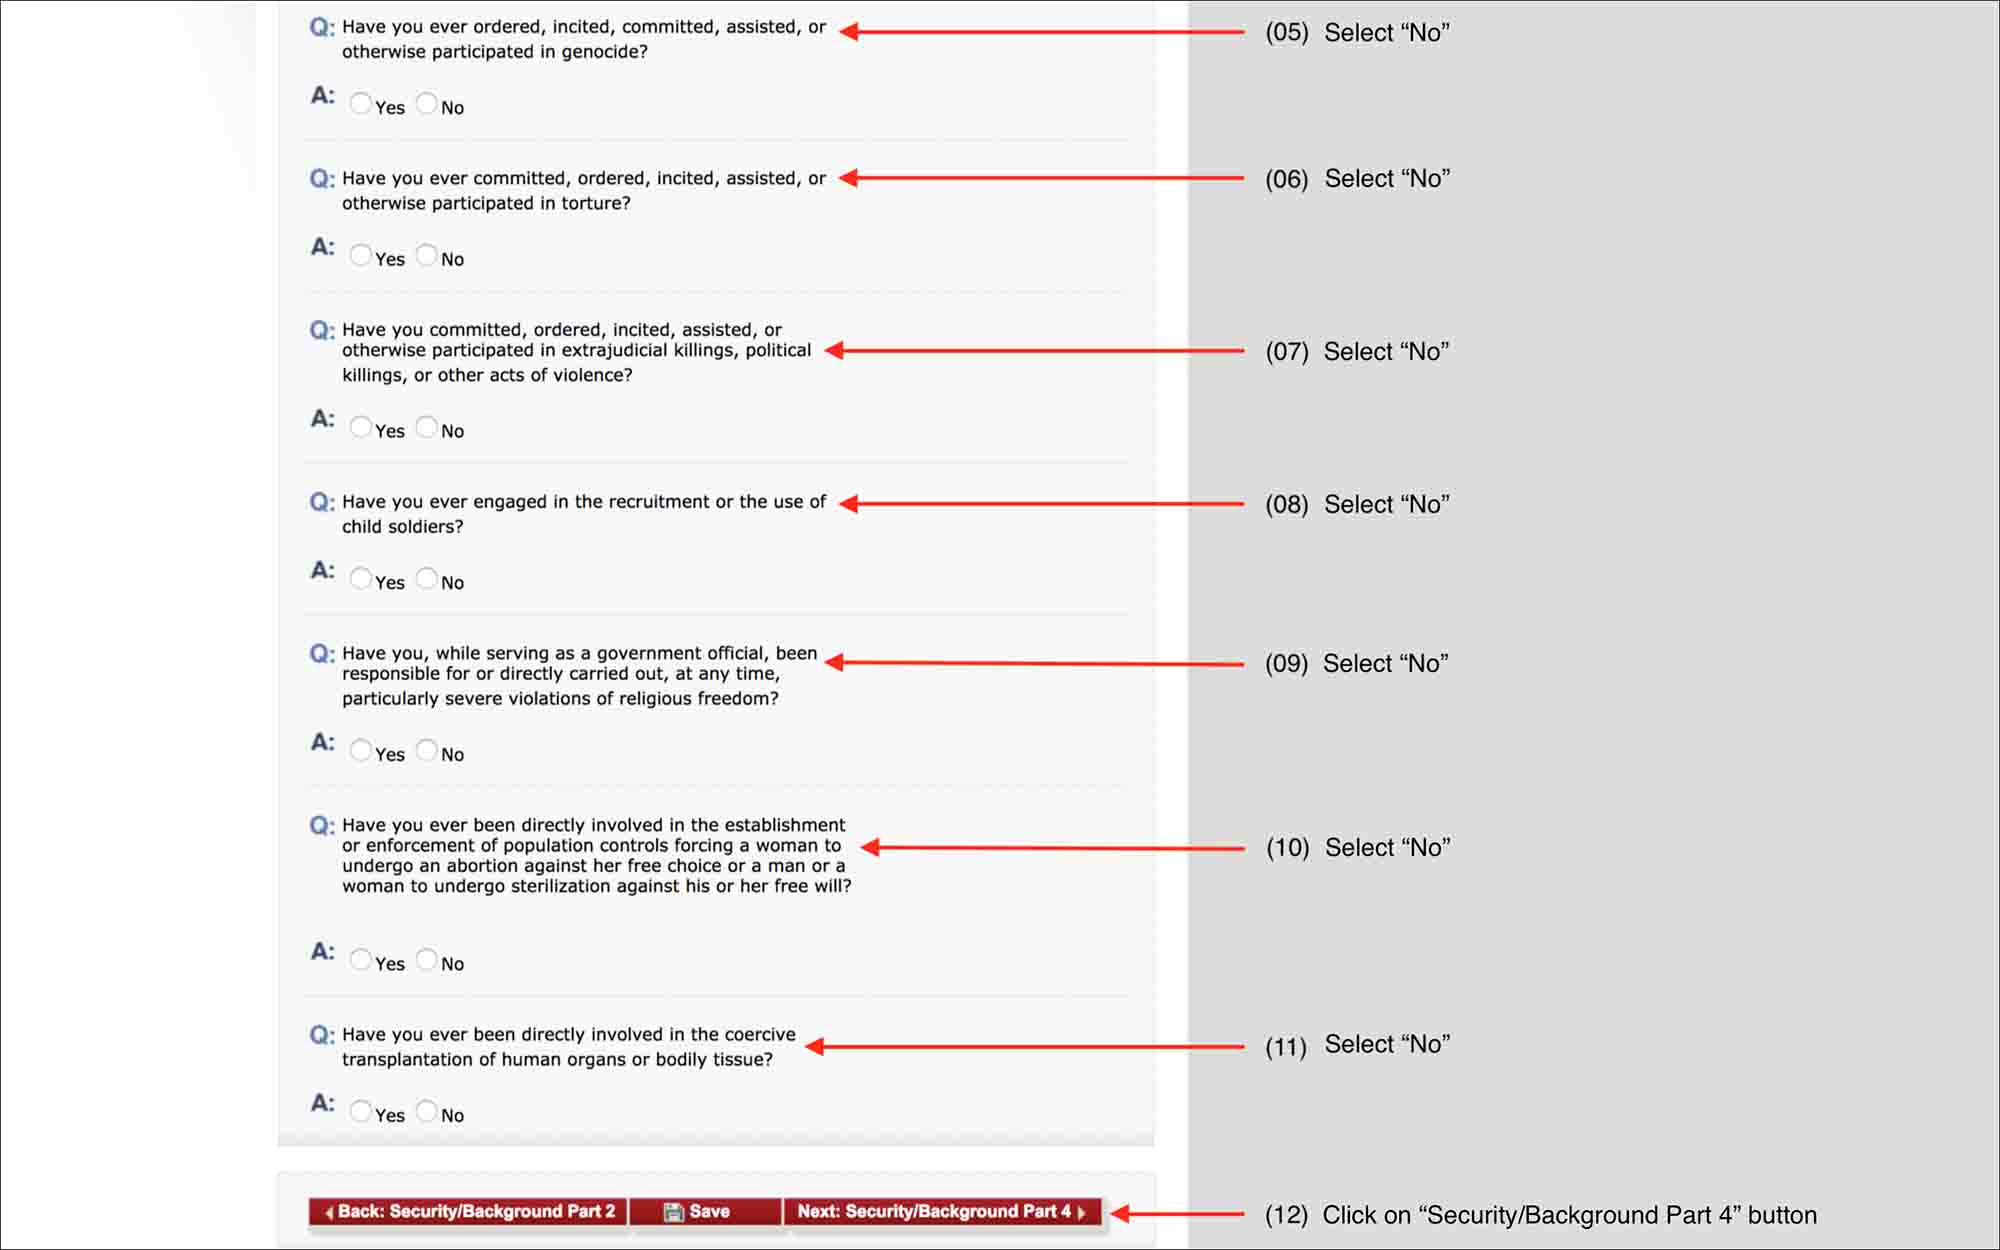
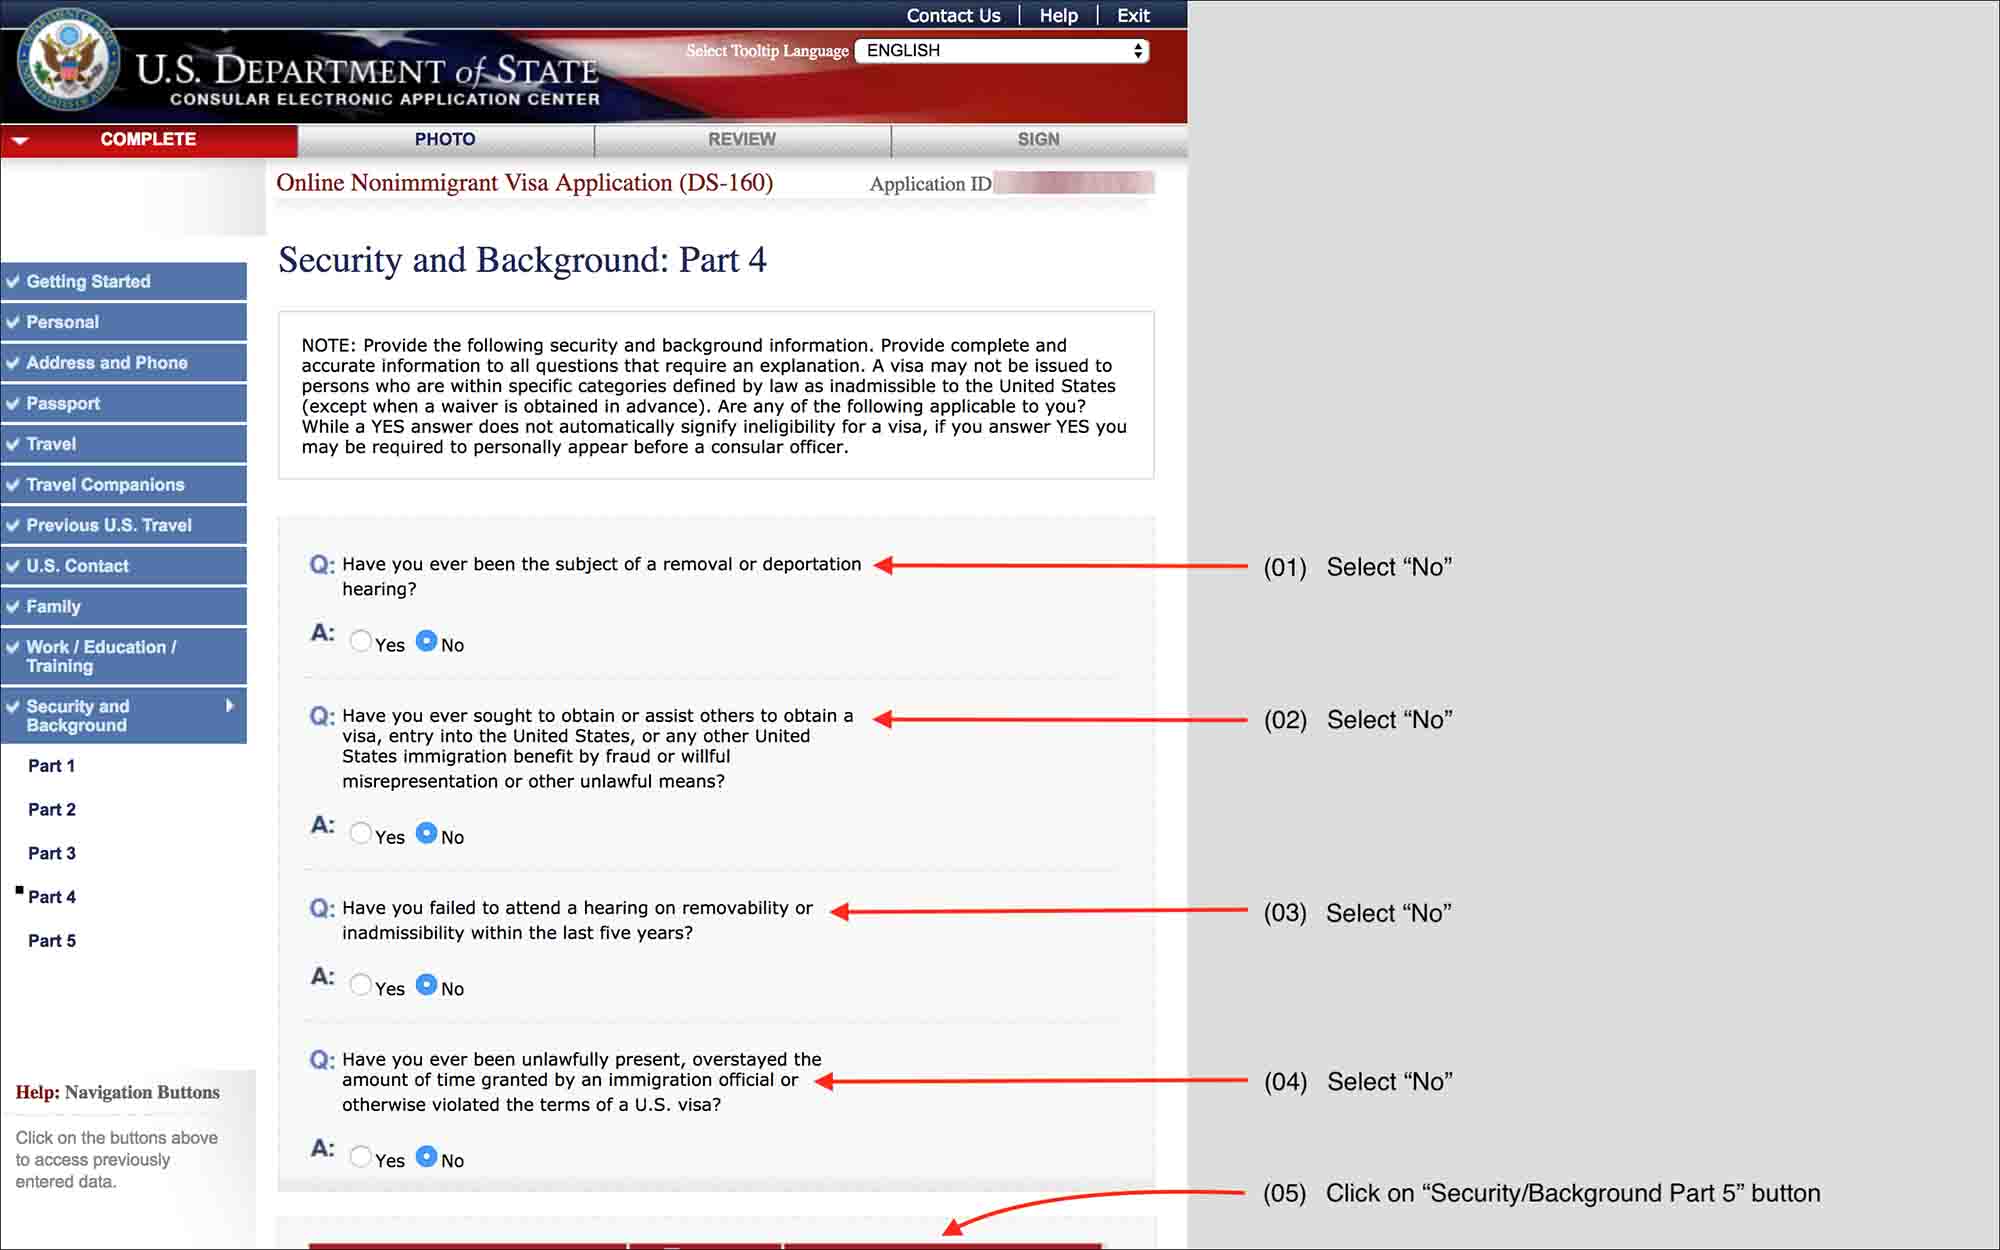
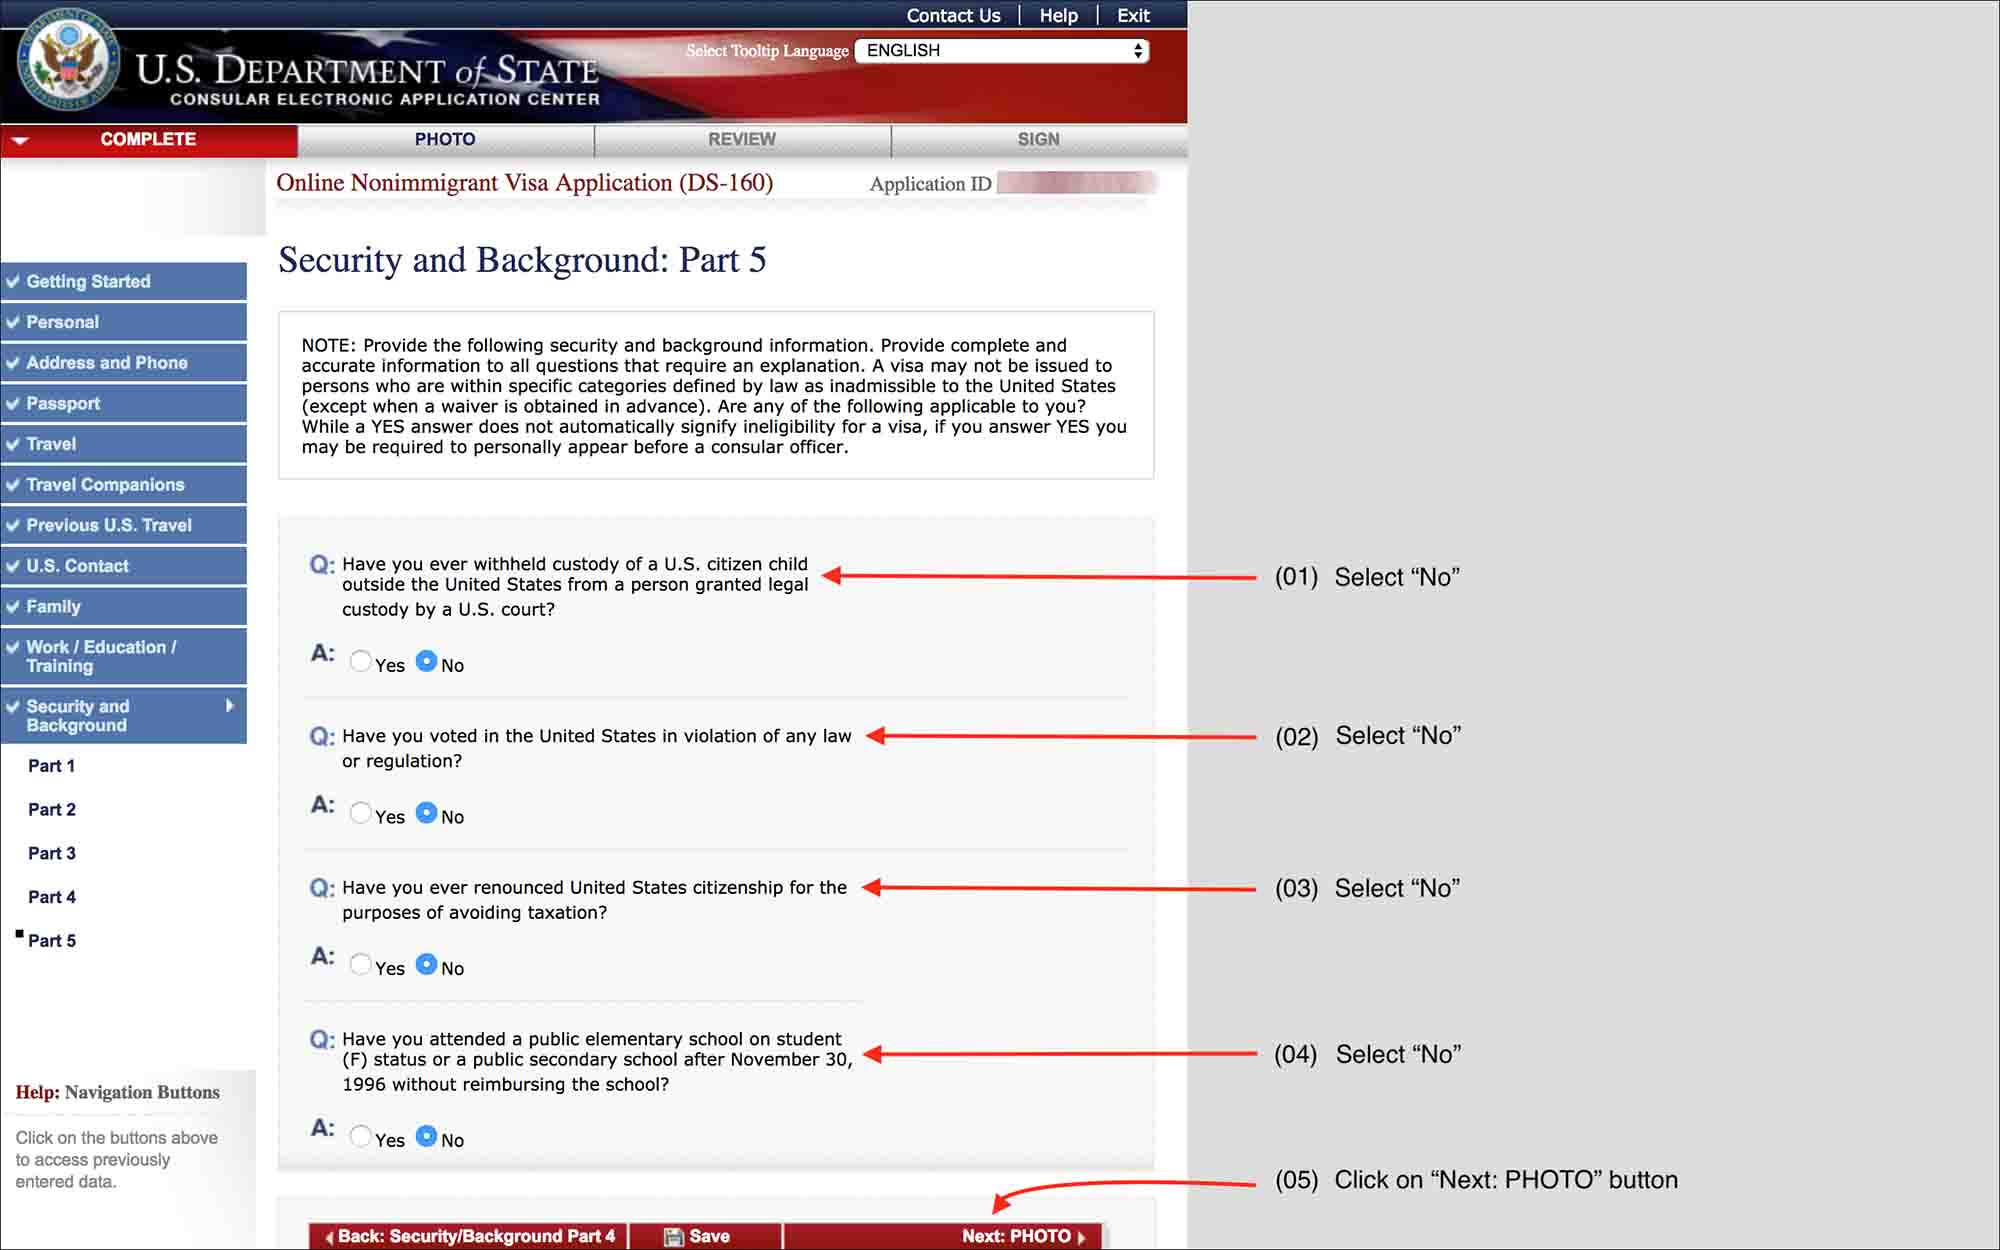
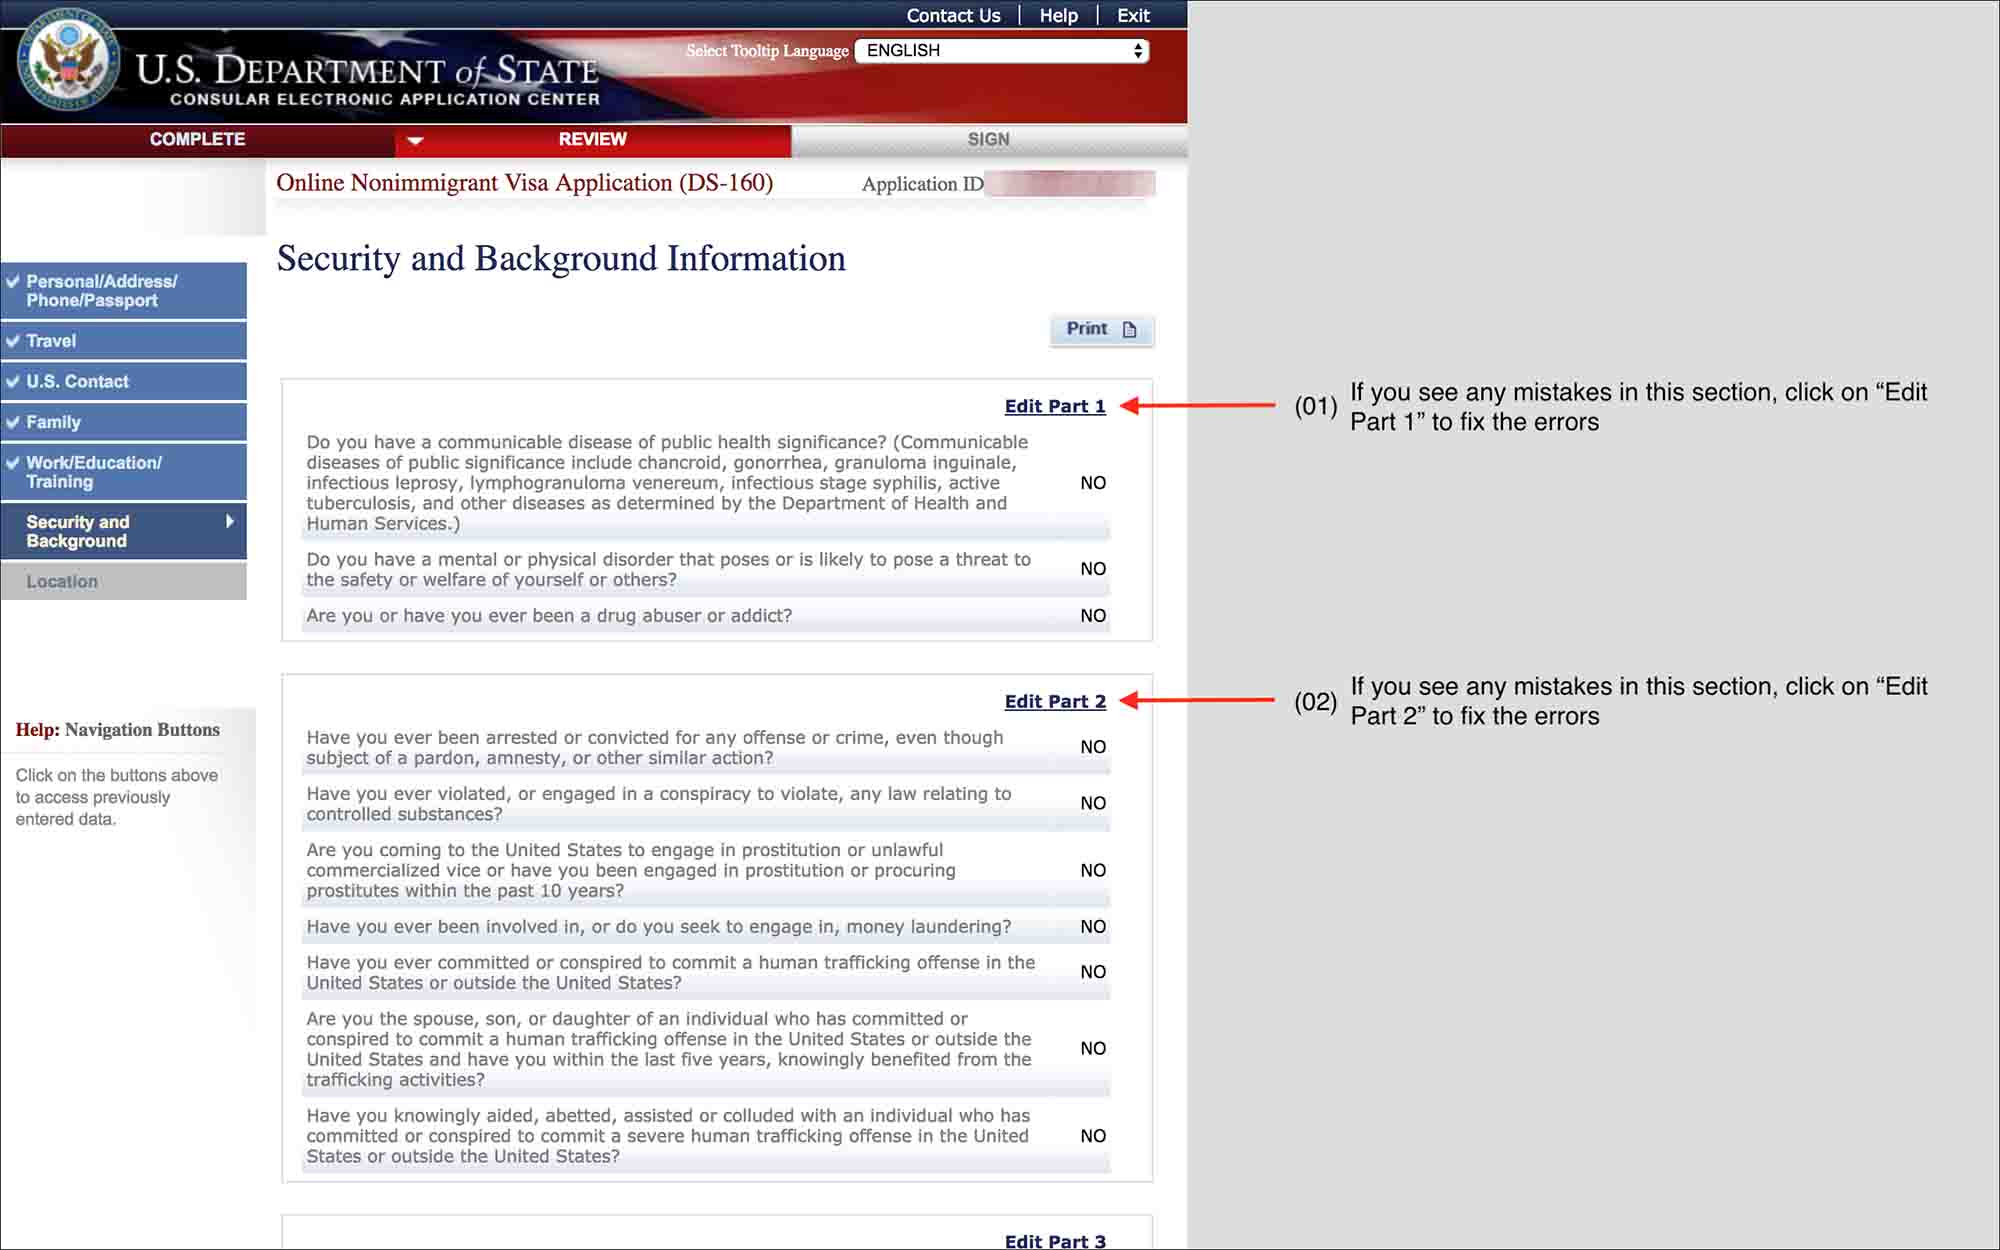
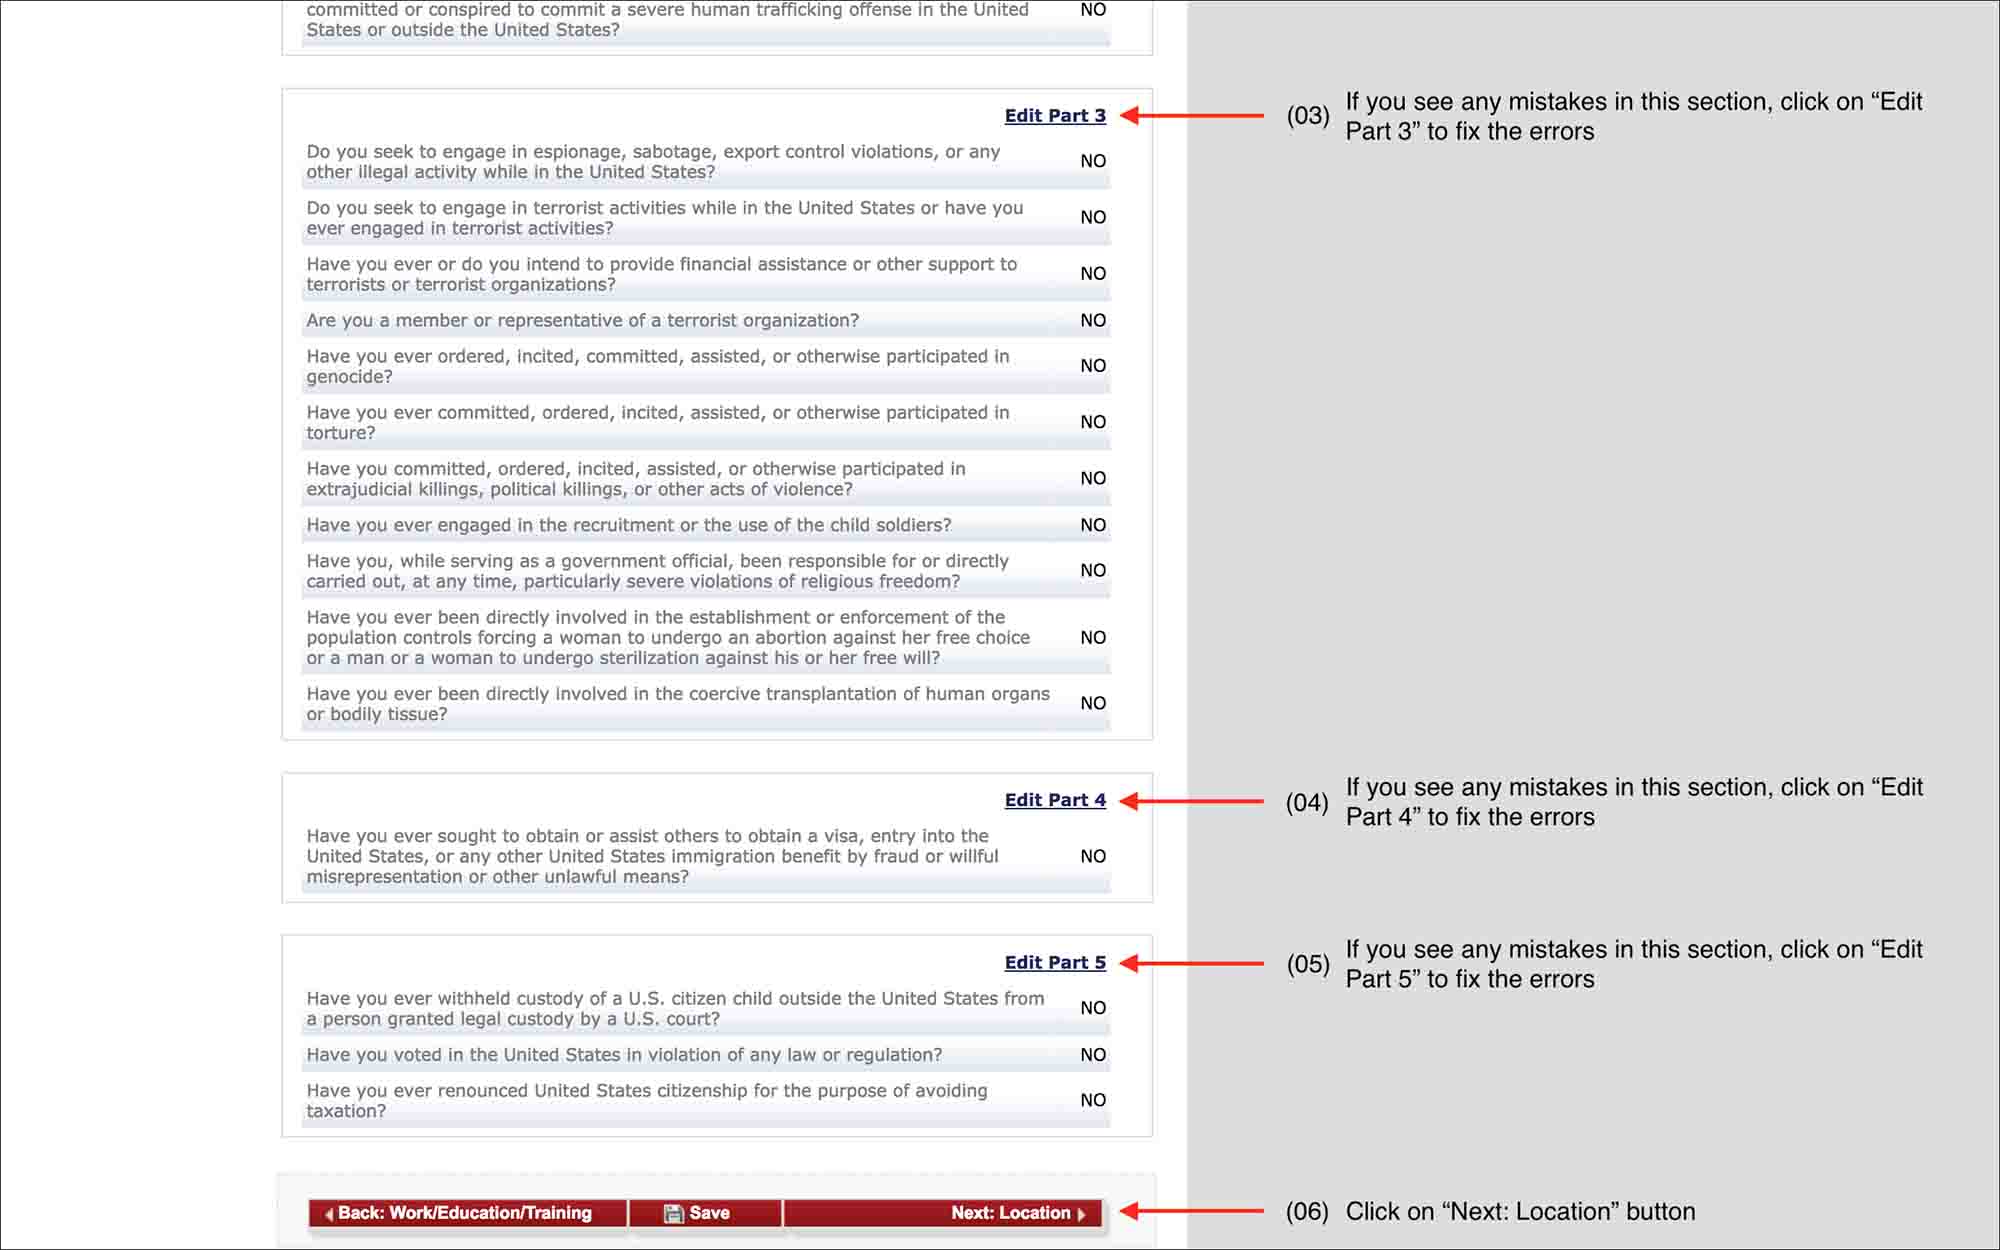
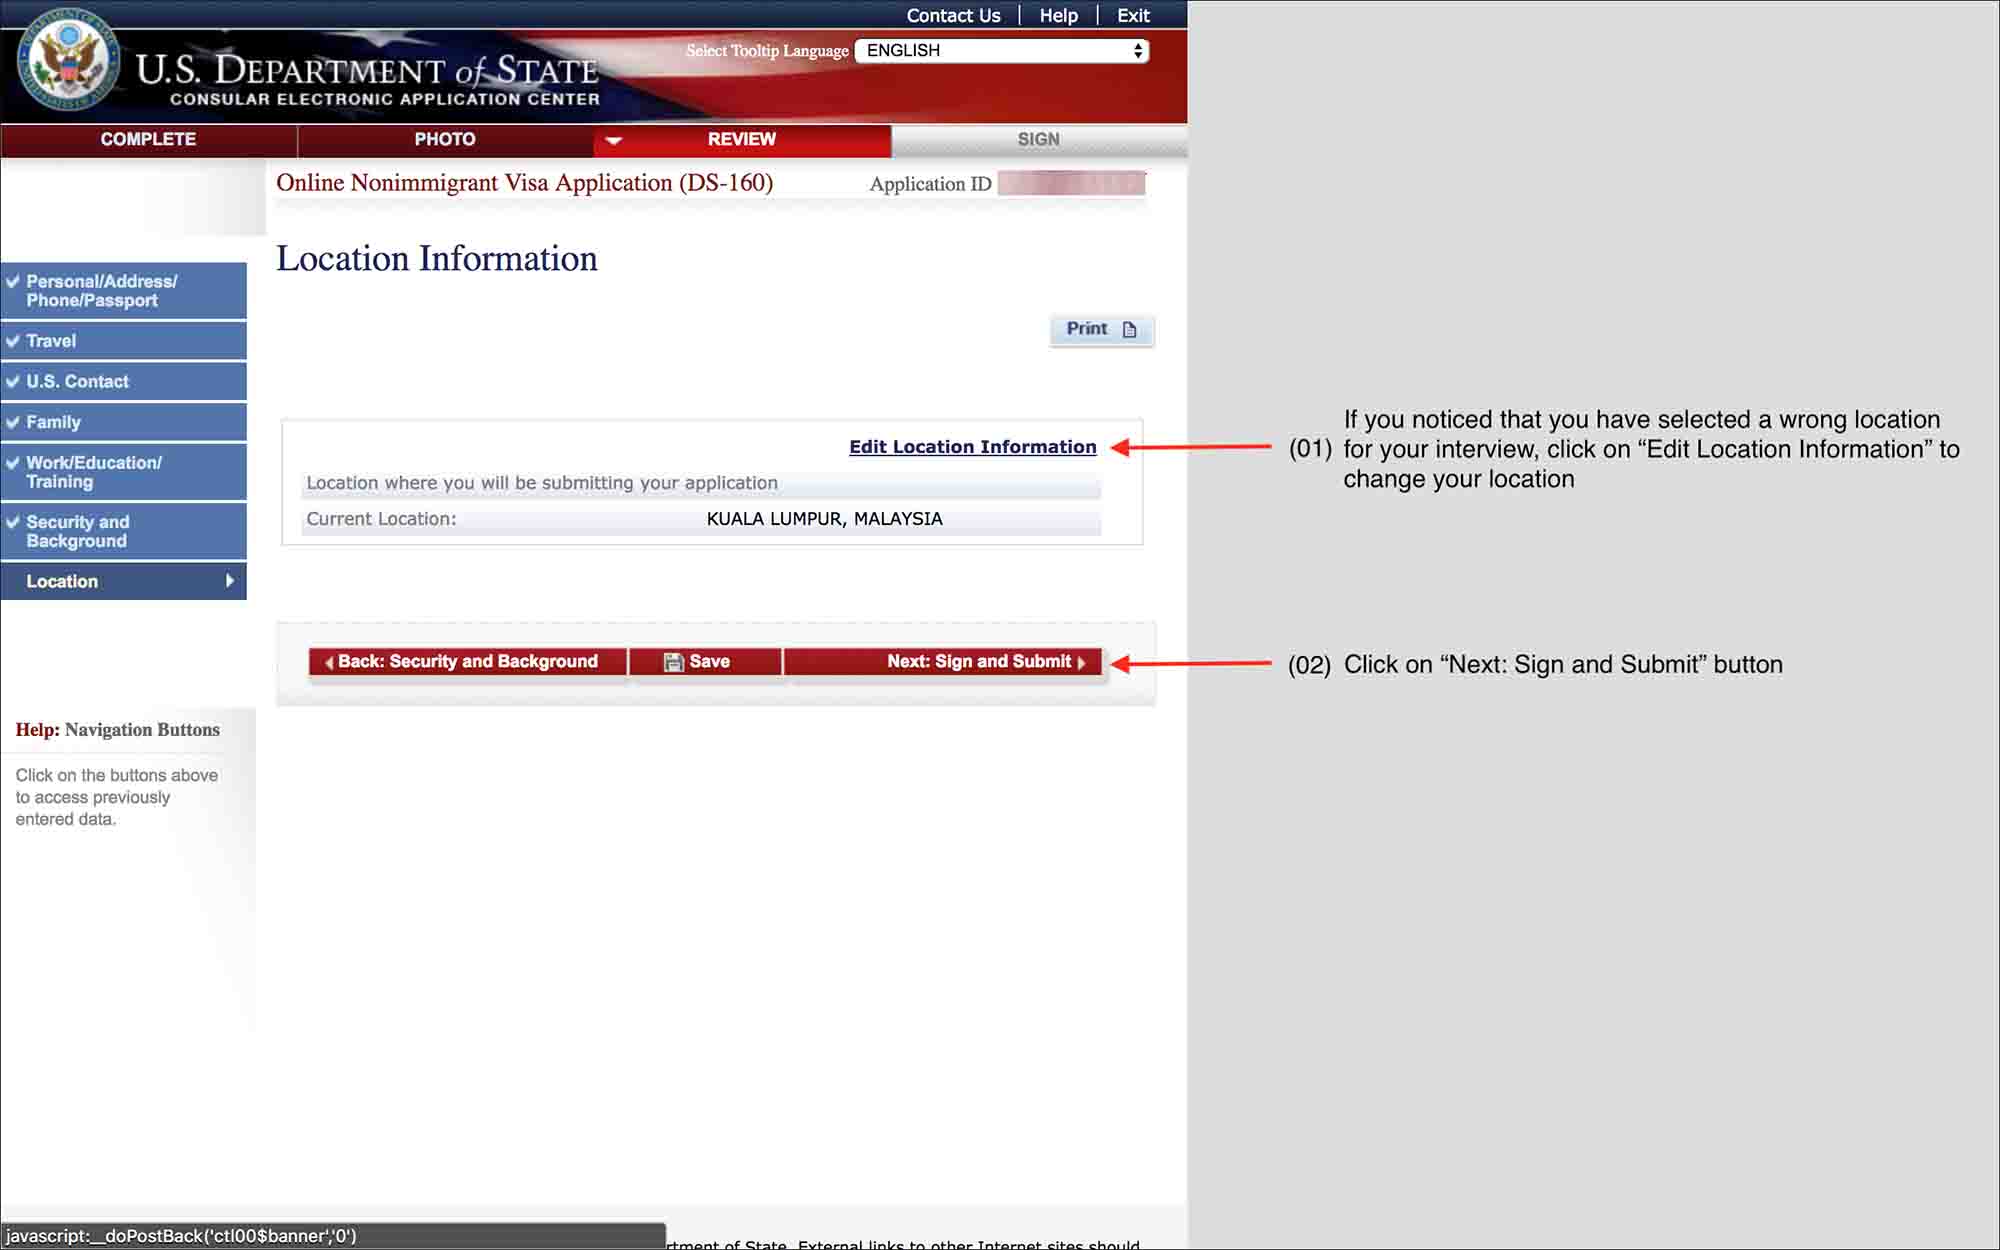
11. Security and Background
12. Photo
This section may not be available if applying in certain countries, ex: India, Mexico, etc. In such countries, photos are typically captured along with fingerprints by the visa application center or the consulate on the day of the visa interview appointment.

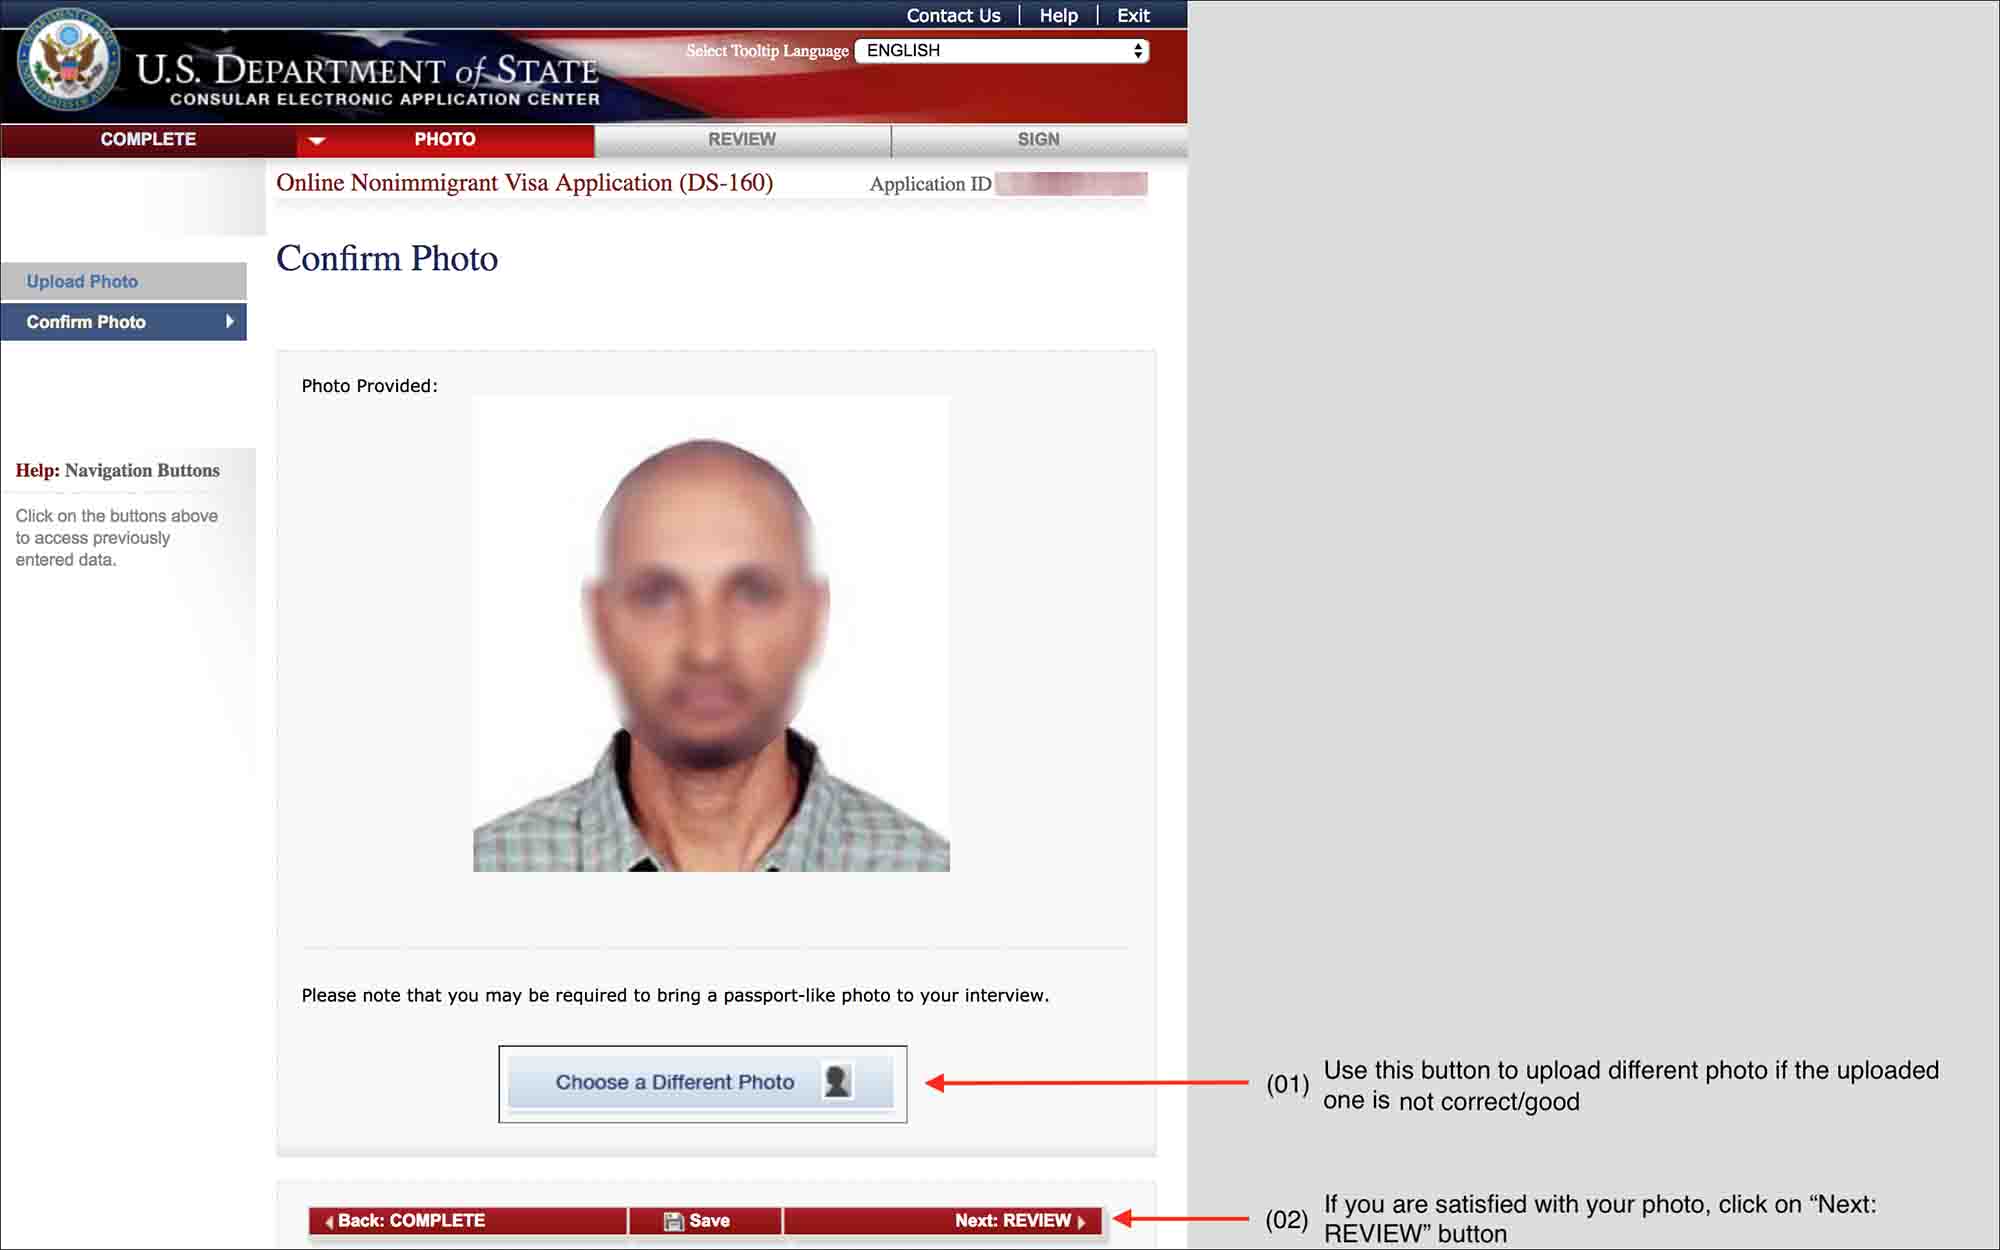
In the “Upload Photo” section, you will upload a passport size digital photo.
NOTE
If you have uploaded and tested your photo in “01. Getting Started” section, you will be taken directly to the “Confirm Photo” section.
In the “Confirm Photo” section, you will see a preview of the photo you have uploaded. If you are satisfied with your photo, click on “Next: REVIEW”. Otherwise, click “Chose a Different Photo” to upload a different photo.
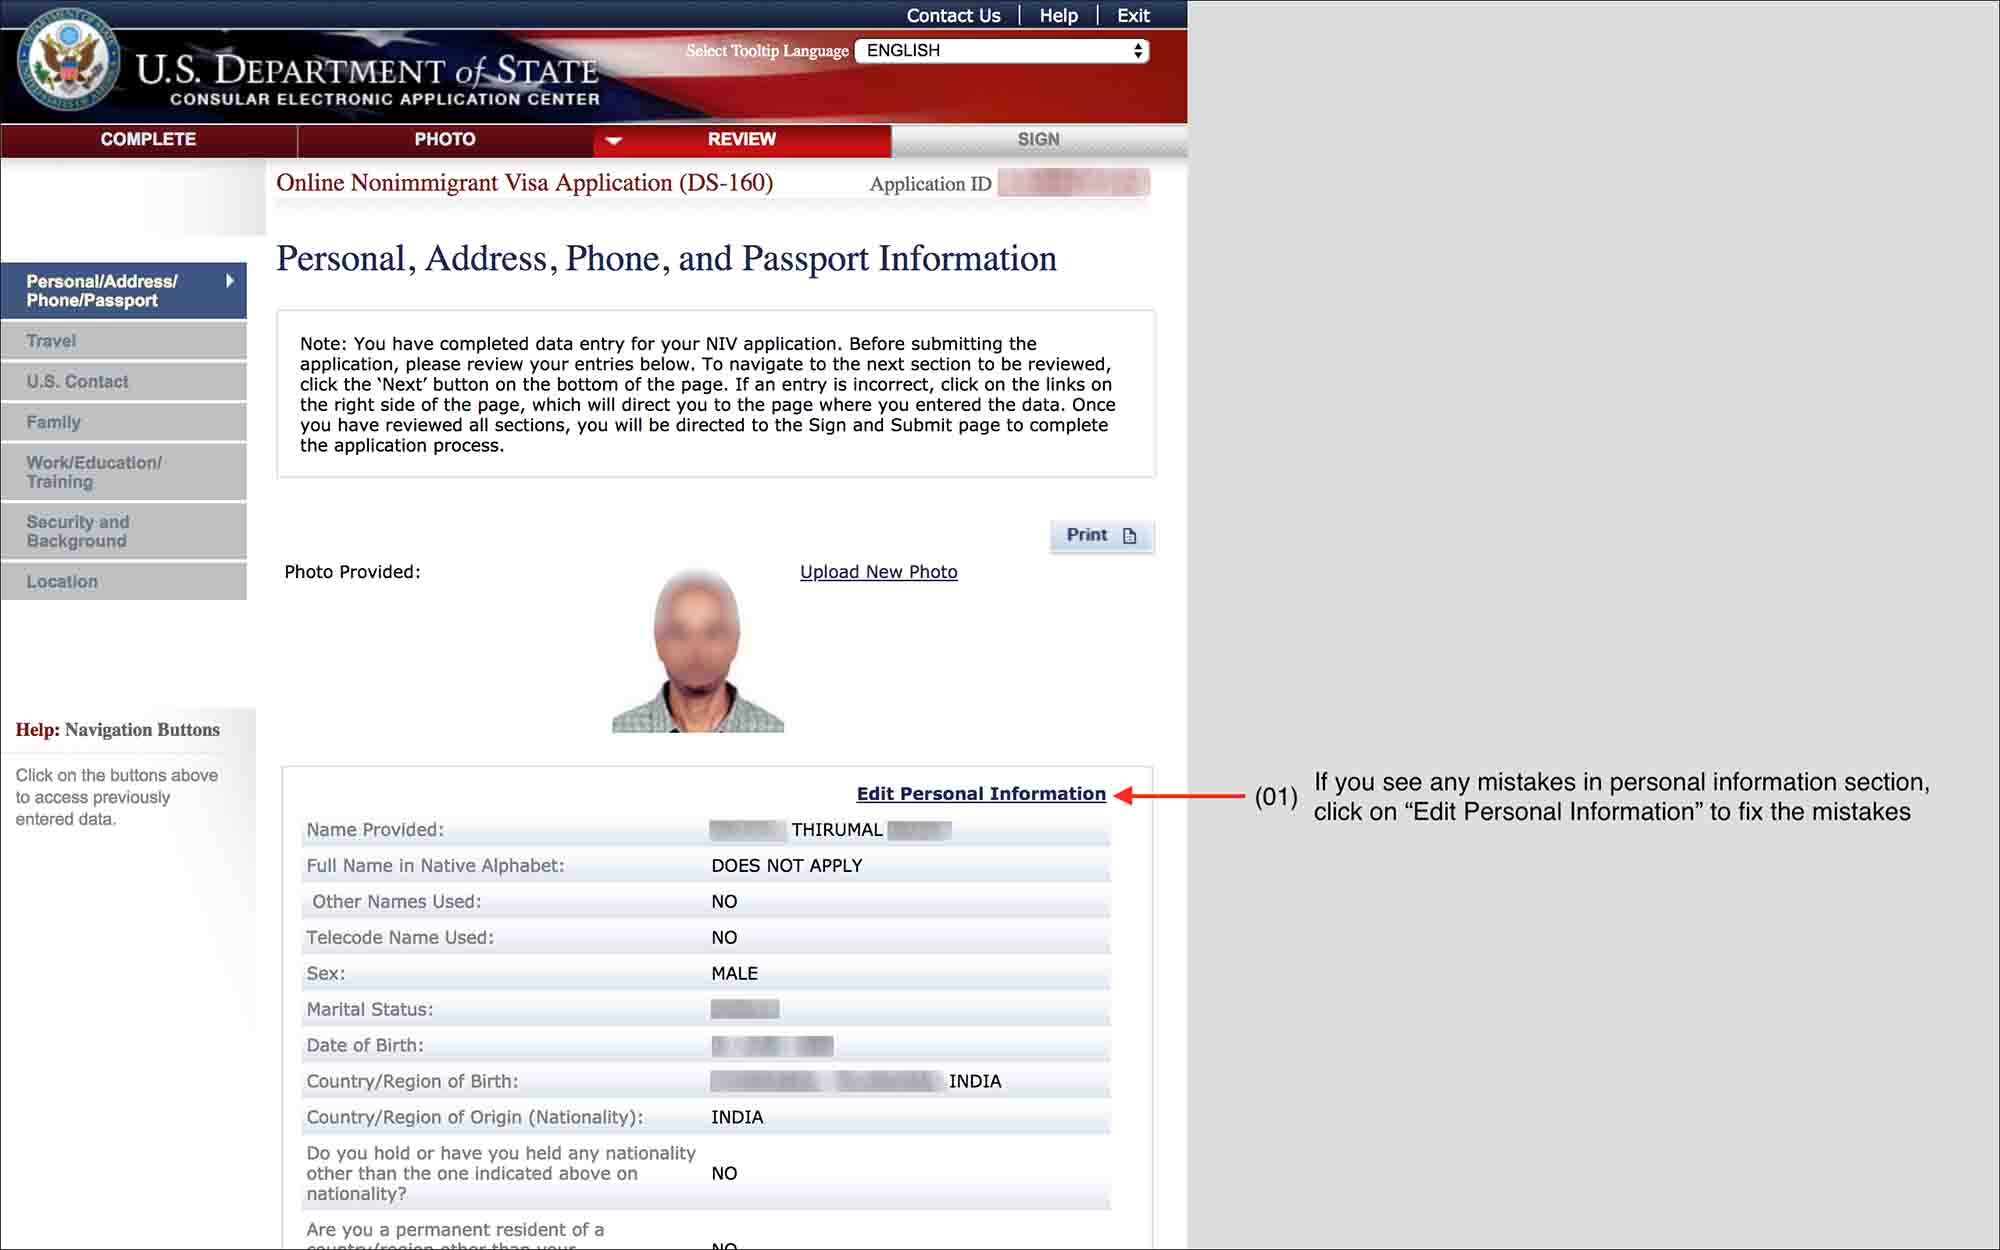
13. Review

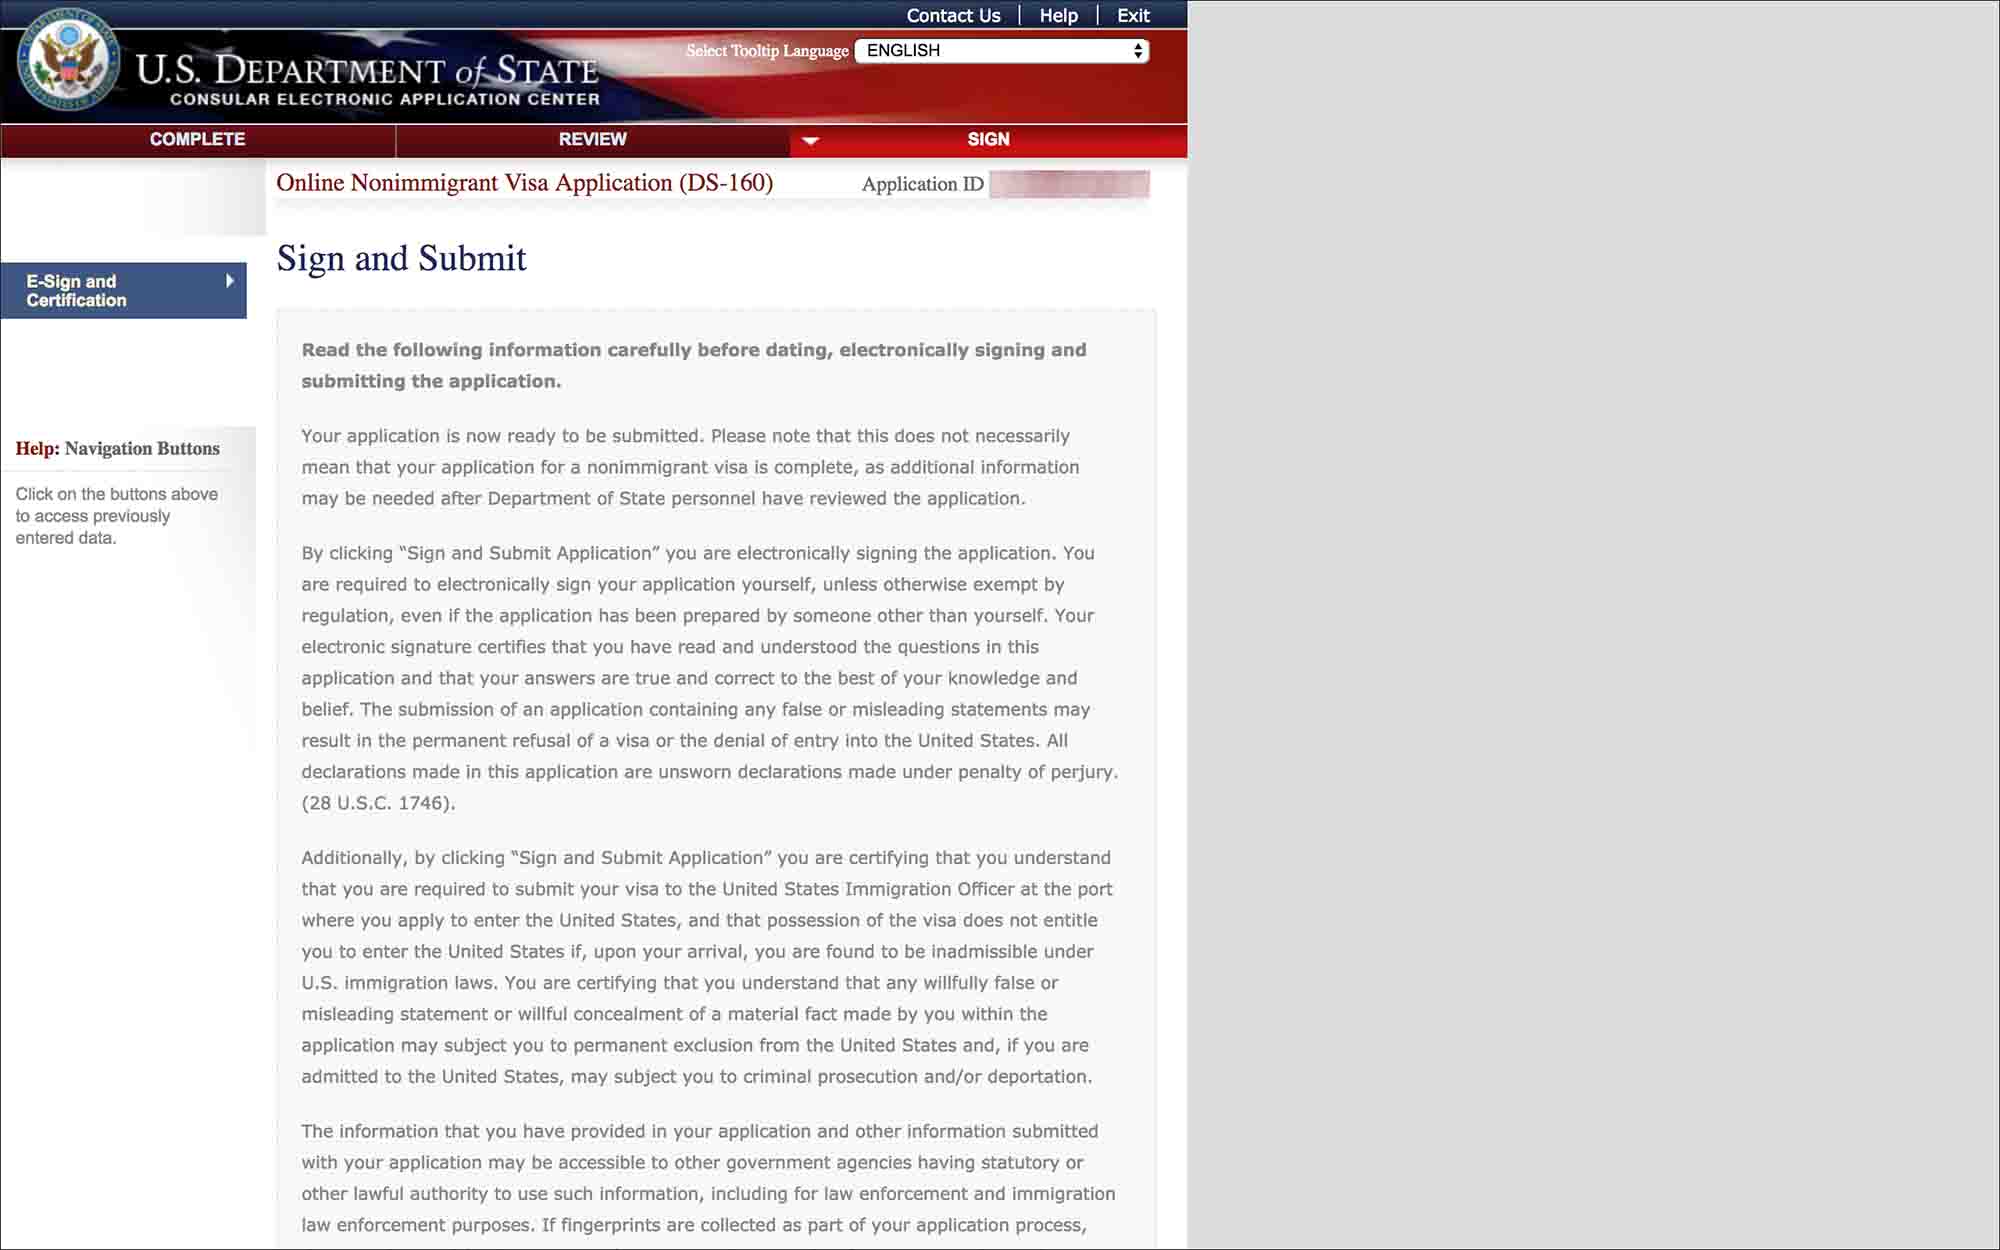
14. Sign and Submit
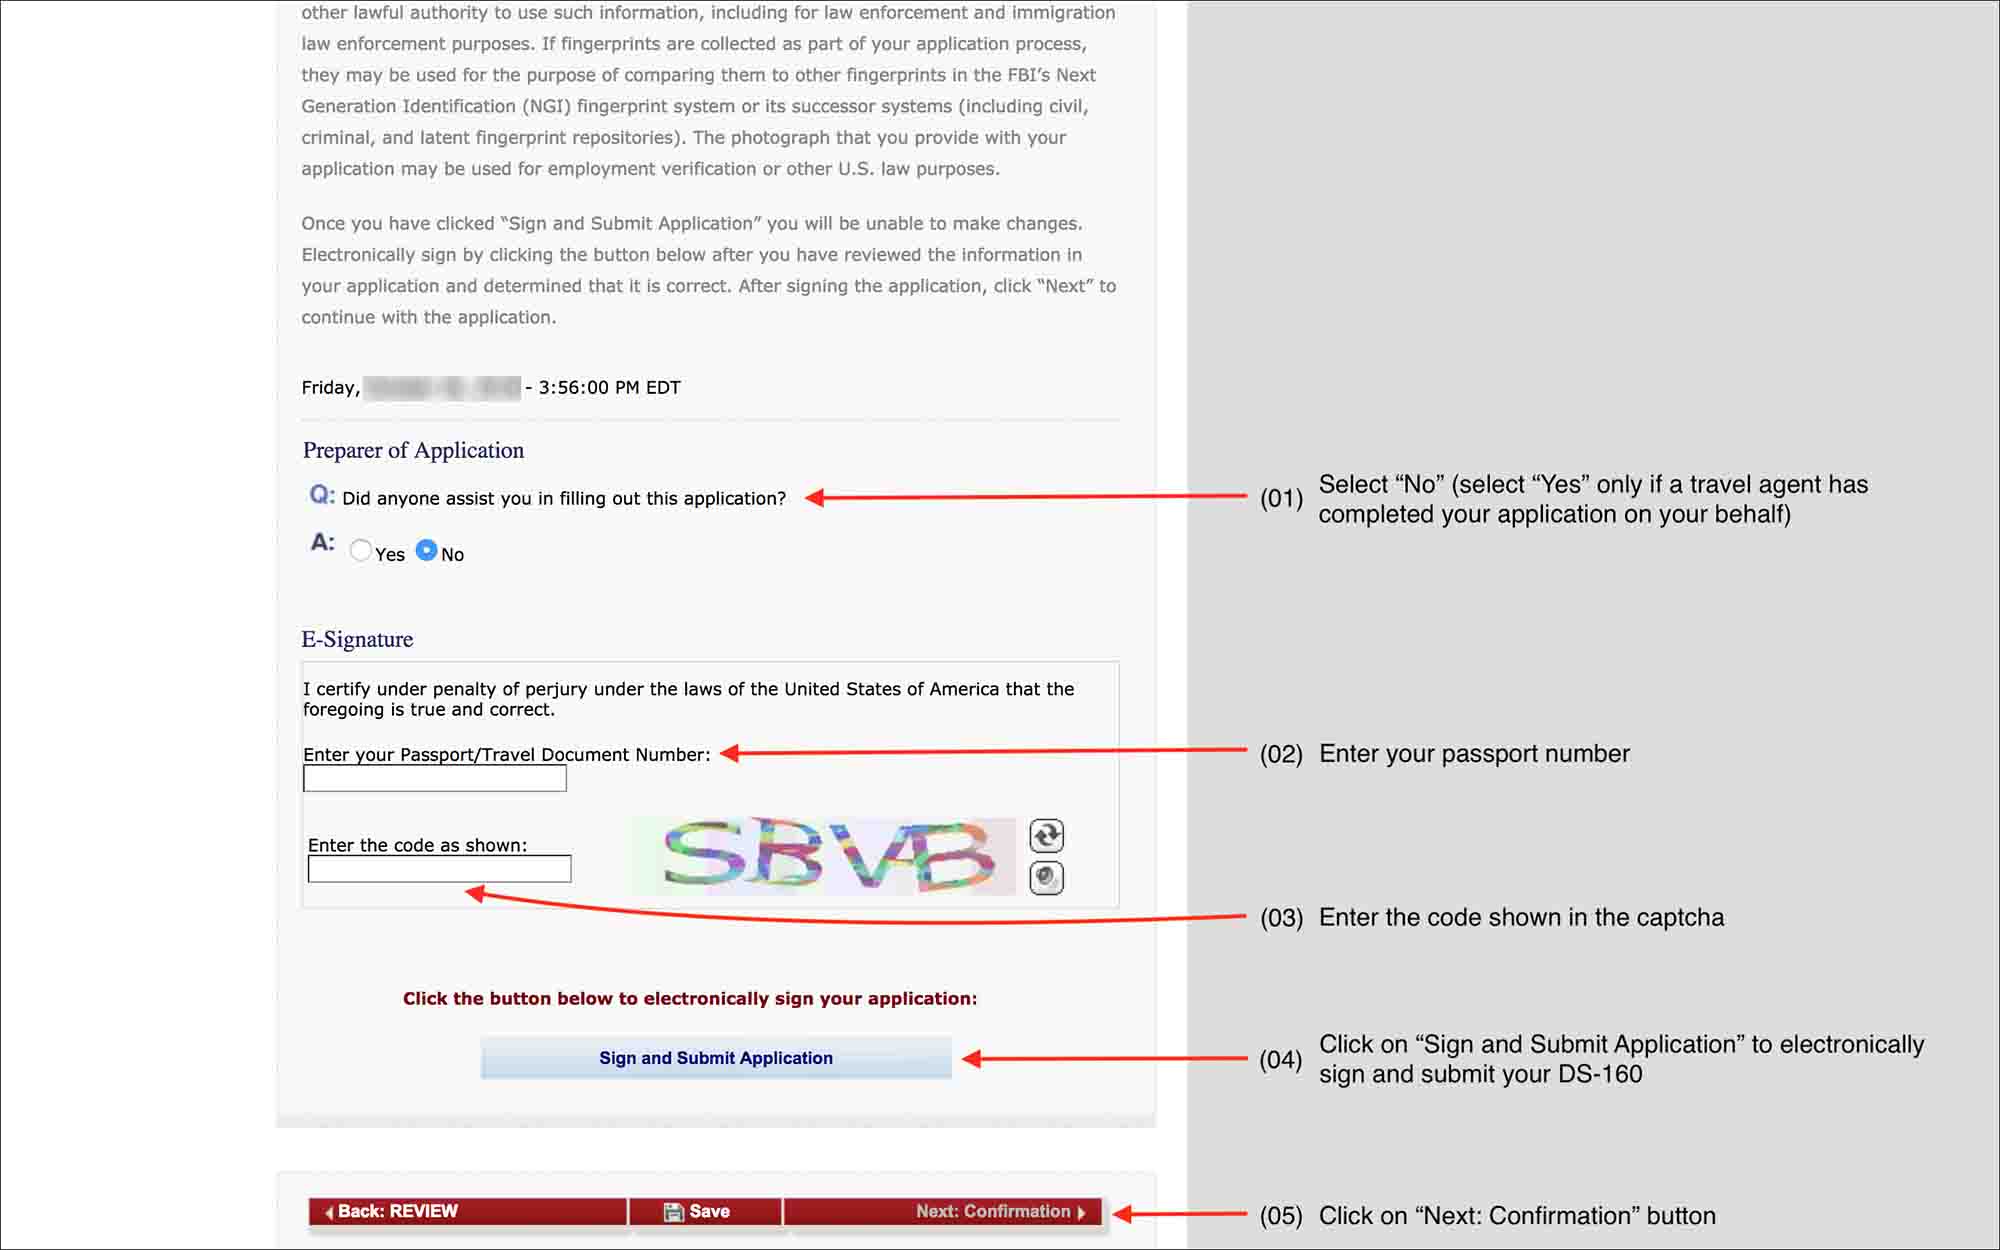
IMPORTANT
Once you click on “Sign and Submit Application”, you cannot make any more changes to your DS-160. If you notice any errors, then you have to fill a new application altogether. So, make sure all your information is correct and error-free before clicking on “Sign and Submit Application”.
15. Confirmation
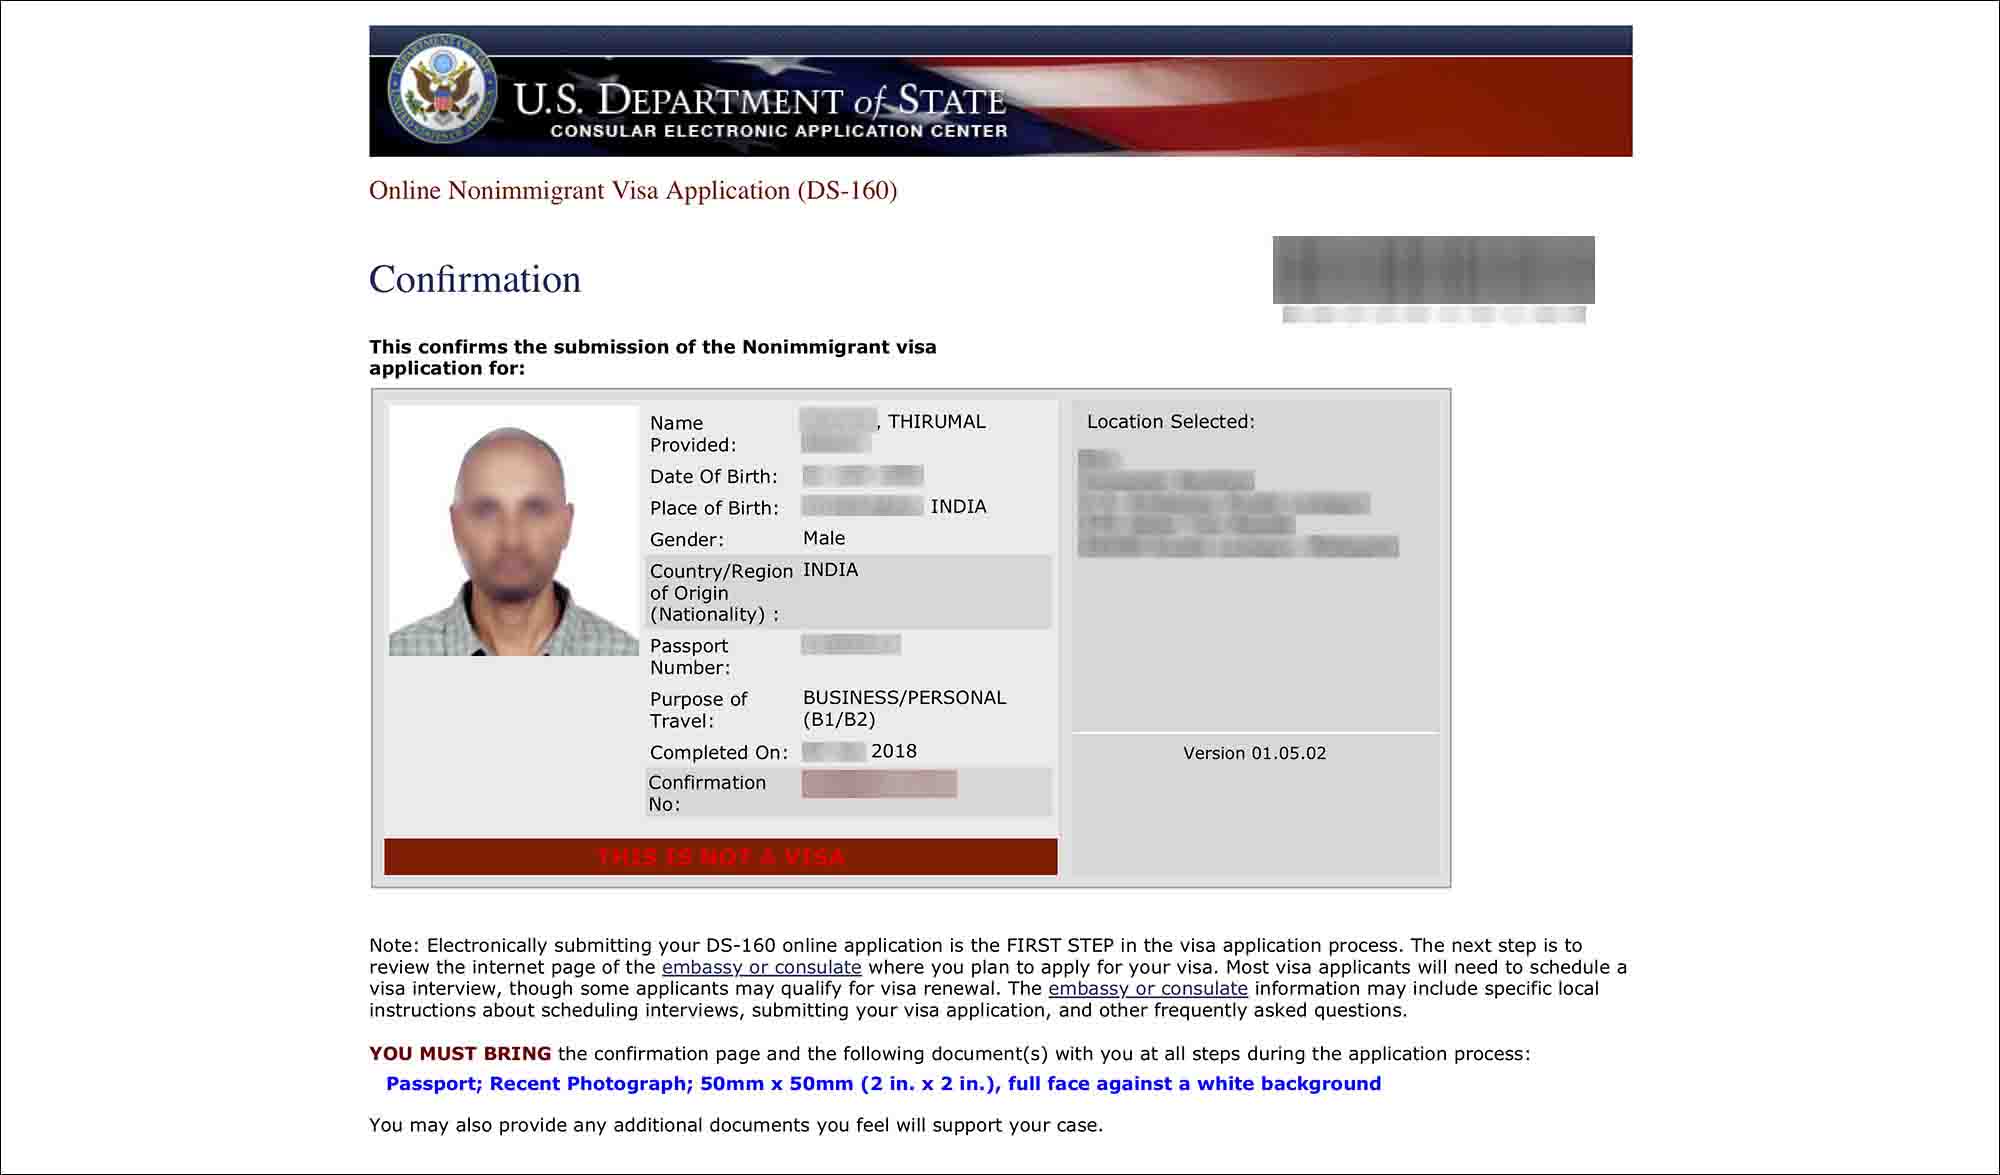
Print DS-160 confirmation from this screen on an A4 or letter size paper. If not, at least print it to a PDF so you can have a copy. Email a copy to yourself as well so you can print it later if needed.
Also, print a copy of your DS-160 to PDF so you will have a copy of that too. Later down the line if you are applying/renewing the visa, you can upload this PDF to pre-populate the DS-160 form for you. It would save a ton of time.
NEXT
After you complete and submit your DS-160, the next step would be to pay the MRV fee and schedule your US visa interview. Follow this detailed step-by-step guide on how to schedule US visa interview.